
The advanced email automation feature allows users to send emails when they meet a particular set of triggers and conditions. You can easily set up an email automation series suitable for your campaign needs. When someone hits a trigger, s/he will automatically receive a message designed beforehand by the campaign creator using weMail.
Let’s learn how you can set up an email automation series using the advanced email automation feature offered by weMail.
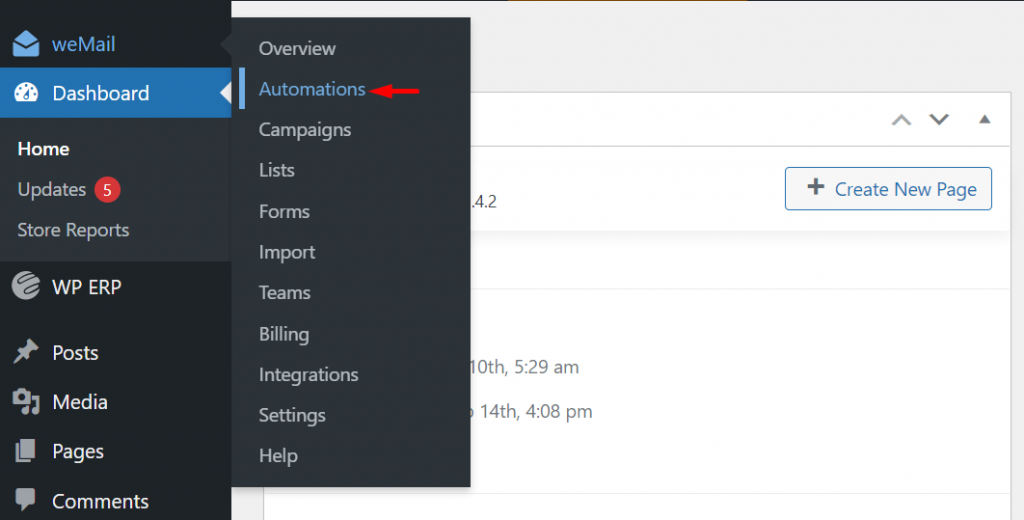
Log in to your WordPress admin panel and go to the weMail dashboard. Choose Automations (make sure to use the latest update of the weMail plugin).
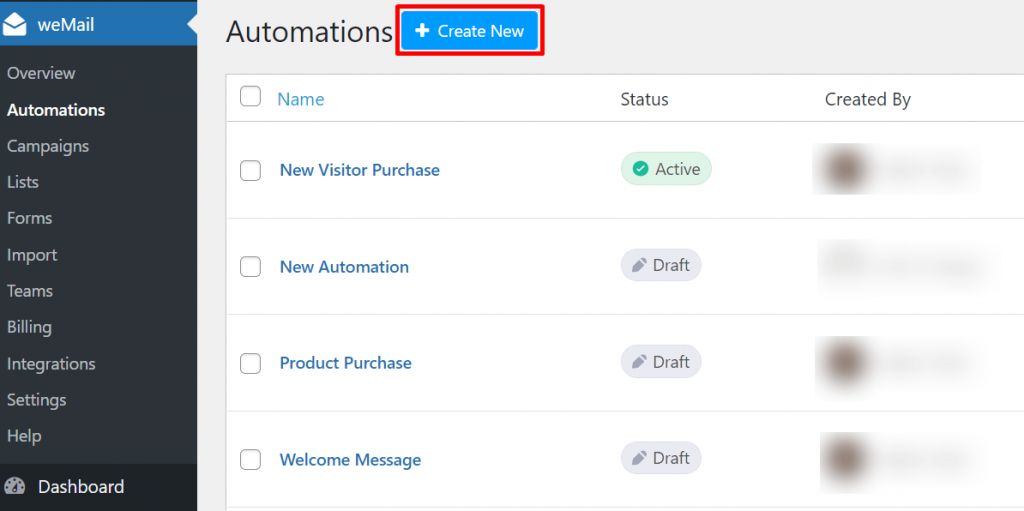
Hit the Create New button to set up new automation.
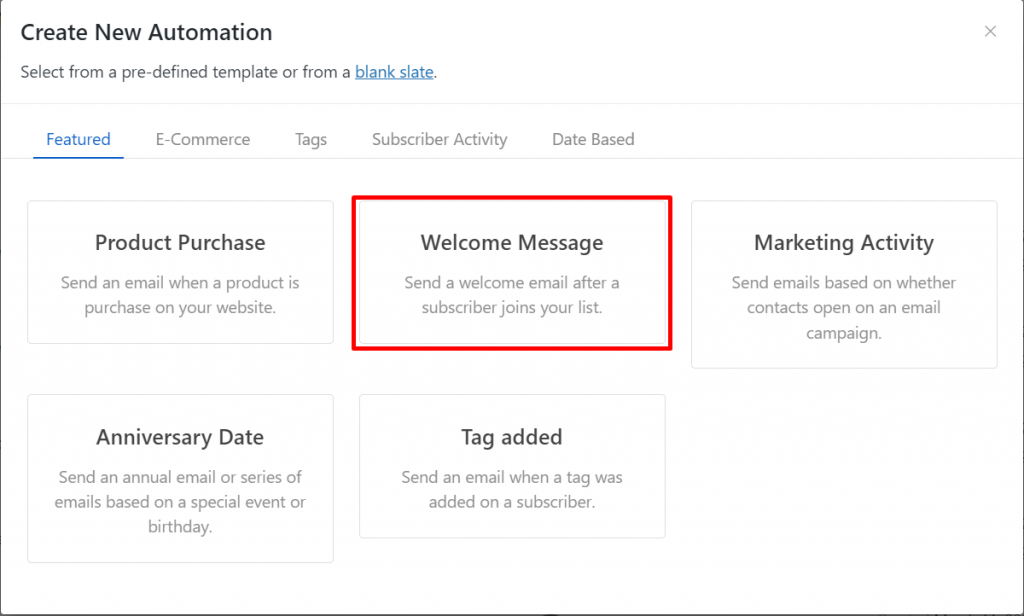
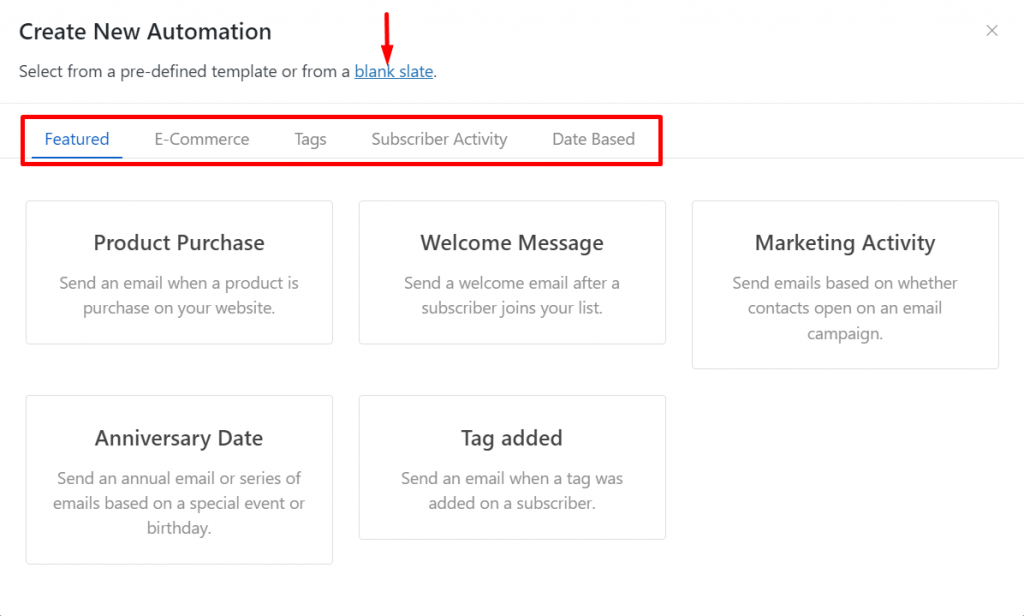
weMail offers a few pre-defined automation templates for the users. You can also start from scratch by clicking on the blank slate link.
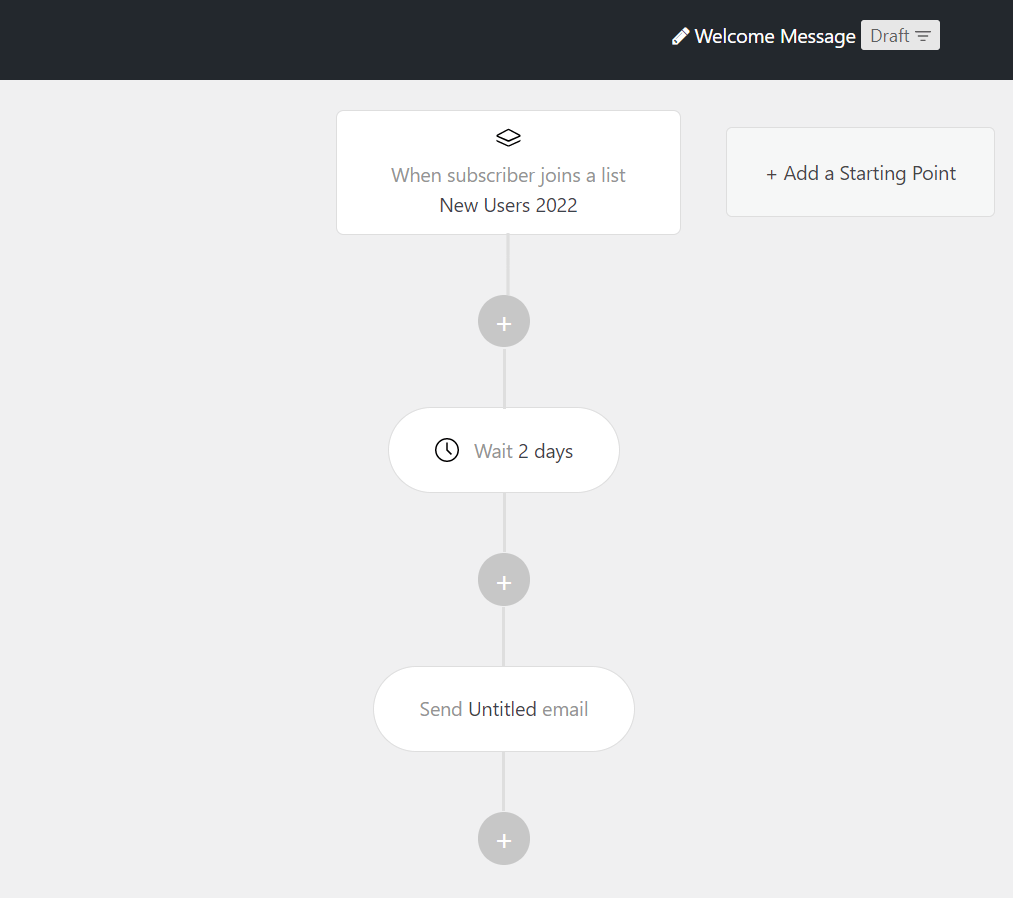
Let’s see how we can use a pre-defined template to create an automation campaign. For example, we chose the Welcome Message template here.
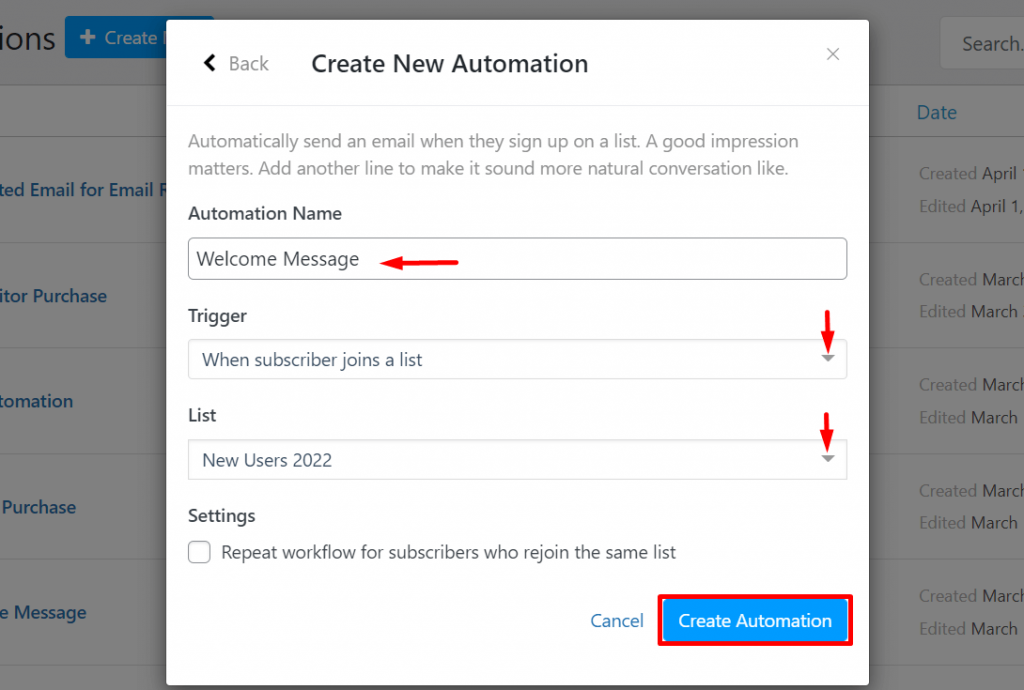
Give your campaign a suitable name. Choose a trigger you want to apply. Select or create a list where you want the triggers to work. Then hit the Create Automation button.
You’ll be taken to the automation edit screen in this step. Choose your desired action by clicking on the plus (+) icon.
Note: The steps to creating various types of automation (Delay, Condition, Action, Email) have been shown in the following sections.
Now that you know how to create an automation campaign with a template, let’s learn how you can create new automation from scratch by selecting the blank slate menu.
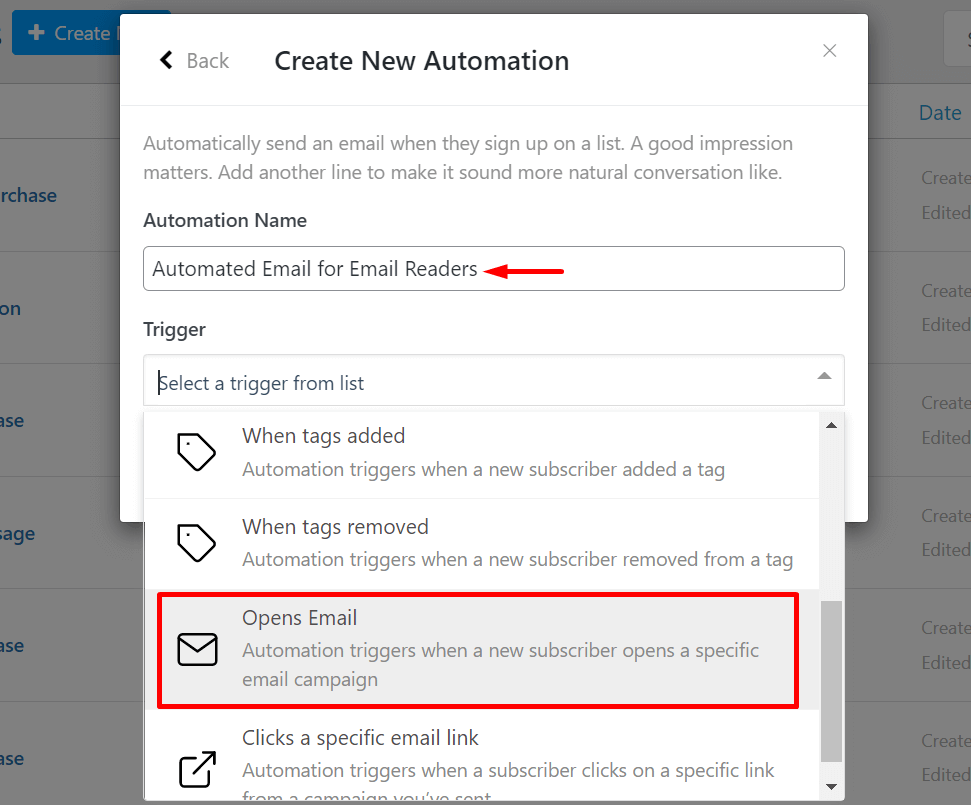
Give a suitable name to your new email automation campaign.
Select a trigger from the given list. Here, we chose a campaign activity (Opens Email) in our case.
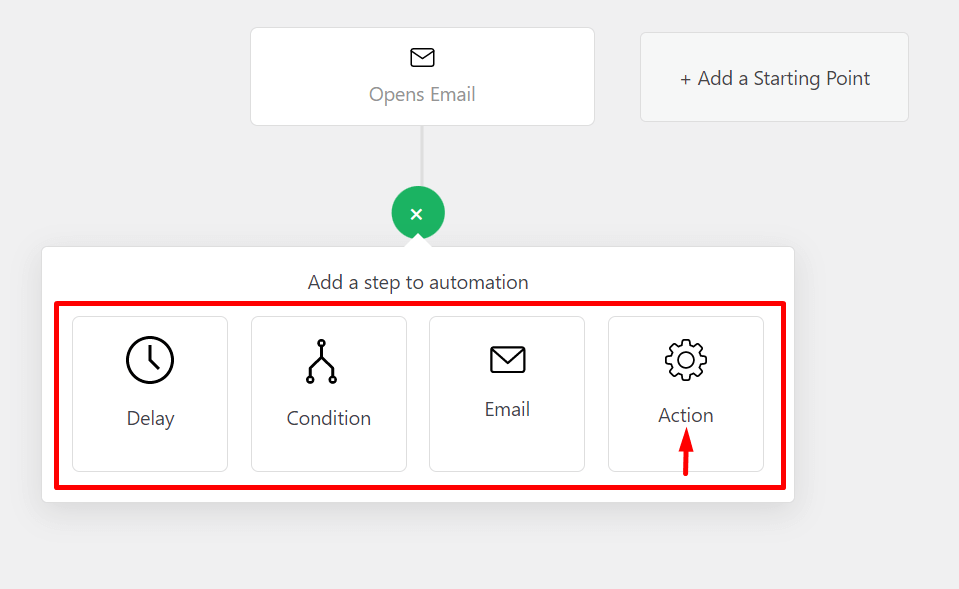
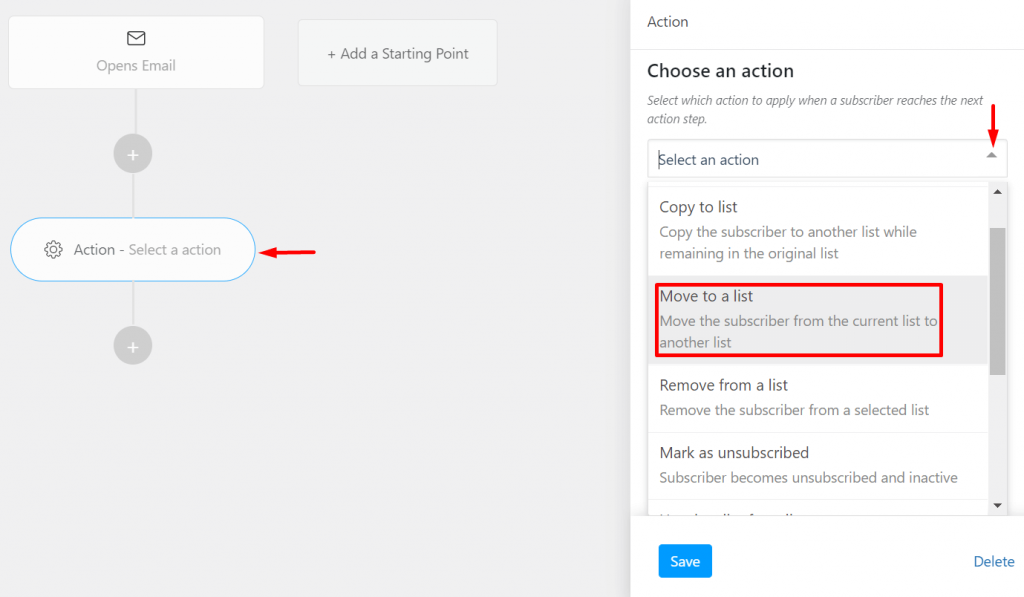
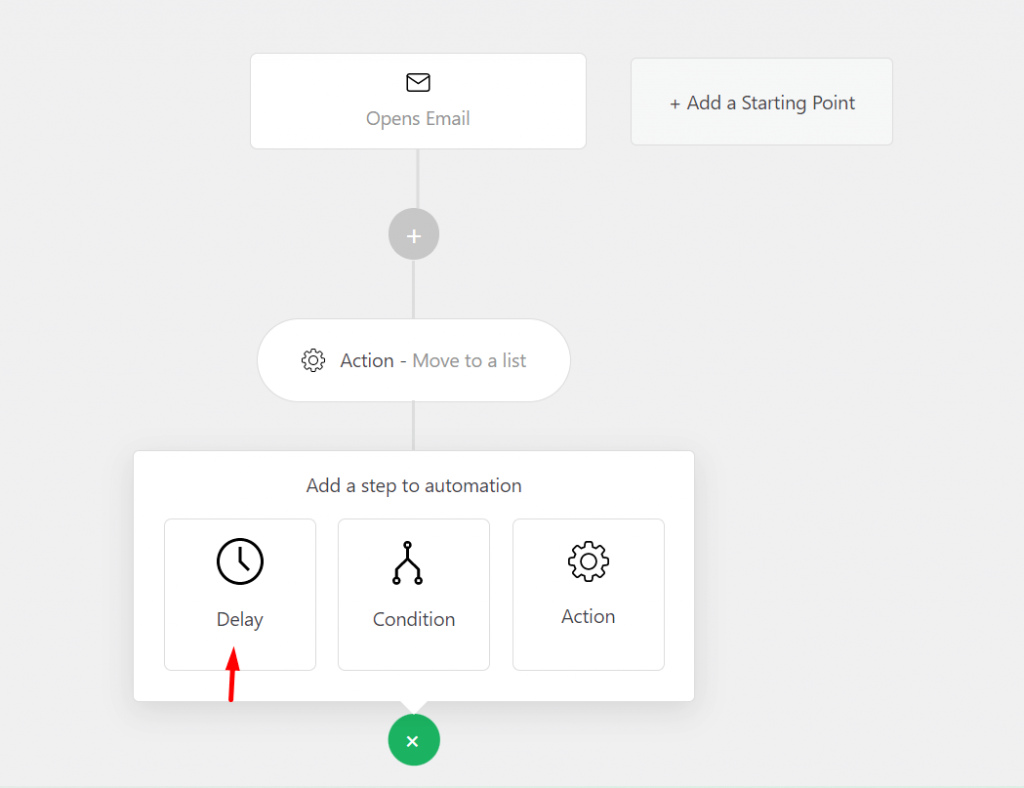
Then choose an action for the next step. Click on the plus (+) icon.
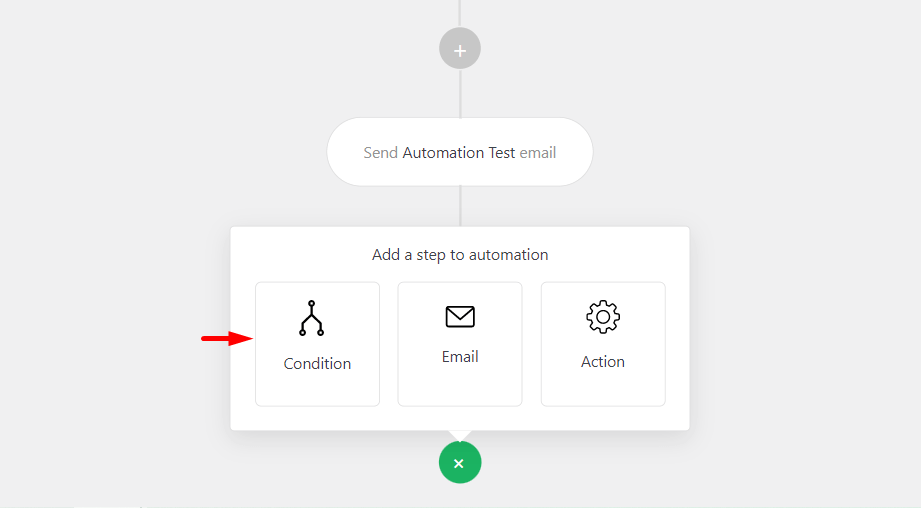
The plus icon will bring four automation steps for you to use. Choose the Action option to enable the automation.
Click on the dropdown menu and apply an action. Choose an option from the list. Here, we chose to Move to a list.
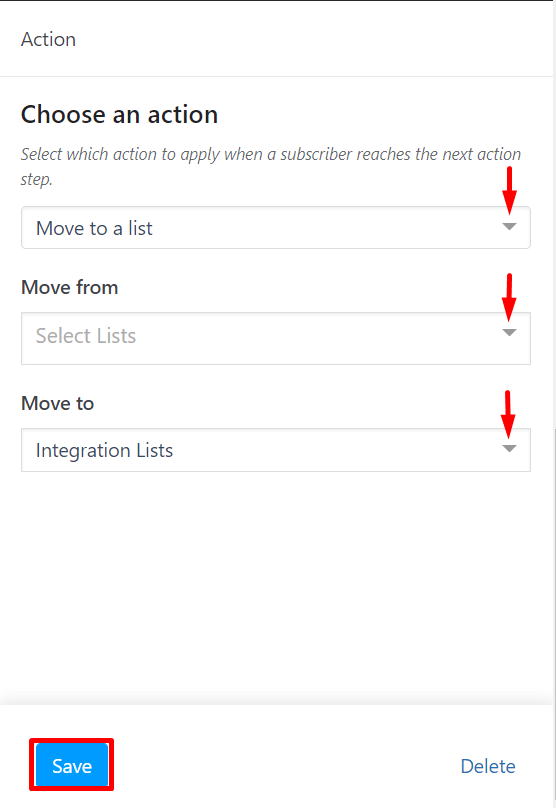
Choose which action you want to apply. Identify the list where you need to move the email opener. Then hit the Save button.
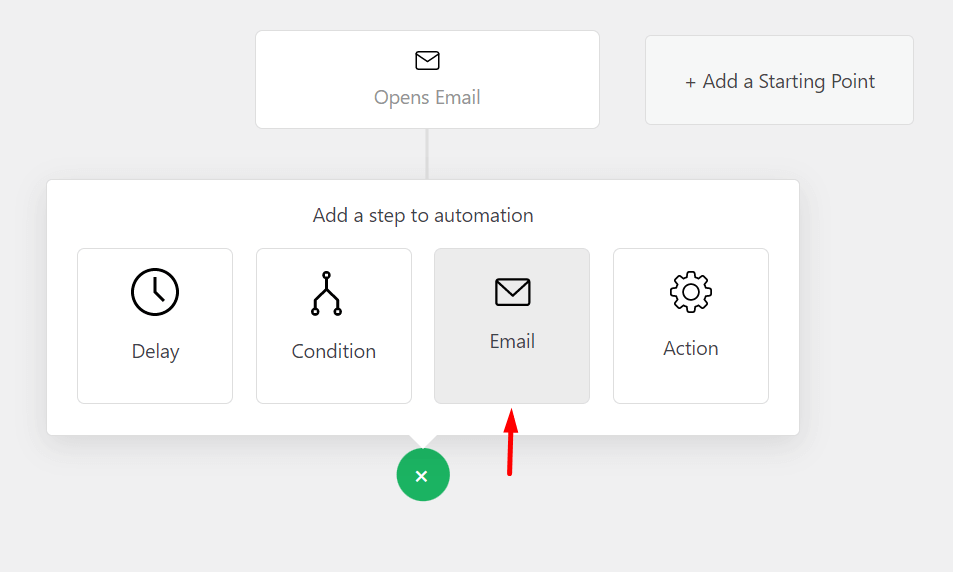
Now select the next step of your automation series. Click on the plus icon and choose Email.
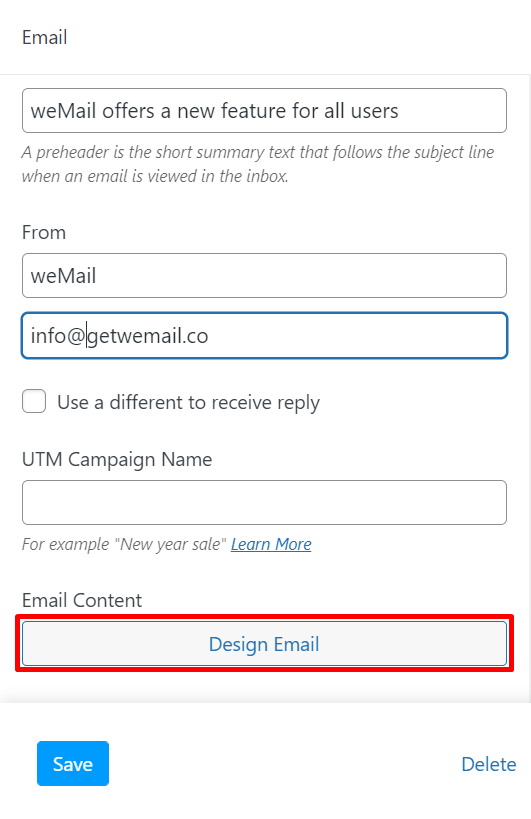
Fill the input fields with the information you want to send to the email recipients.

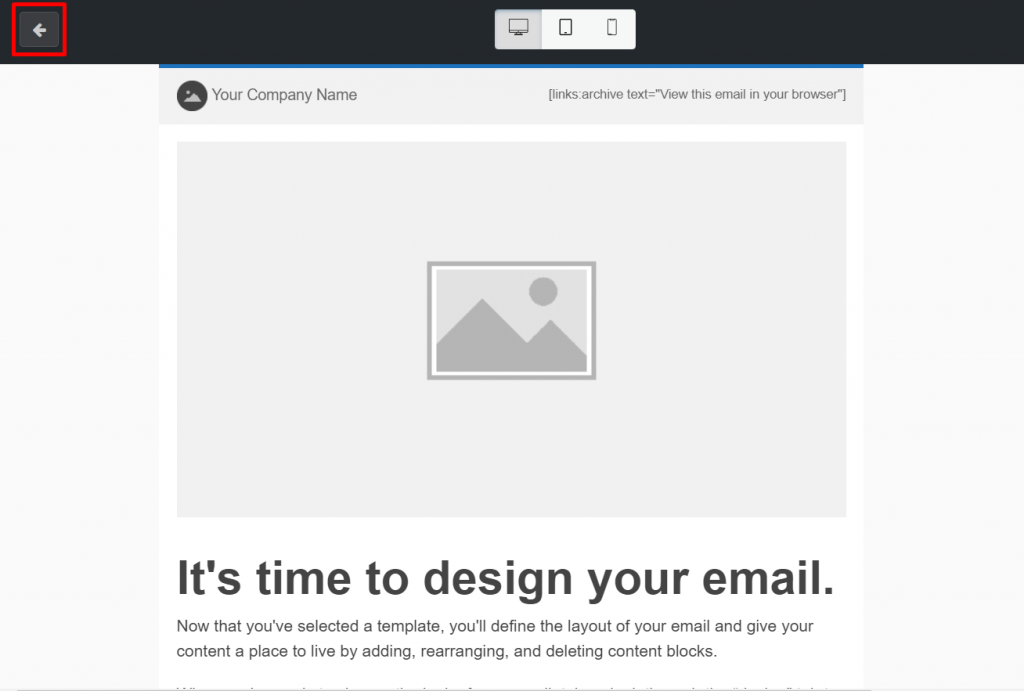
Scroll a bit down to find the Design Email button. Click on the button to open the email editing screen.
This will lead you to the following page. You can design the email manually here or click on the back icon on the left corner to access the readymade templates.
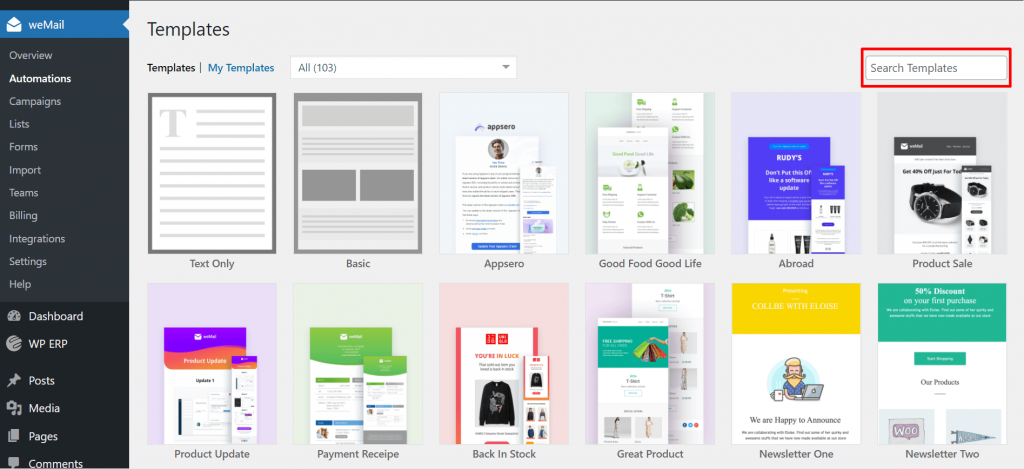
Choose a template that fits the best with your business identity. You can search for your desired temple using the search bar.
Select the next step of the automation process. Here, we chose Delay to set a waiting period before we take the next action.
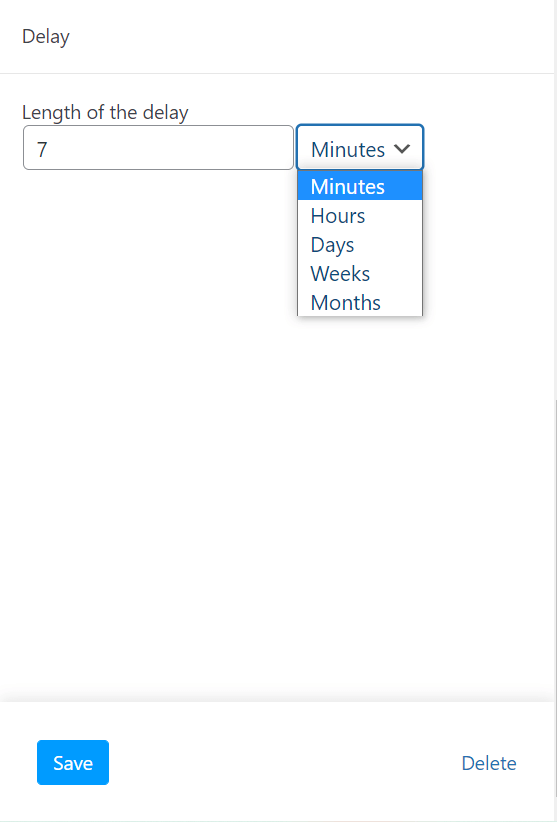
Choose the length of the delay from the dropdown menu. You can select minutes, hours, days, weeks, and months.
Now choose a condition applicable to the next step to automation.
Select a set of conditions from the dropdown options. We chose Campaign Activity for this particular automation series.
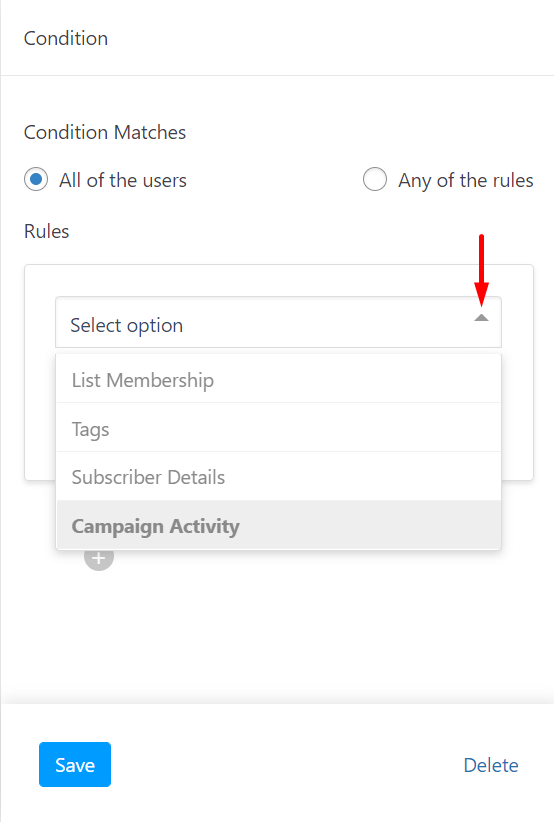
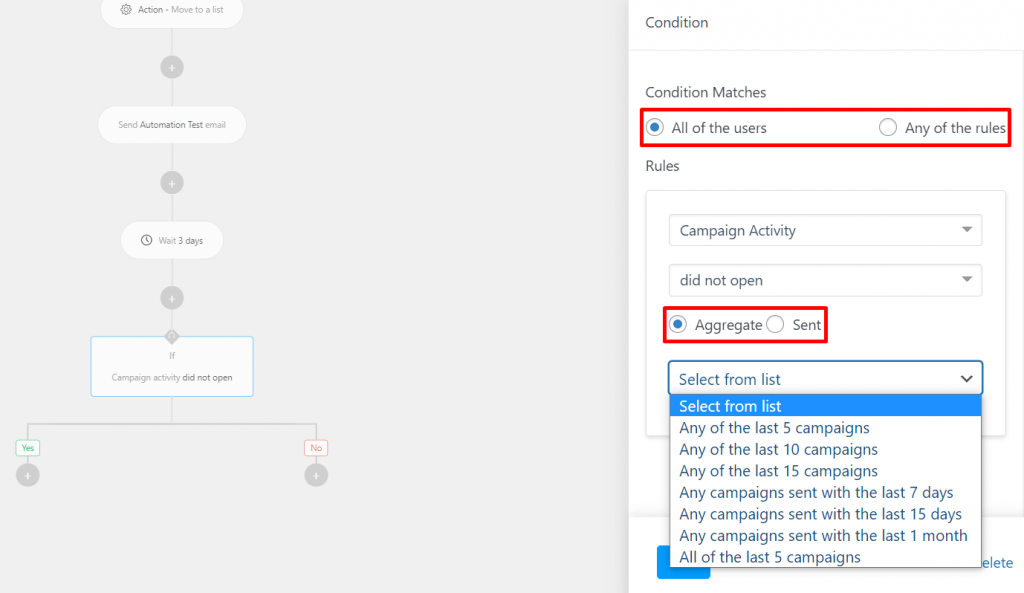
Choose your desired campaign activity from the list. We chose ‘did not open’ for this automation series. You can choose the conditions and align them with either All of the users or Any of the rules.
Select any list to apply these conditions. The Aggregate option allows users to select any campaigns based on numbers and days, and the Sent option allows them to select a specific campaign.
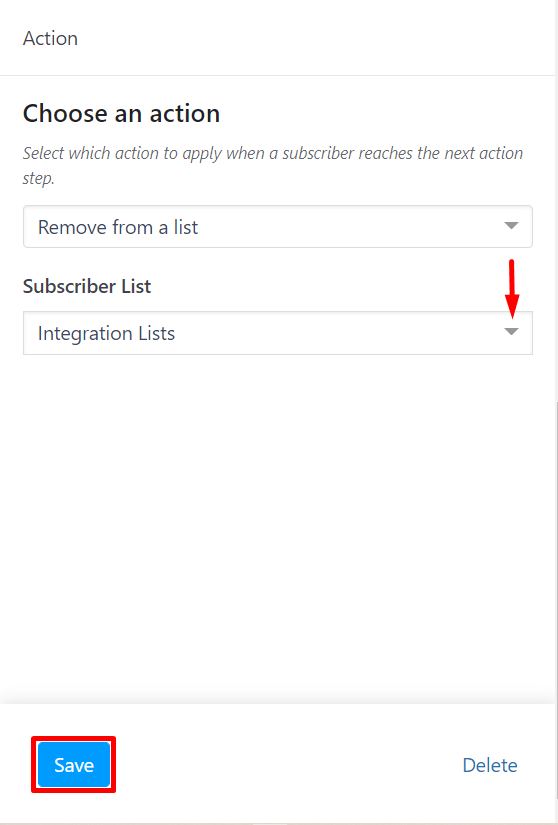
Then choose the next step for the automation process. Enable an action based on the previously set condition. We chose Remove from a list in this case.
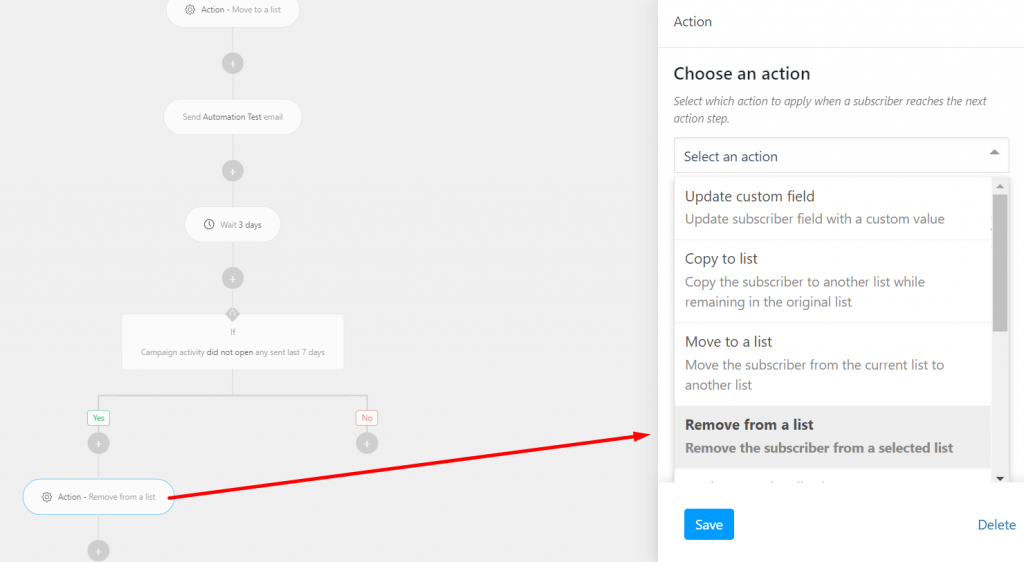
Name the list from which you want to remove the subscriber. Then hit the Save button.
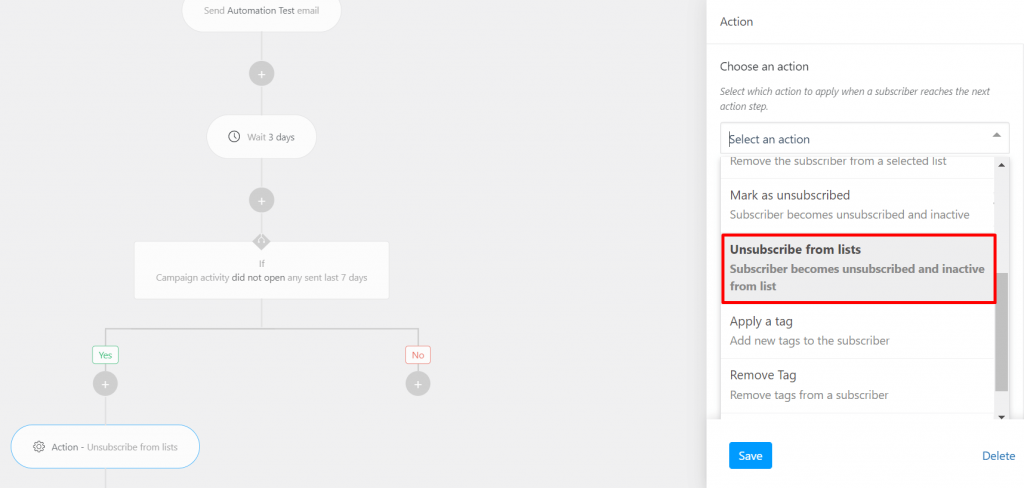
You can also choose any other action to apply when a subscriber reaches this step. Here, we’ve shown you how to unsubscribe users from a list. Choose the Unsubscribe from lists option.
It will automatically remove users from the subscription list and they will not receive any future emails.
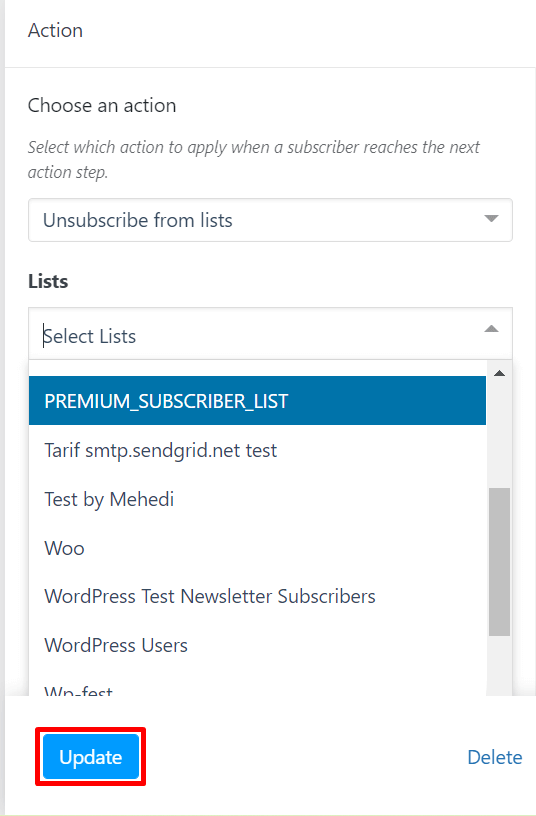
Choose the list name from the dropdown menu. Hit the Update or Save button to implement the action.
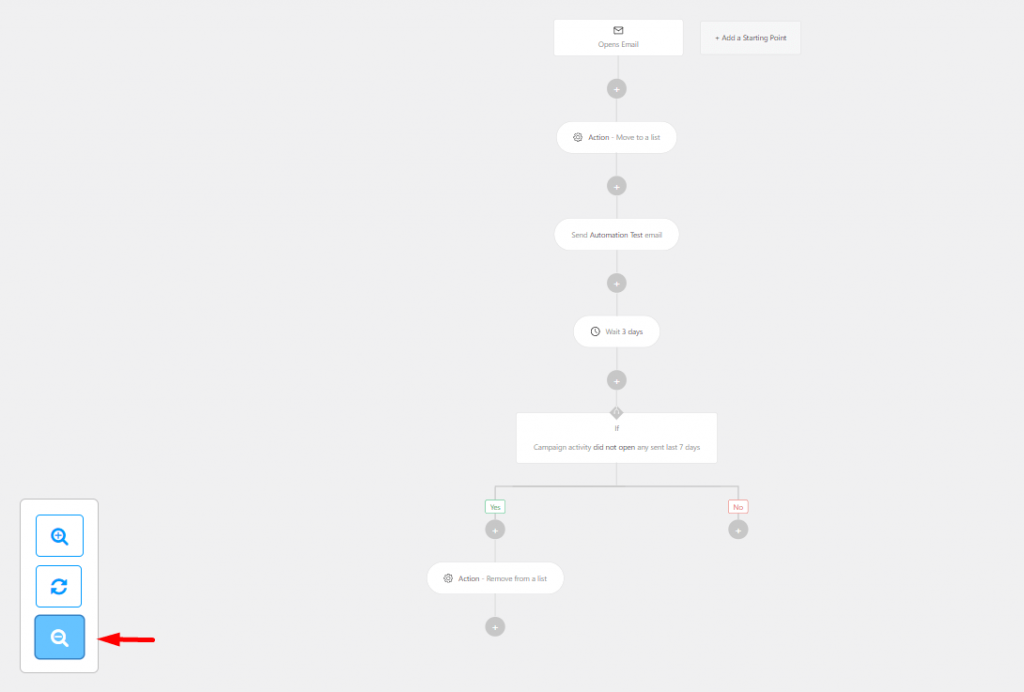
You can see the full map of the automation series by zooming out. Observe the series closely to check if everything aligns with the conditions and actions you’ve set.
You can activate the automated email campaign from the header section. Click on the Active option to enable the triggers.
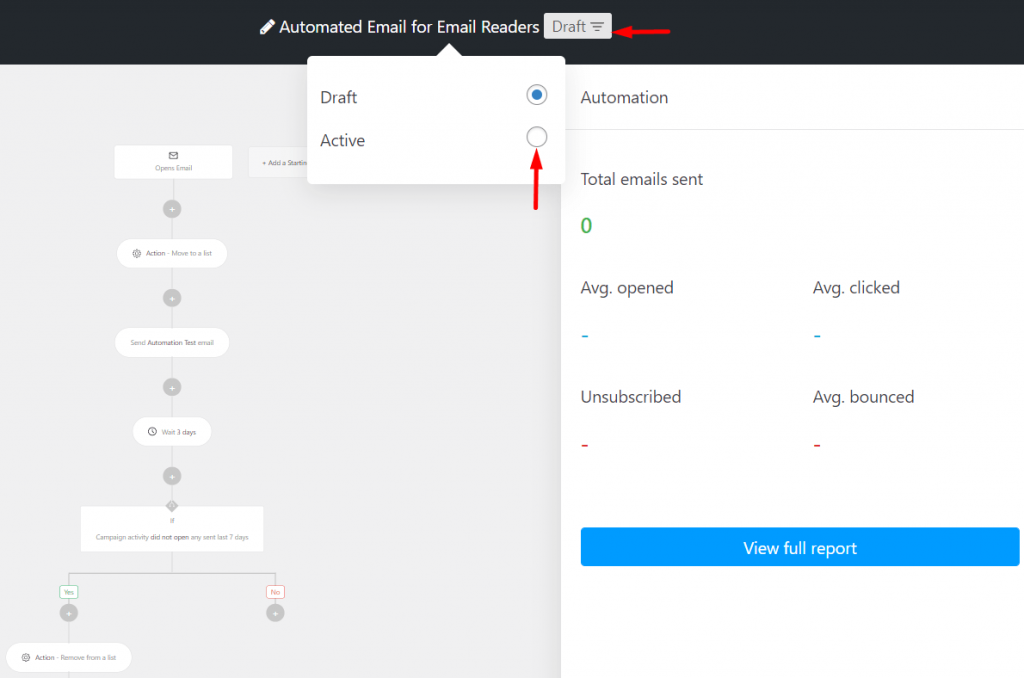
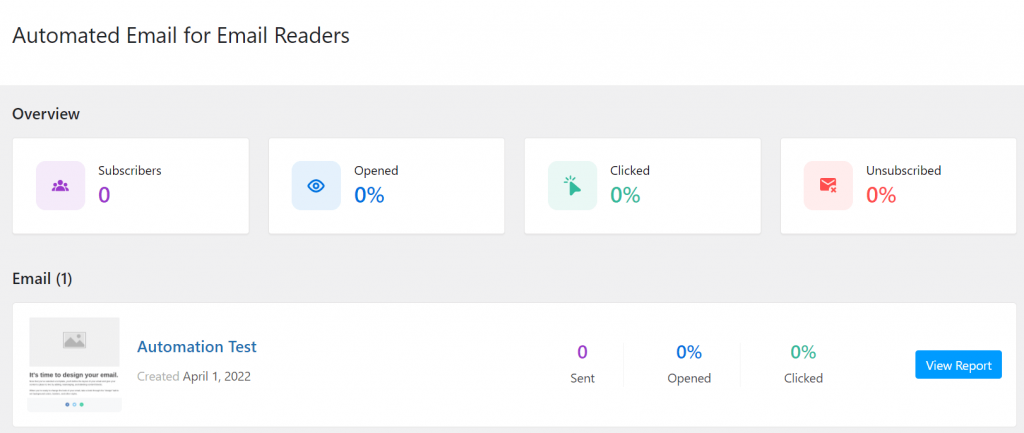
Once the set-up is complete, you can see the campaign report and track the campaign’s performance. Click on View full report to get an overview of the reports.
That’s it.
You can also see the following video to know how the advanced automation feature by weMail works.