weMail Product Roundup: October 2019
October is over and we have introduced a couple of new exciting features We believe this new feature will help your team to manage email marketing campaigns smoothly.
Email marketing is not a one-man effort. You need team members to help you create and craft the perfect emails’ copy, write catchy subject lines, design email images and integrating email analytics.
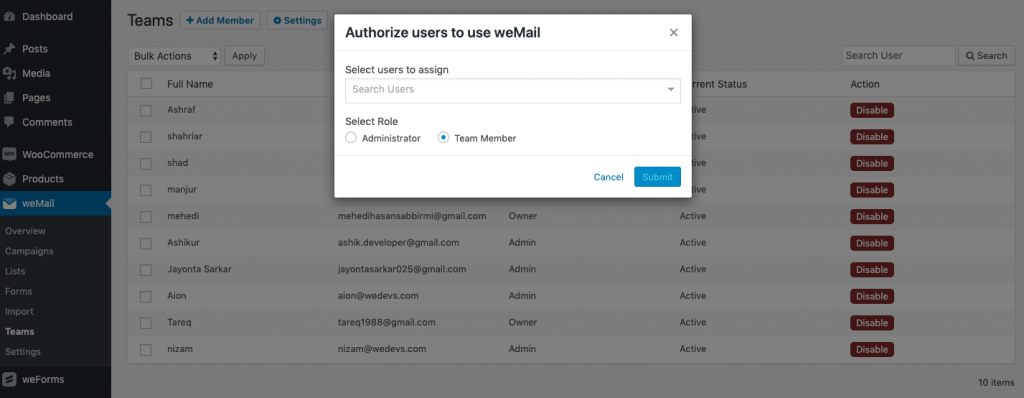
To further aid this process, weMail introduced the Team feature. Team setting is the perfect solution to manage your email marketing team. You can manage user roles, user role status to provide access to specific campaigns.
1. Team Setting Page Walkthrough
First thing first, to avail of this new feature, update the plugin to the latest version 0.10.0 then go to weMail->Teams
Overview Page
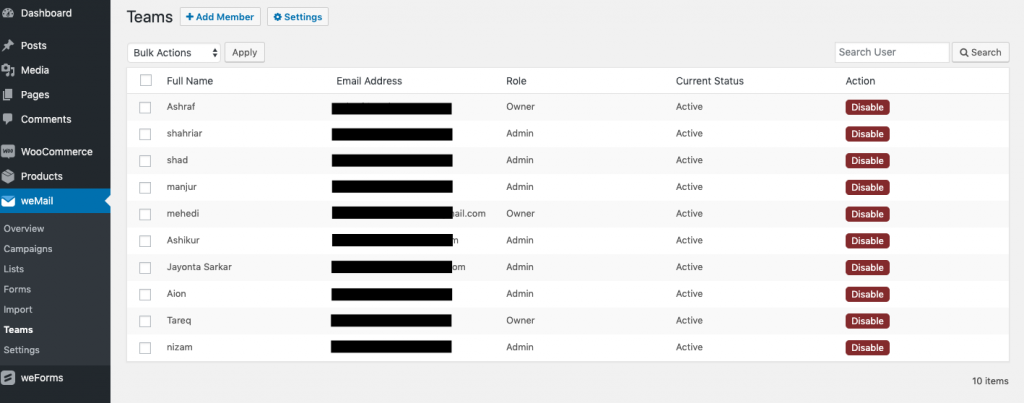
The Team section will show you an overview of all the user roles currently added to weMail with status. As you can see from the screenshot above, all the user roles are currently inactive. You can click on the “Disable” option to “Enable” a user.
Settings Page
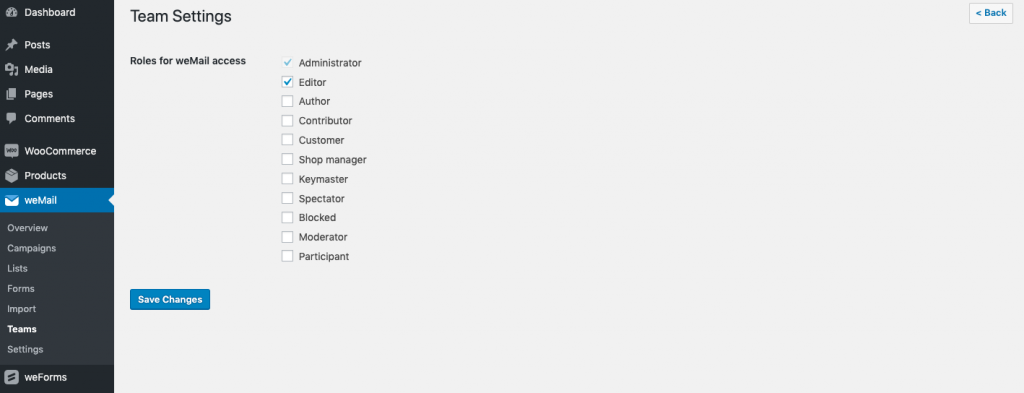
Setting page will show you all the user roles currently the WordPress site has. From Administrator, Editor to every other user roles your website has including all the custom user roles other plugins added. You customize the type of users who will get access to weMail by ticking on the user role.
Add Member
You can select the user(s) you want to add in weMail. Users on your WordPress website will be shown in this dropdown list. You add new users, assign their user roles (Administrator or Team Member) and click “Submit”.
Besides this awesome new feature, we improved the campaign reporting analytics.
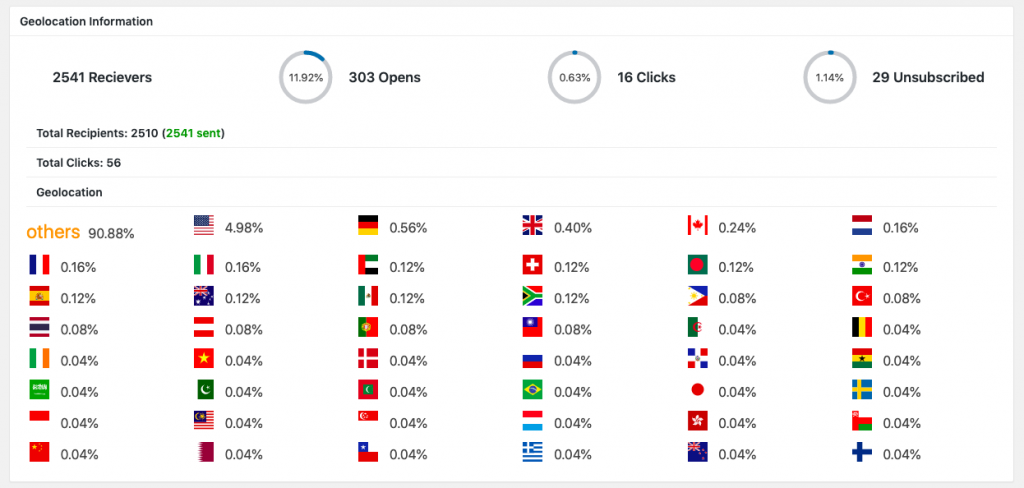
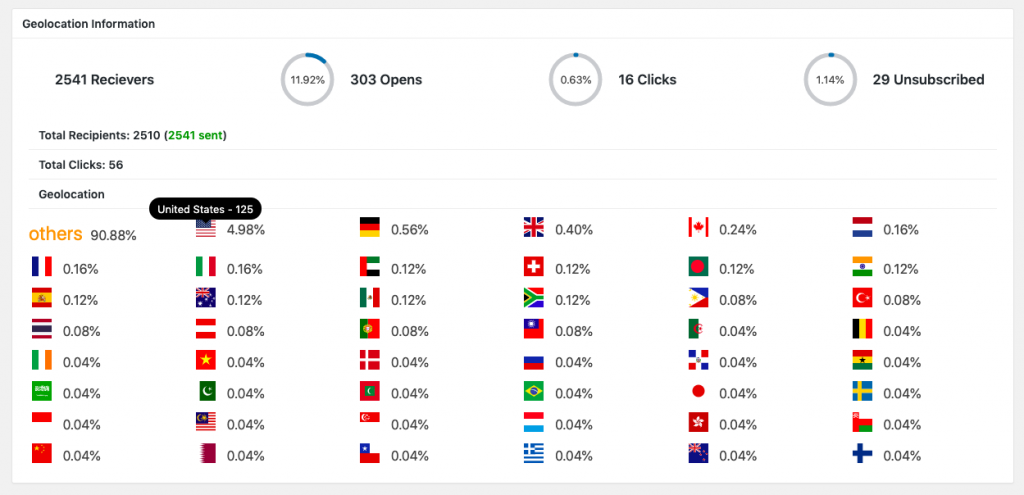
We have reorganized the country flags, It will now show from the highest clicked locations to the least clicked locations. Also, you can see the country name with clicks if you hover over the flags.
2. List Double Opt-in Options
We had double opt-in previously, but it was a global setting for all the lists. You cannot turn off double opt-in for a list. You either have to “enable” the double opt-in for all the lists or “disable” it.
We have moved the double opt-in plugin inside the lists.
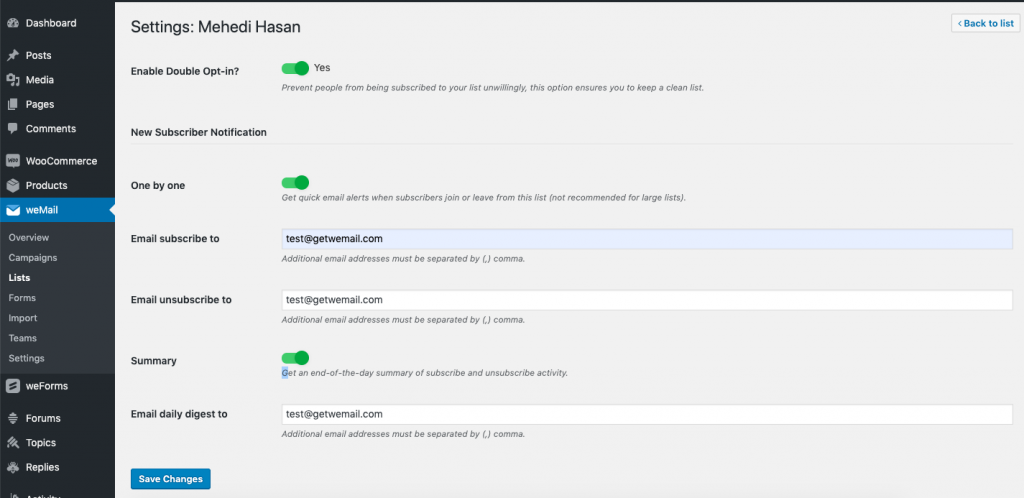
You can find the double opt-in setting in Lists->View Subscribers->Options->Settings. Now let’s go through the options one by one –
- Enable Double Opt-in: Will enable and activate the double opt-in feature for that particular list.
- One by One: Each time a new email contact subscribe to this you will get an email. Similarly, you will get an email for each time an old email contact unsubscribe. You can put different email addresses for the subscribe and unsubscribe notification email. you more than one email address with comma-separated.
- Summary: Get a daily summary email (subscribe & unsubscribe activity) of a specific list at the end of the day.
3. Two New Newsletter Templates
We have also introduced two new templates. Both of these templates are designed for the newsletter.
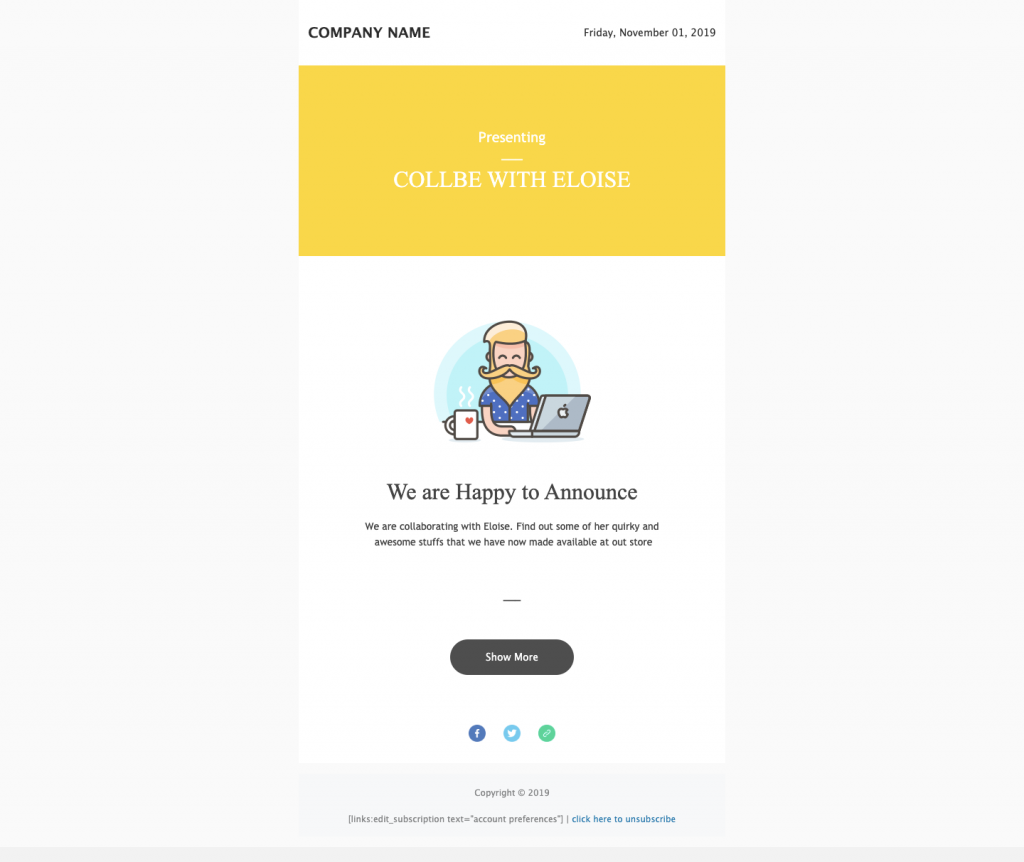
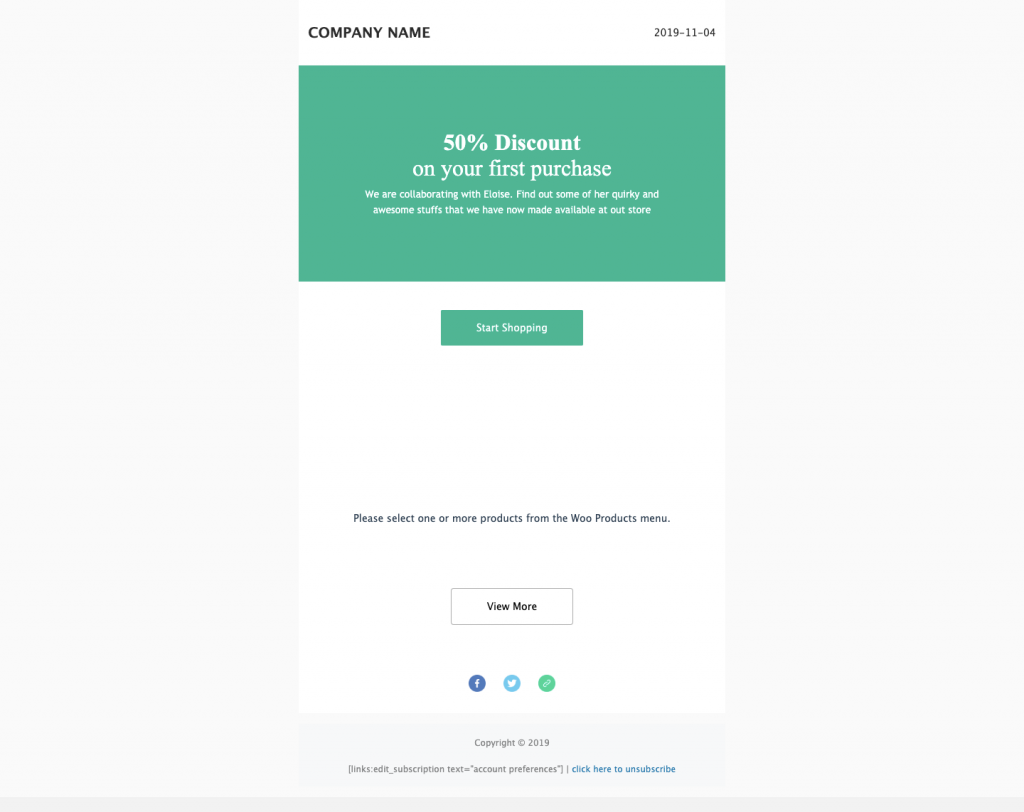
Newsletter, being one of the most used email marketing send, we have added an announcement newsletter template. You can share your product or blog post announcement with this newsletter template.
Besides these, we’ve made a bunch of improvements, fixed major issues and did some code refactoring. Most notable fixes are –
Fix: WP Post Block issue in campaign builder issue
Fix: Issue on my-account page
Fix: “site is experiencing technical difficulties” issue
Fix: Opt-in form responsive issue
Fix: Template Rendering issue when no products or posts added on the post or wooProduct Block in the Campaign builder.
Improvement: Refactored import email code for better performance
Improvement: Refactored 24 Stats notification for accurate stat email
This is all for now, If you have any questions, please contact us via the contact form.


