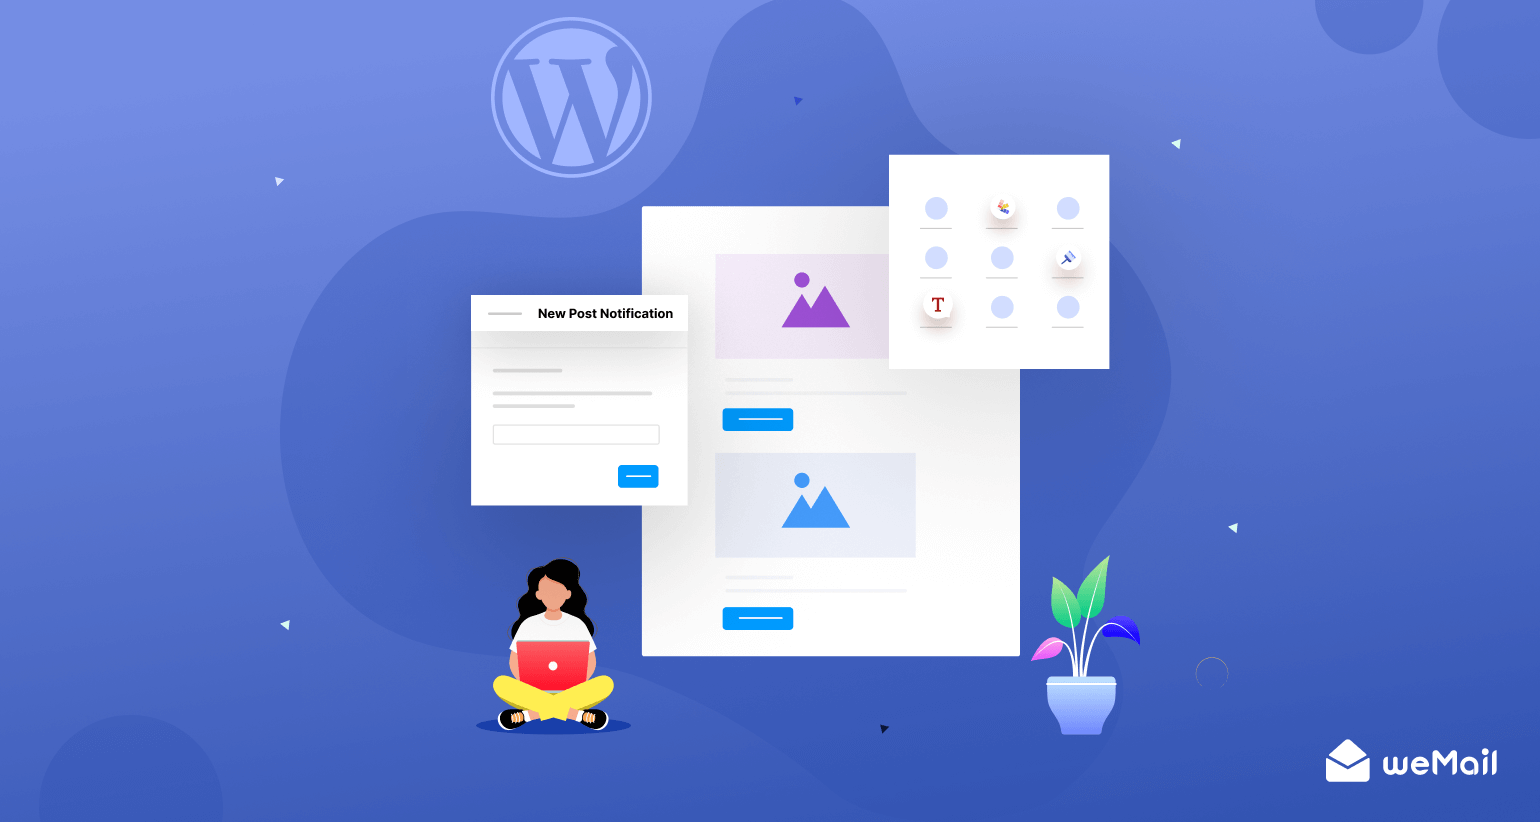
weMail New Post Notification Campaign – How WordPress Sends Email When a Post Published
Publishing new blogs remains the best way to generate organic traffics to your website.
Besides the search engines crawling your content and drawing web visitors, there’s another hack to leveraging new blog posts to increase site engagement.
You can notify your subscribers whenever you published a new blog through specialized email campaigns aka RSS campaigns.
Well, there’s another question is – can WordPress send email when post published? Yes, if you have a WordPress site, it is possible.
weMail has recently Launched a new post notification campaign to help you out. In this blog, we will show you how this feature work.
WordPress Send Email When Post Published – The Benefits

Once visited, more than 70% of visitors never come back to a site. So it is wise to bring atleast a portion of them back with each post published. User retention is the key to sustaining success.
Well, before we move on to the details of the new post notification feature, let’s help you to understand the benefits you are going to get from it.
- Sending new post notifications helps your subscribers to read your blog
- Increase your blog traffic
- You can build a more engaging relationship with the subscribers
- You can nurture the subscribers and keep them active
Well, the feature is designed to increase the overall engagement of your subscribers. So, whenever you send an email with a new post notification, your subscribers going to know how you care for them, and it will develop a better relationship between both parties.
N.B. Well, one caution you must maintain. Never send unplanned new post notification emails. It should be strategic and follow a good frequency.
How to Send WordPress New Post Notification Campaign with weMail
To use this feature, make sure you publish new blogs on your WordPress site frequently.
Jokes apart, it is a reality, that if you publish the newest blogs on a healthy frequency (it can be different based on the types of product/website), they can increase your site’s performance undoubtedly.
Along with that, if you send those blogs to subscribers right after they’ve been published, they will trigger an instant user action.
Here’s how to do it with weMail.
If you already are using weMail, you are ready to go. Otherwise, make sure you have installed weMail in your WordPress. To see the installation process, follow the instruction on how to install weMail in WordPrees.
Step One: Creating a New Post Notification Campaign
At first, go to your WordPress dashboard and then, click on weMail.
Now, click on ‘Campaign.’
You will be taken to the next page with Create Campaign option.
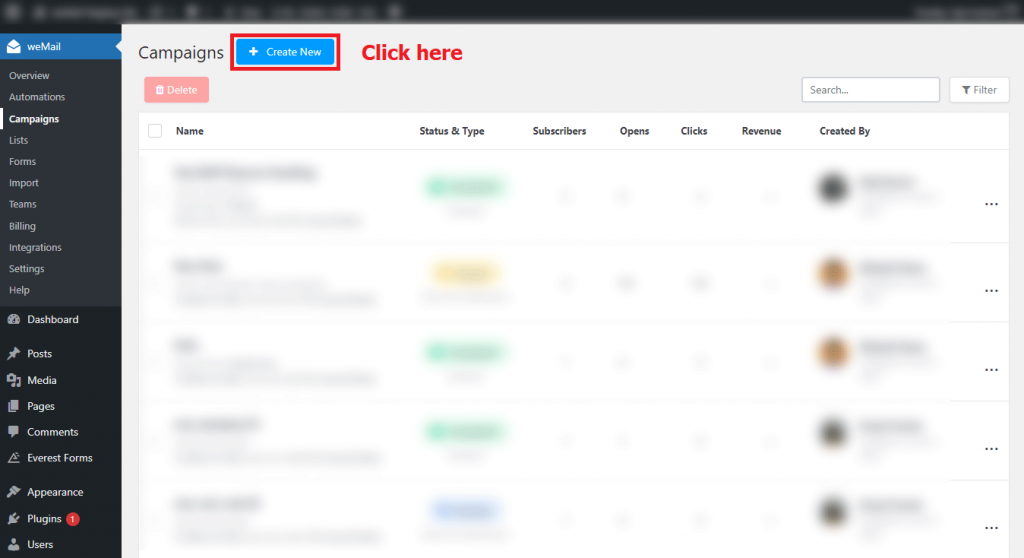
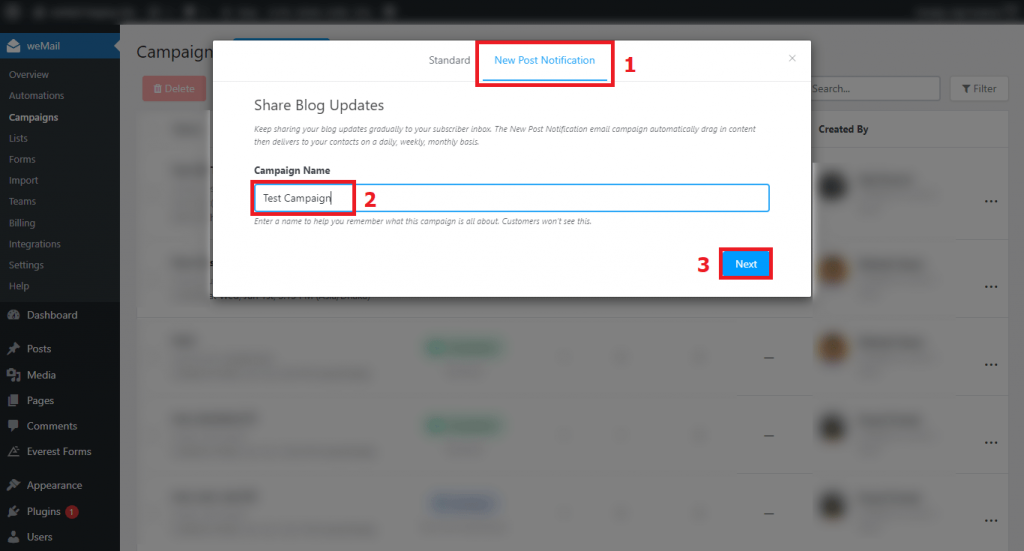
After you click on Create New, you will see a modal popup that will show you either to choose a standard weMail campaign or create a New Post Notification campaign
You need to click on the latter one.
So, here are the steps for doing it properly –
- Click on New Post Notification
- Name Your Campaign
- Hit Next
After hitting Next, you will see where to put your subject lines, and options to select email lists and segments before creating the campaign.
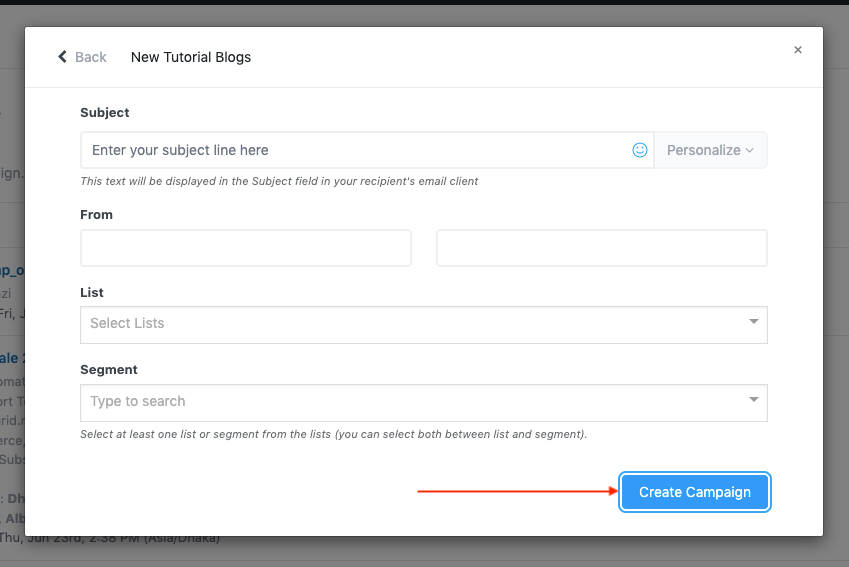
After you fill-up in the necessary information, click on Create Campaign.
You can personalize the subject lines and add emojis if you see fit.
Step Two: Choose a Template for Your New Post Notification Campaign
Here comes the fun part. Now that you’ve created a new post notification campaign with weMail, you can customize it before sending it.
After creating your campaign, you can go to the template section. Then choose a template you like, and start customizing.
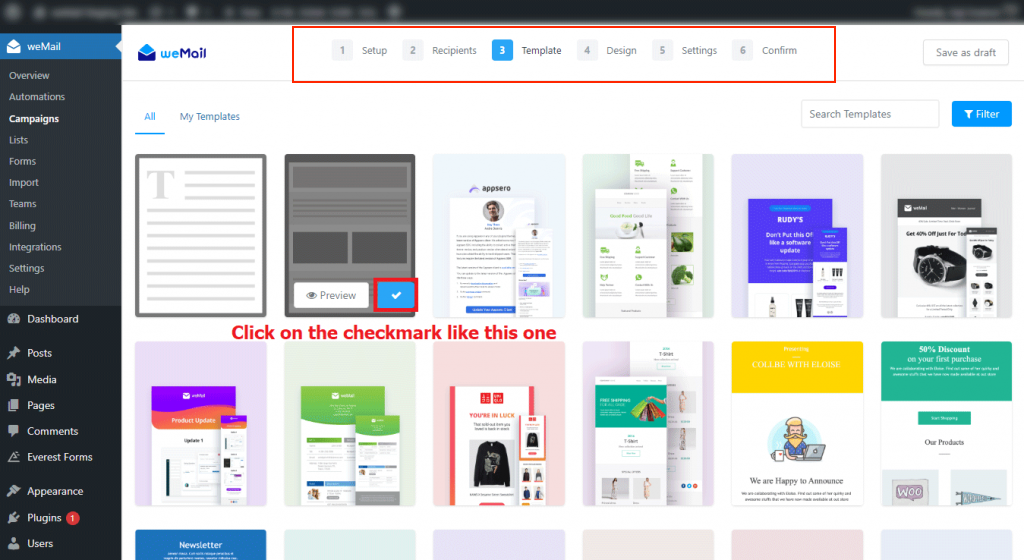
Step Three: Design Your Template
If you choose a template, you can start to customize or design it in the next step.
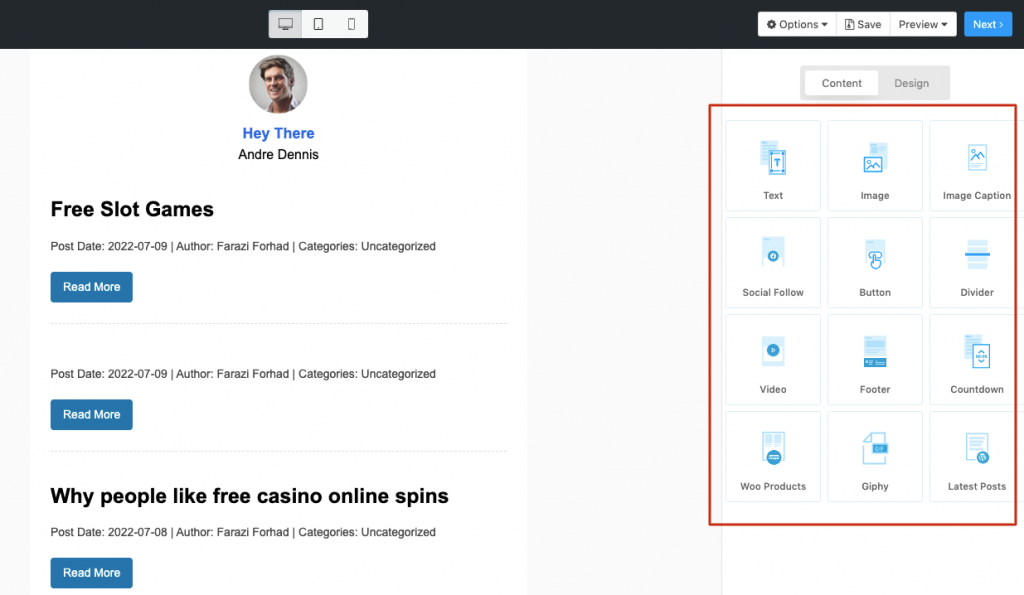
Well, you can insert images, header text, or CTA buttons. Despite the latest post will automatically show up randomly, you can select which posts you want to send as the latest ones. There are options like selecting a category or tags.
Select Categories and Tags
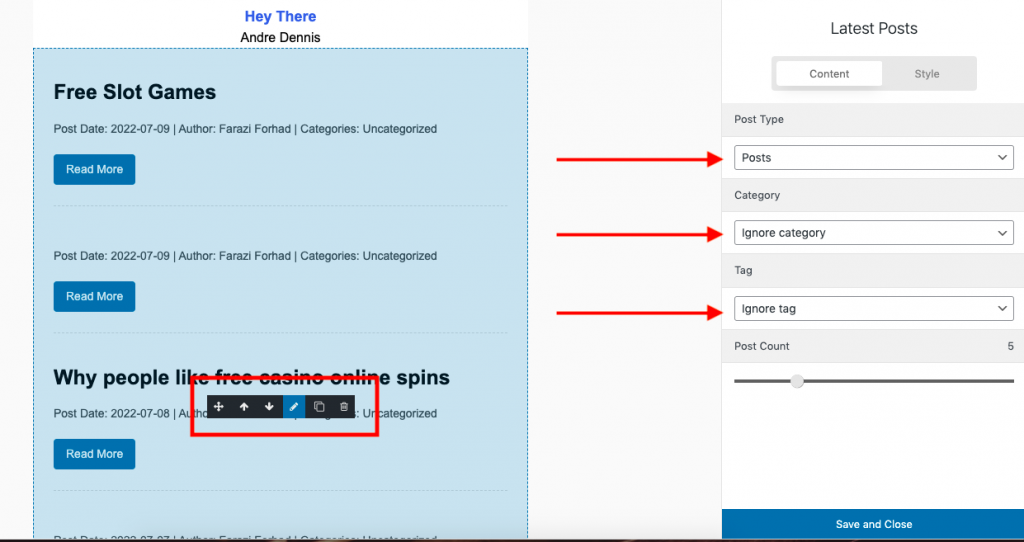
If you select a category, the campaign will show only the new posts or pages published under that particular category.
It’s the same if you select a specific tag.
Customizing Style
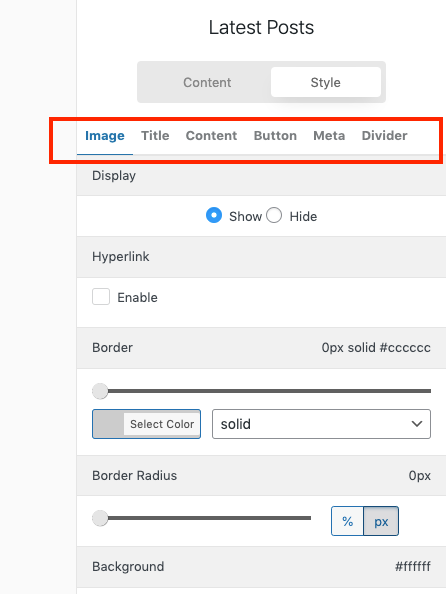
Just beside the content part (where you have select tags and categories), you can find a section to customize the style of your campaign. You have options like title, content, button, or meta to customize.
After you are done with the template designing, save and close it. Then, hit the next button just above the right corner.
Step Four: Settings
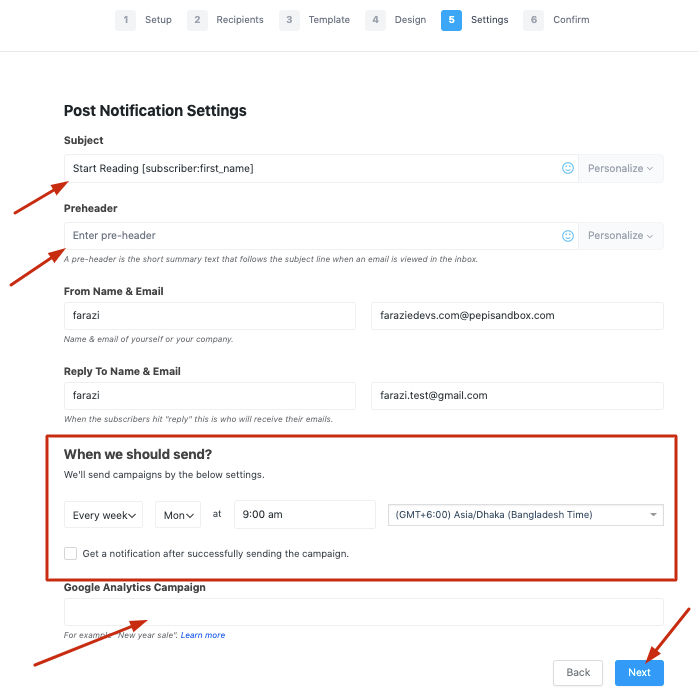
This is the settings page. Here you can check your email campaign subject line, email preheader, sender, and reply-to address.
On this page, you can also schedule your campaign whether you want to send it every day, month, or week. You can set the days, and times alike. Also, there are an option to get a notification whenever a campaign is sent successfully.
Therefore, if you want to add Google analytics to track this campaign, you can add the code in the box.
After you are done with the setup, click on the Next button.
Step Five: Confirmation and Start Sending New Post Notification In WordPress
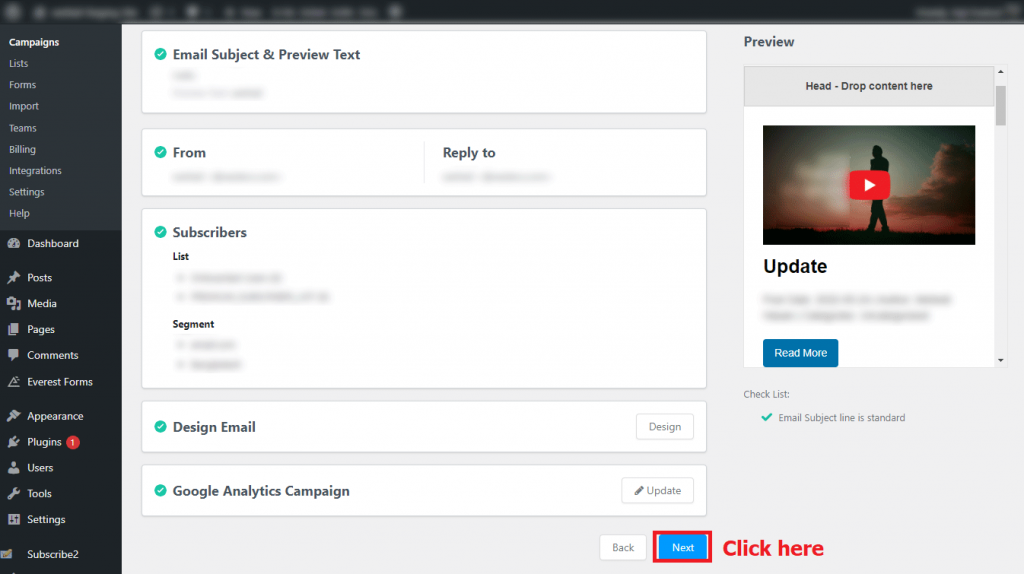
This page is for reviewing if everything you put down is OK and if you are ready to go. You can also check the previews, you can see what your WordPress new post notification will look like.
Now, you can hit the next button and activate the WordPress new post notification campaign.
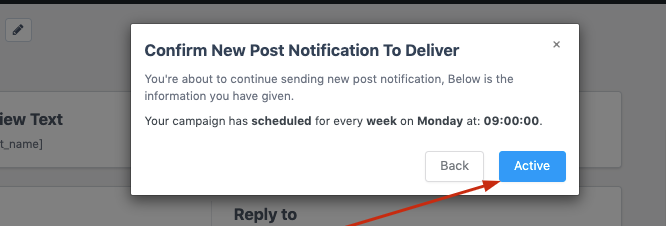
And, that simple it is. Indeed, WordPress Send Email When Post Published and you can do it with weMail following only five simple steps. To check out the full documentation, click here.
Final Thoughts on WordPress New Post Notification Feature
weMail is one of the most affordable WordPress email marketing platforms.
It will guide you to the easiest way to propel your email marketing success and generate conversions. The new post notification feature is such another arsenal to make your marketing effort more winning.
Tell us what you think of it. If you have further questions regarding the feature, don’t bother to let us know.

