weMail Feature Update: Exclude Recipients – Personalize Your Email Lists with Ease
Accurate filtering and personalization in email listing are a must for any successful email marketing campaign. This enables you to send emails to the most suitable recipients based on their behavior, interests, demography, and other valuable points.
But creating new email lists from scratch every time before starting new campaigns is a time-consuming process. To make the process easy, weMail has recently released a new feature – Exclude Recipients. It will give you more control in personalizing email lists in the shortest possible time.
This blog post will break down the process of how to personalize email lists easily with the exclude recipients feature. But before that, we’ll talk a bit about this feature. Let’s get started!
What is the Exclude Recipients Feature?
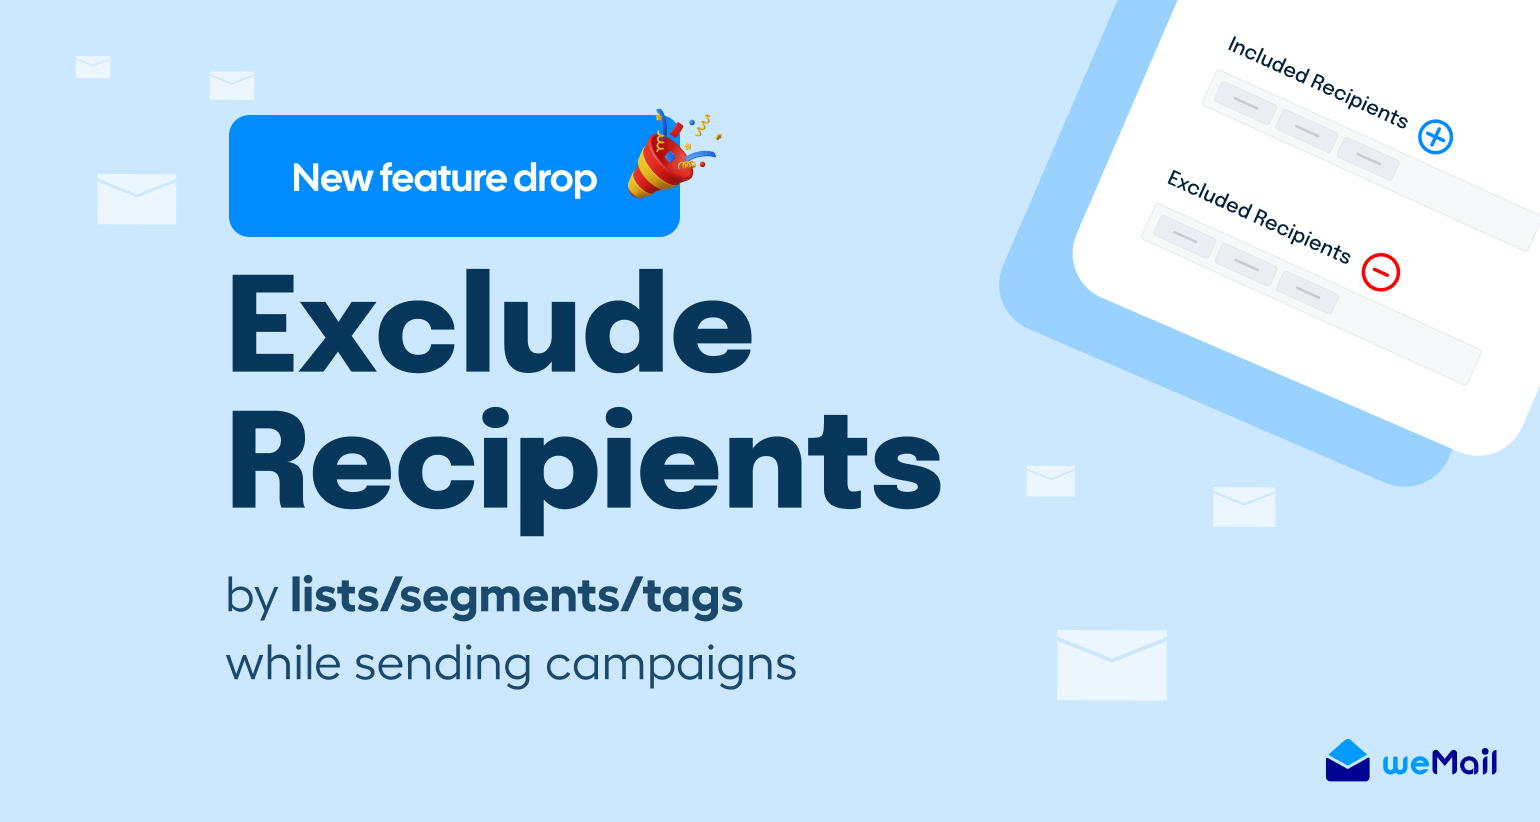
The Exclude Recipient feature enables you to prevent specific users from receiving emails or newsletters from any particular campaign.
This can help you enhance relevance, improve email deliverability, optimize resource utilization, and ensure a better user experience.
Apart from all these, the biggest benefit of this feature is that it can save you from being labeled as an email spammer.
So, without the slightest doubt, the Exclude Recipients feature can be a valuable asset for any email marketer looking to maximize the impact of their campaigns.
How to Exclude Recipients Using the weMail Plugin
Before jumping into the process, make sure you have installed the weMail plugin and activated it on your website.
Here’s how to install weMail on your WordPress site.
Once you have the plugin installed properly, start following the steps explained below.
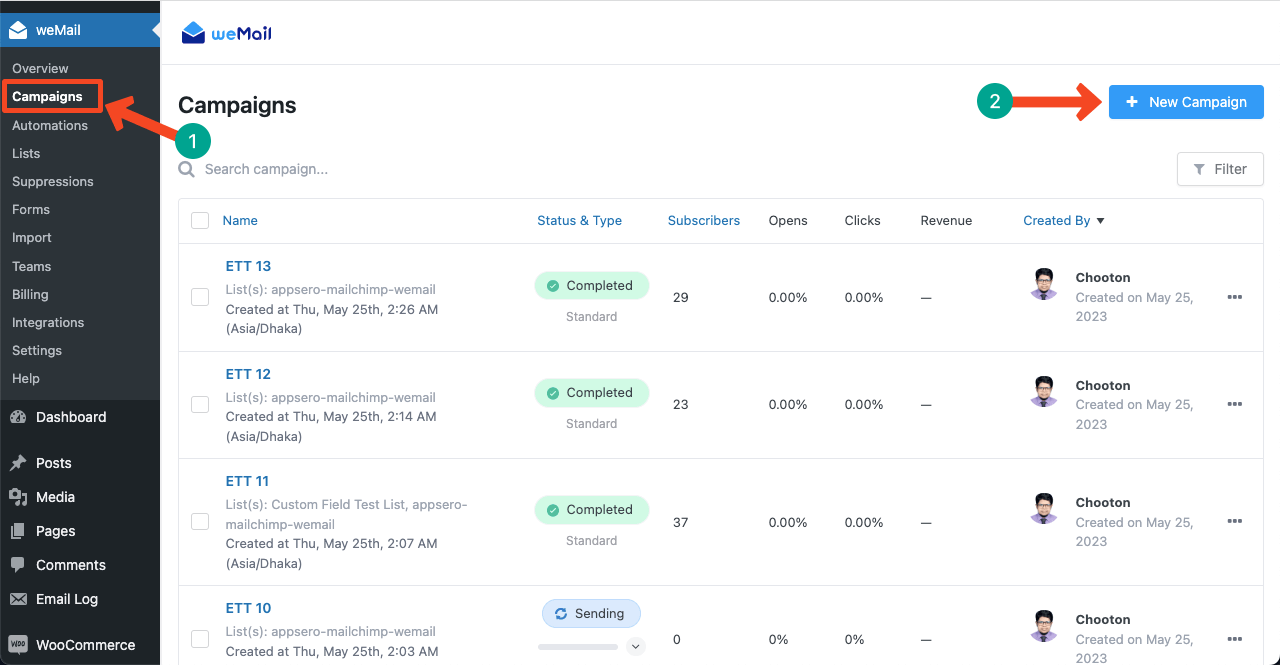
- Navigate to weMail > Campaigns.
- Click the + New Campaign button.
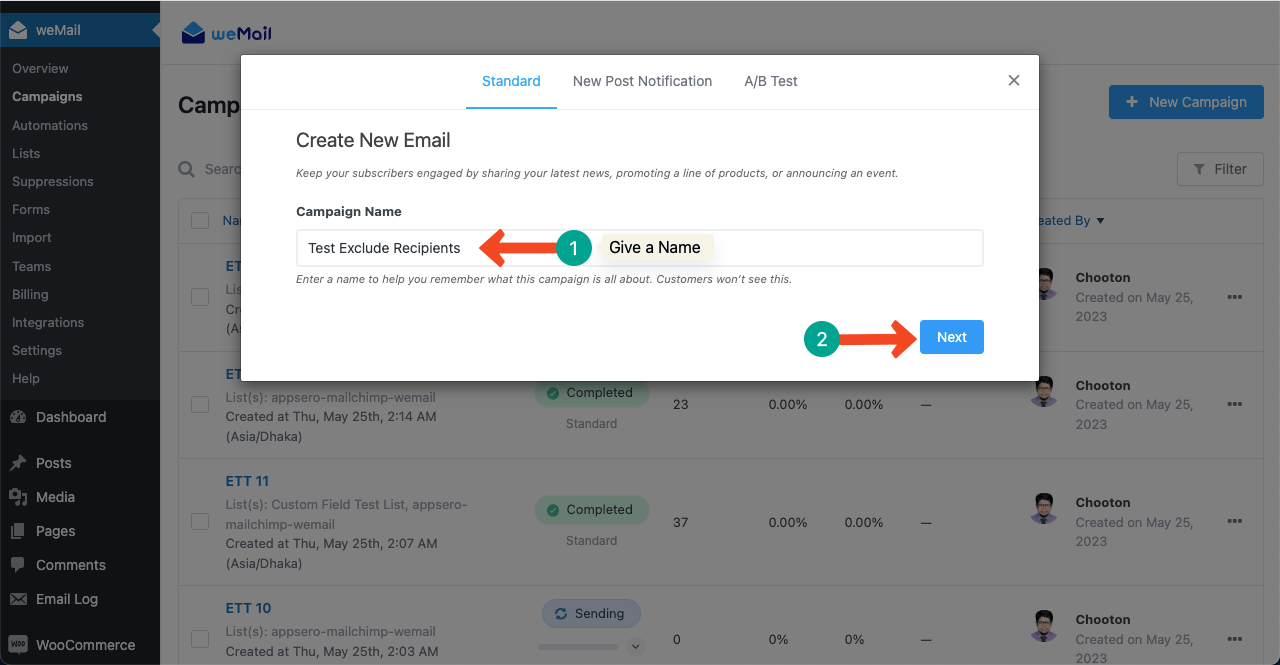
- Give a name to the campaign so you can easily find it later.
- Click the Next button.
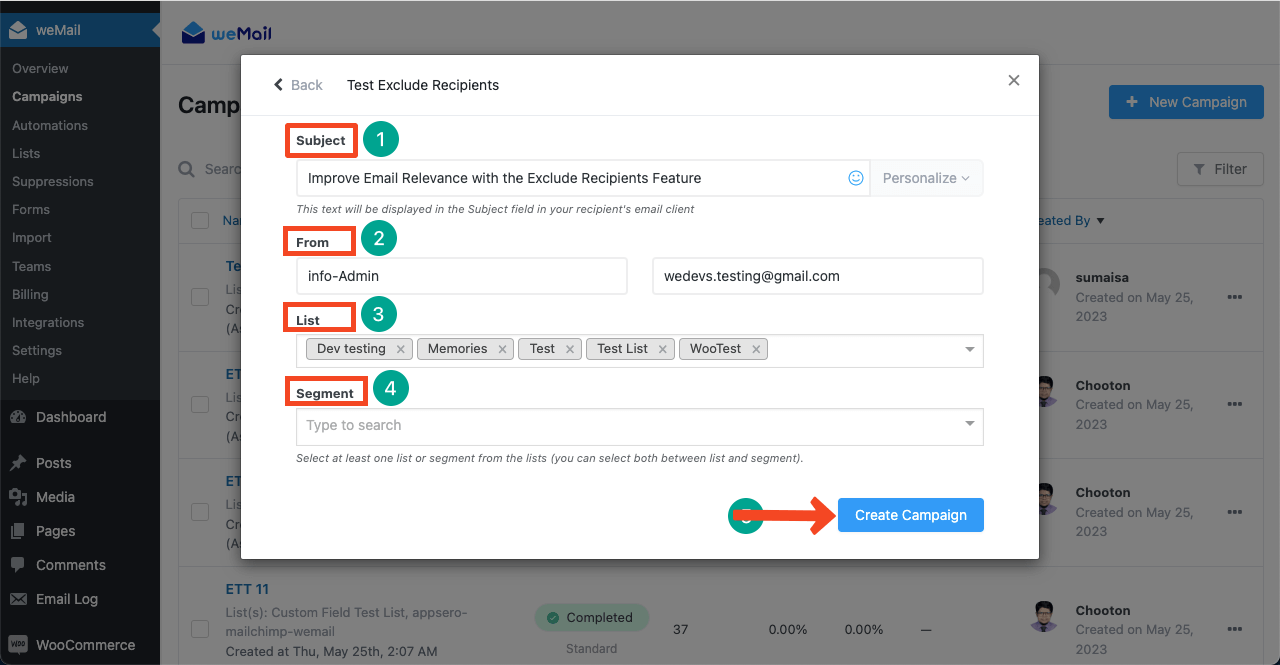
- You’ll get a new pop-up.
- Write a subject line that will be displayed in your recipient’s inbox.
- Set the sender’s name and email address.
- Add those email lists that include your audiences.
- You may also select segments at this step.
- Press the Create Campaign button from the below-right corner of the pop-up.
- Get into the list.
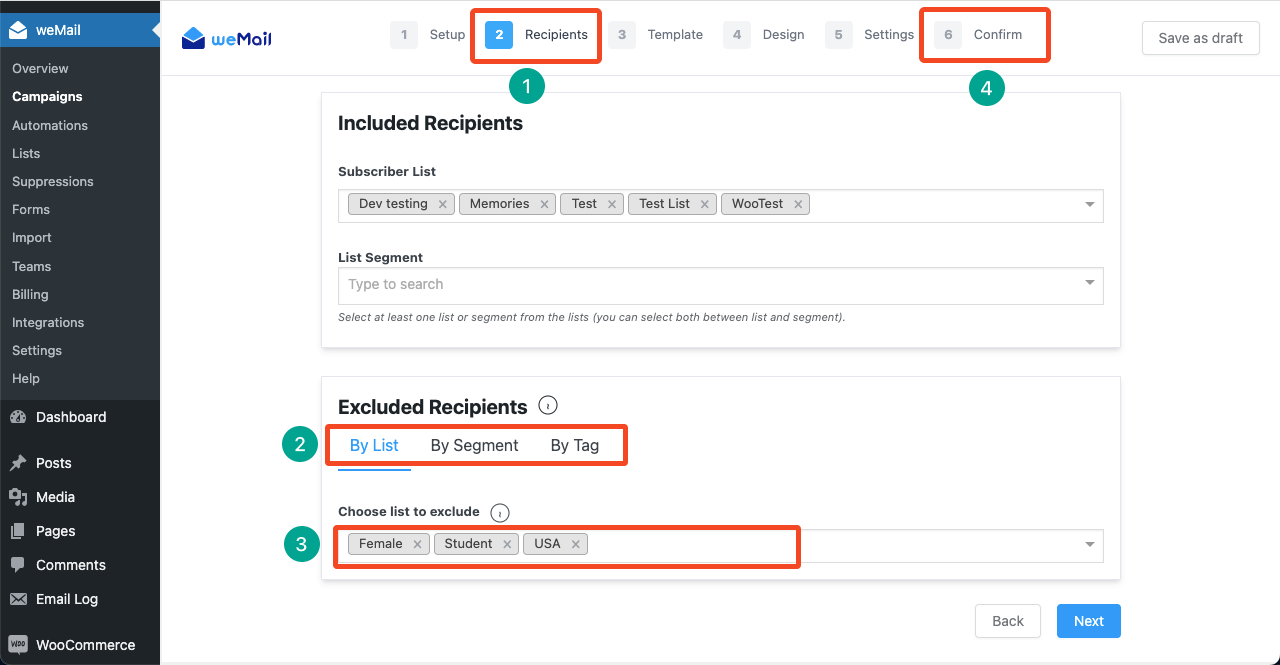
- Stay on the Recipients tab.
- Come to the Excluded Recipients section.
- You can exclude subscribers By List, By Segment, and By Tag.
- Hit the Next button if you want to design an email/newsletter template.
- But for testing this feature, we’re jumping into the Confirm tab.
Note: If both the included and excluded lists have common subscribers, they will be removed when the campaign is activated.
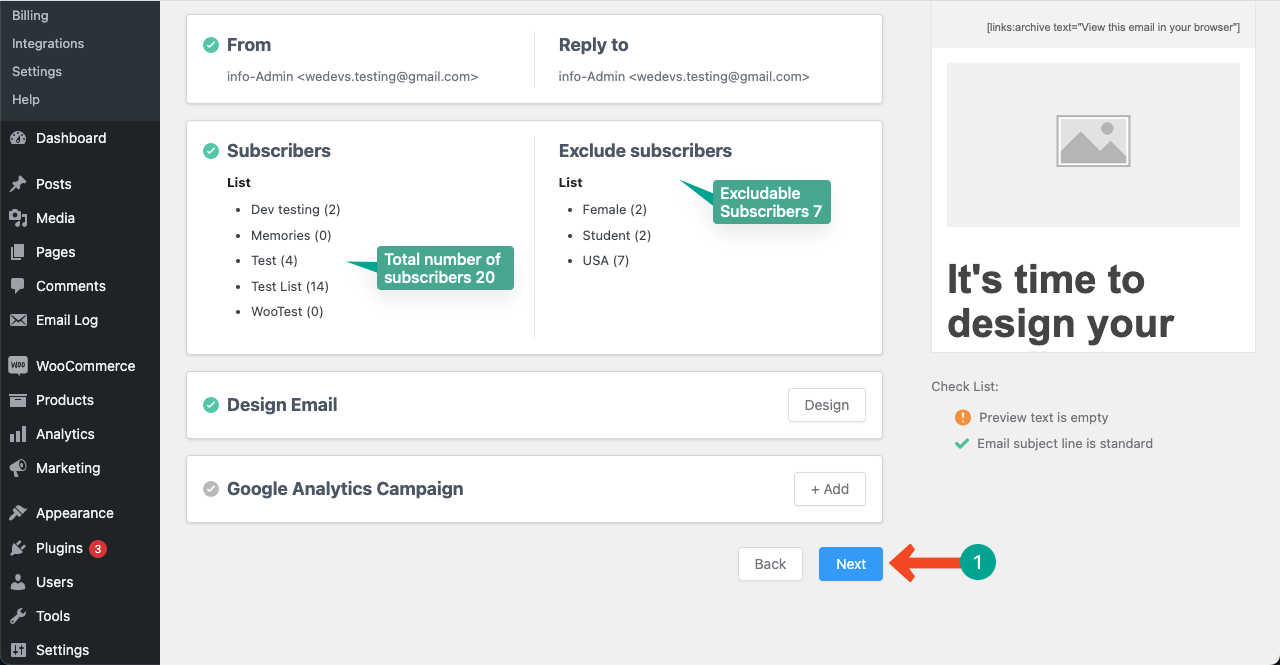
- You can see the total number of subscribers in the selected email list is 20.
- Excludable subscribers are 7.
- Click the Next button to activate the campaign.
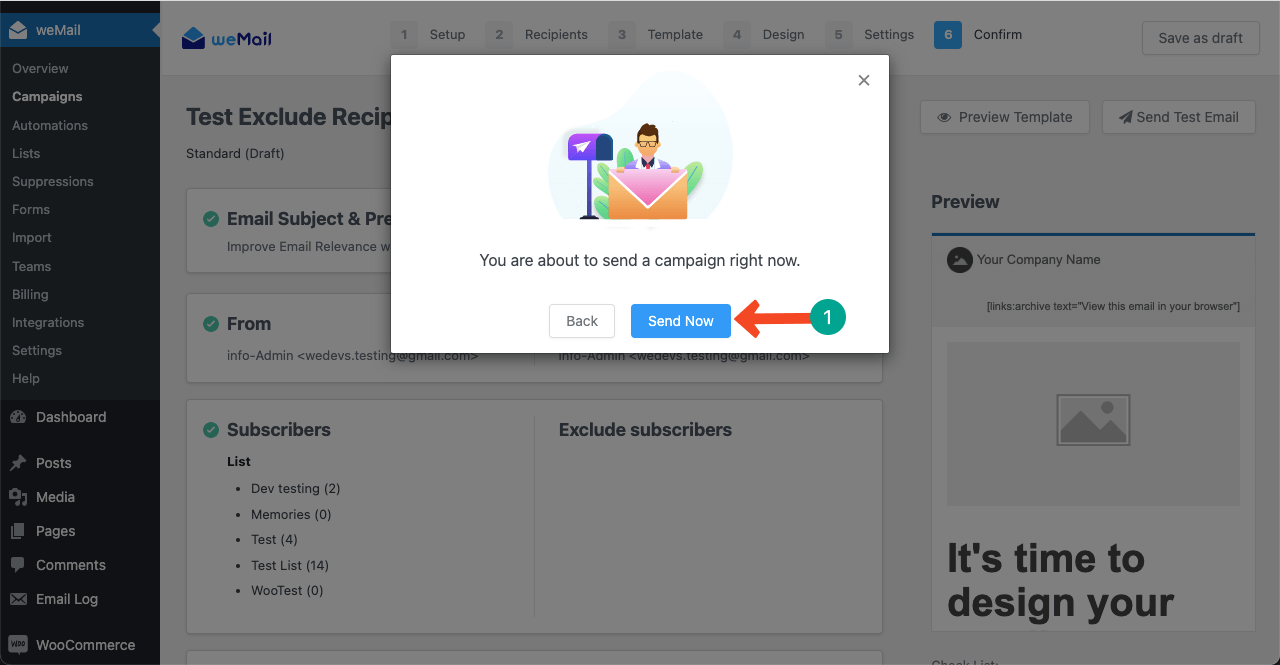
- A new pop-up will appear for your final confirmation.
- Press the Send Now button.
- The campaign will be activated.
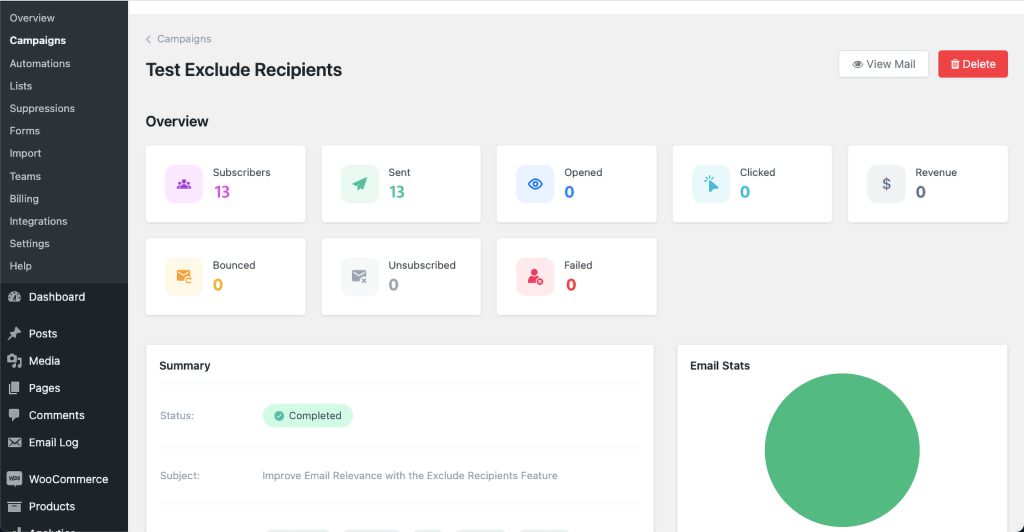
- Now, get into the campaign to see its performance.
- You’ll see there are 13 subscribers, and the email has been sent to 13 people.
- Because after excluding the above-defined 7 people, there remain 13 people.
- This is how the Exclude Recipients feature work.
Concluding Remarks
The Exclude Recipients can be a game-changing feature. You can fine-tune your segmentation and personalization capabilities to elevate your email marketing performance.
You’ll be able to focus more on utilizing your time, efforts, and marketing costs to maximize the expected output.
In the competitive commercial world, if you want to stay one step ahead of your fellow email marketers, you must need this feature. Hope this guide has been able to educate you on how to use this feature.
For more information, knock out our support team or use the comments section below.


