weMail and Elementor Forms Integration – Sync and Manage Leads with Ease
weMail is now more powerful with the new Elementor form integration! It allows you to synchronize the leads you receive through the Elementor Form directly to the weMail email list without any manual effort. This can save you time, eliminating the possibility of human errors.
The weMail and Elementor Form integration is very simple. Configuring the integration to your weMail plugin will take only a few minutes. Let’s explore the weMail and Elementor forms integration process in this article. Before that, ensure you have their latest versions installed on your site.
weMail and Elementor Forms Integration Process
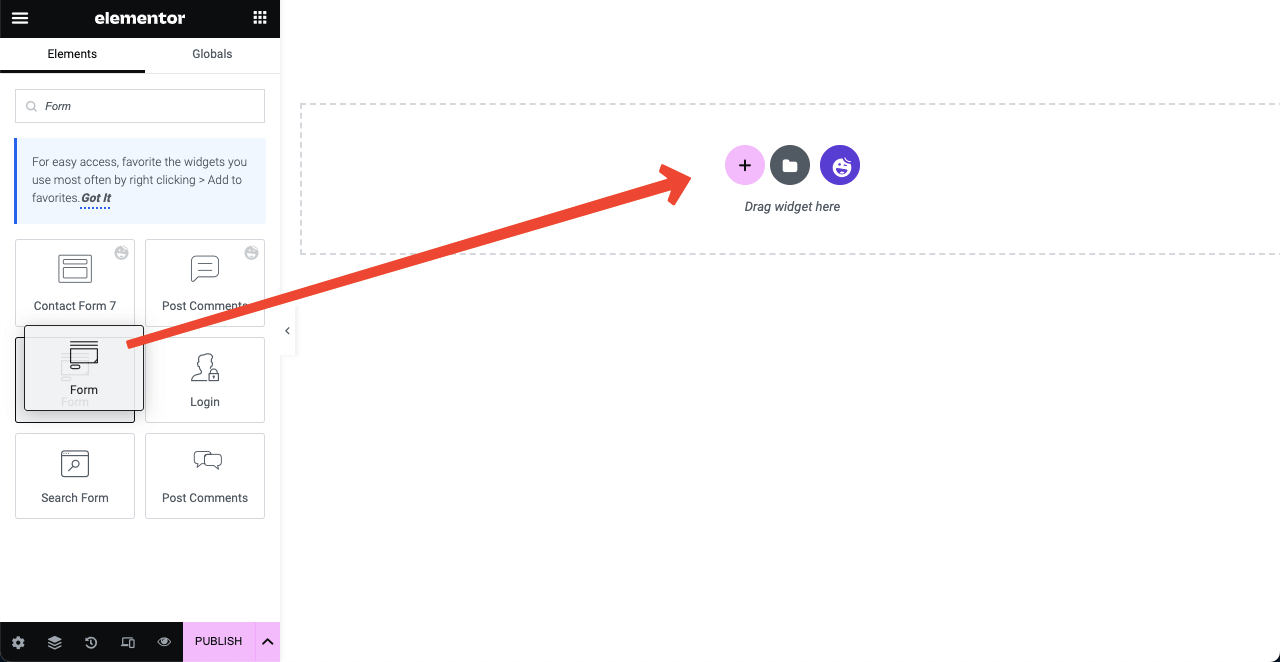
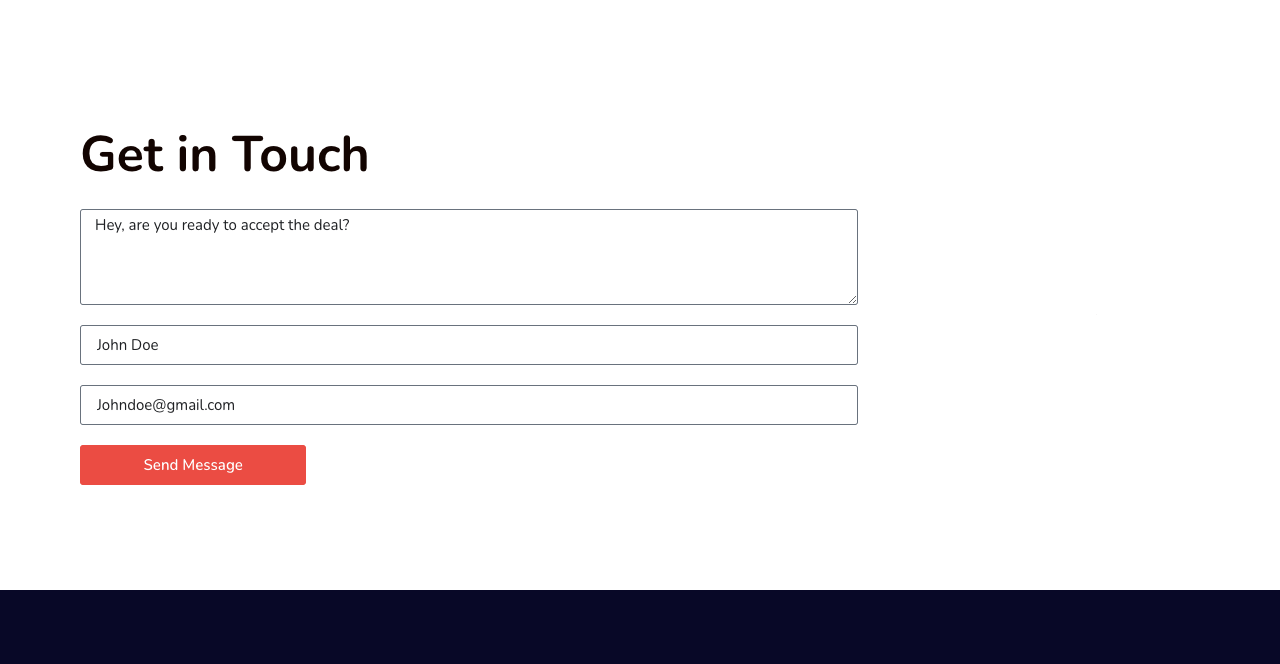
Open a new page with Elementor. Drag and drop the default Elementor form widget to your desired section on the page. (If you already use this widget on any of your web pages, you don’t need to create a new page. You have to sync it with weMail from the backend, which is coming below.)
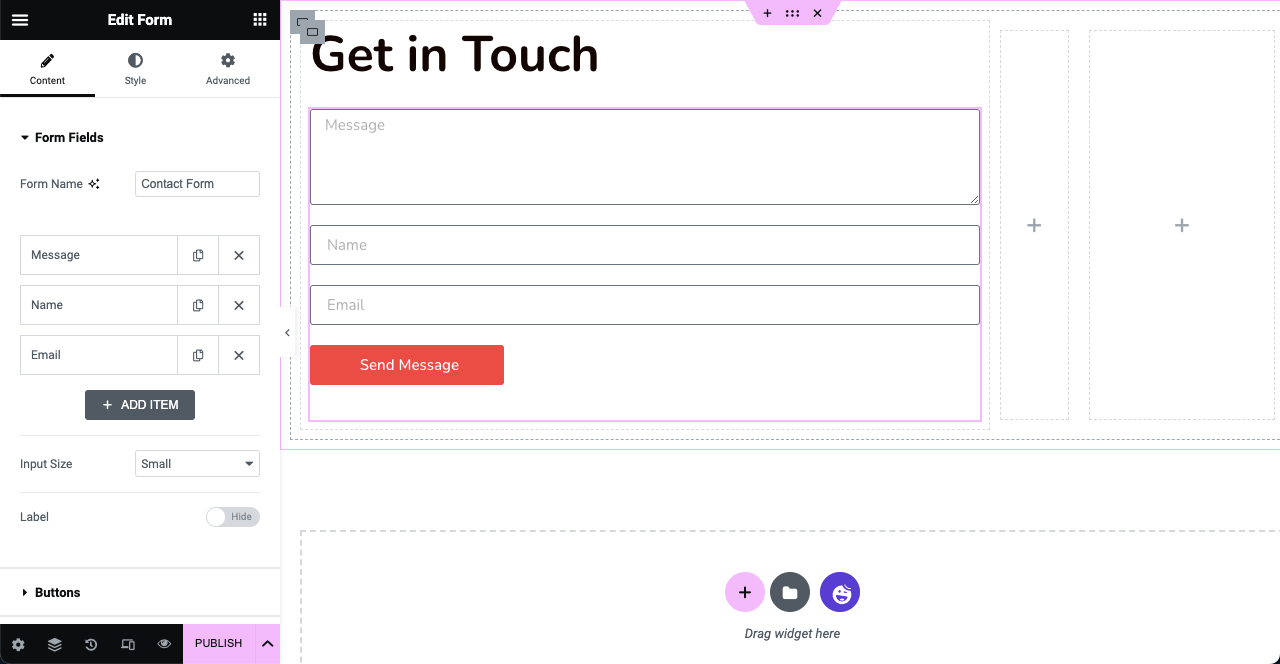
Customize the form as you want using options from the Content and Style tabs. You can add more fields to the form by pressing the + ADD ITEM button. Use the flexbox container to align the parts of the form easily. Click the PUBLISH button at the end when you are done with customizing.
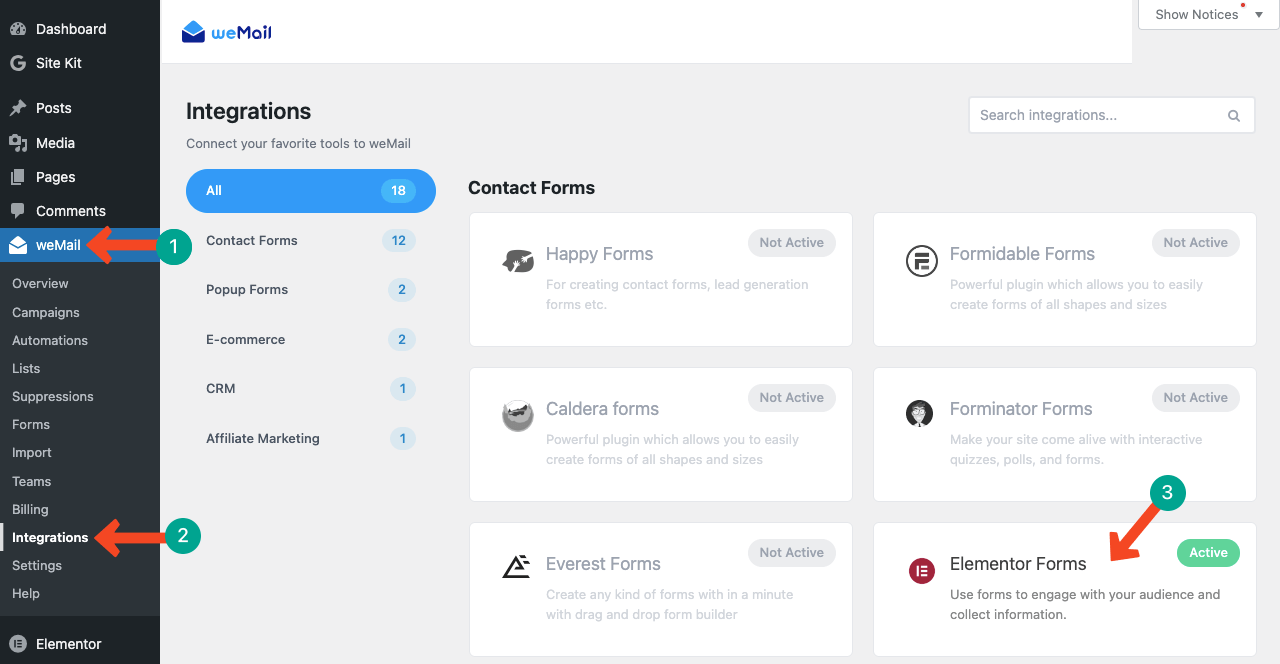
Navigate to weMail > Integrations. You’ll get a list of items that have integration with weMail. Within a few seconds of scrolling the list, you will find the Elementor Forms option. Click on it.
You’ll get the form you created and published just a while ago. The form has two parts: Subscribe to list and Map fields.
Each option has a dropdown list. You need to select the right option from the list for each field by clicking the dropdown icon.
Note: You may create multiple forms on your website based on your needs. In that case, you have to set up each form individually. Here, we’ll show the setup process of only one form.

Click the dropdown icon next to the option Subscribe to list. Select a list already existing there or create a new one by pressing + Add new list. Tick mark Yes to ensure overwrite existing data.
Come down to Map Fields. Select the name for Name, email for Email, and ignore this field for Message. Because there is no specific option for the message. Hit the Save Settings button at the end.
Note: Check expert tips on how to grow email list.
Come to the frontend of the page where you added the Elementor Form widget. Type a message and send it with a name and email address.
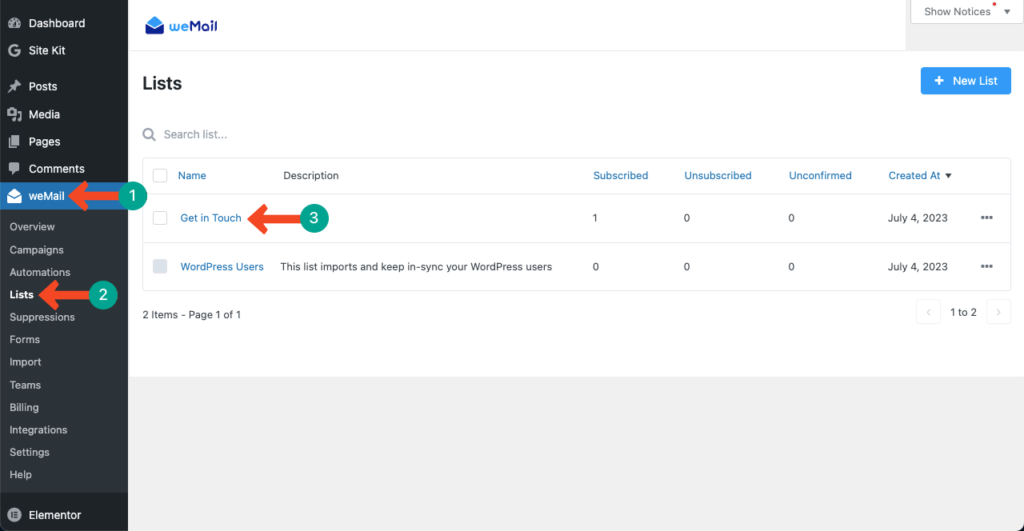
Get into the WP dashboard again. Navigate to weMail > Lists. Click the list you selected for the form just a minute ago.
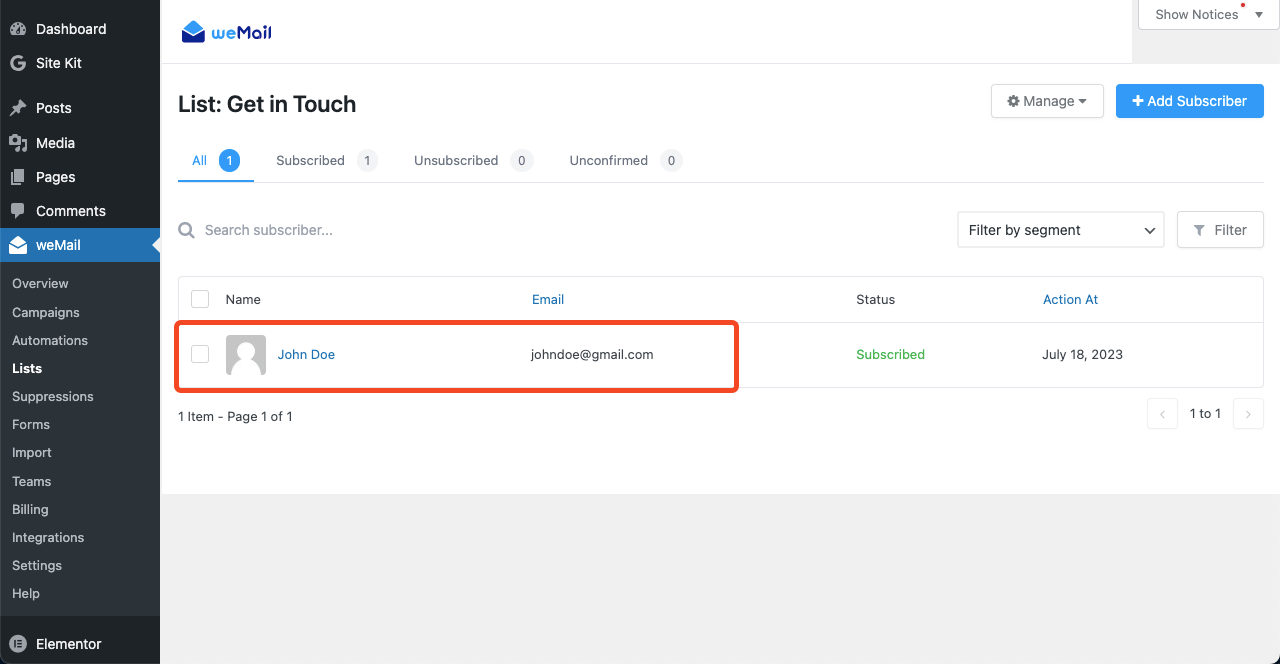
You’ll see the name and email address you used to test the Elementor form. In this way, other subscribers’ names and email addresses will be stored in this section.
Final Words!
weMail is one of the growing email marketing solutions. To bring you the best email marketing experiences, we are constantly working to develop new features and functionality. Just a few days ago, weMail released the exclude recipient feature.
There are still some new features in its pipeline, and expected to be released in no time. Stay tuned for the next update, and let us know your feedback about today’s feature.


2Comments
Teknik Industri
Can you explain the process of setting up and configuring the weMail and Elementor Forms integration?
Fuad Al Azad Editorial Staff
Hi there,
Thanks for your question. Actually, the process is explained in detail within the post itself. We would recommend you revisit the post and you should find all the information you need.
However, if you have any specific questions with a particular aspect of the integration process, please let us know. We’d be happy to assist you.