Sending Automated Newsletters for New WordPress Blog Posts and How to Enable Hyperlink to Post Titles

Do you think it’s difficult to insert links into your email body?
Especially when you automate the process of sending recent published posts/blogs as a newsletter to subscribers, you cannot add any link to their title.
Wouldn’t it be more amazing if you could add any link to post titles?
Well, weMail brings you a solution to this.
With its latest “new post notification campaign” feature, you can add a hyperlink to your post’s title so that the user finds it more accessible. And, in this blog, we are going to show you how to do that step by step.
Let’s follow through.
What is a New Post Notification Campaign

weMail has recently launched the “New Post Notification” Campaign feature. It allows you to send emails containing recent posts on your website.
Using this campaign you don’t have to select the post’s limit manually. It will automatically select your recent blog posts and send them as a newsletter to your subscribers.
Enabling hyperlinks to the post’s title in the “new post notification campaign” is a robust addition to this feature.
Also Read: How WordPress Sends Emails When New Post Published
What is Title Hyperlink, and How Does it Work
A clickable title that redirects a user to the post’s landing page is called “Title Hyperlink.” Adding a hyperlink to your post title increases your chances of getting clicked.
When you enable hyperlink on your post title and send an email, the recipient will have a better view to find the link to read the full post.
This unique feature is very user-friendly and eye catchy. It is also helpful for the email marketer as they don’t need to add an additional link to the email body.
As we all know, fewer links increase the chance of higher deliverability and click rate.
How to set up a hyperlink on the post title using weMail
Before enabling the “hyperlink on the post title” feature in weMail, you must create a New Post Notification Campaign.
So, first, we will show you how to create a new post notification campaign. Then we will guide you through the process of enabling title hyperlink.
Step One: Creating a New Post Notification Campaign with weMail
Here’s what to do –
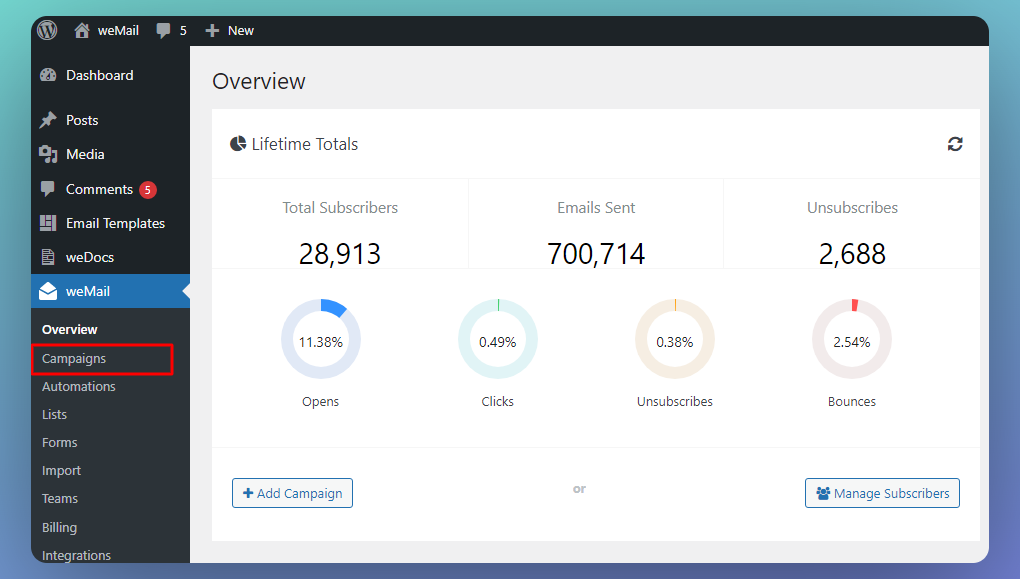
- Click on weMail from your WordPress dashboard.
- Go to Campaign as suggested in the image below.
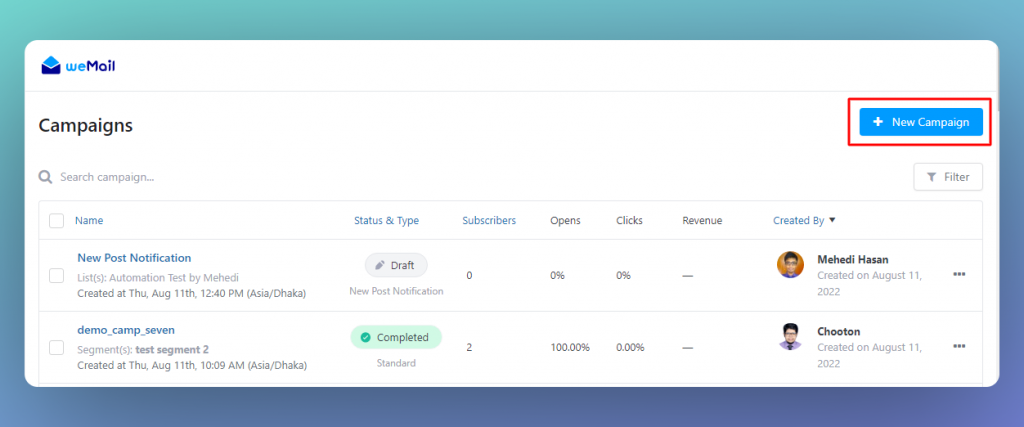
Now click on “New Campaign.”
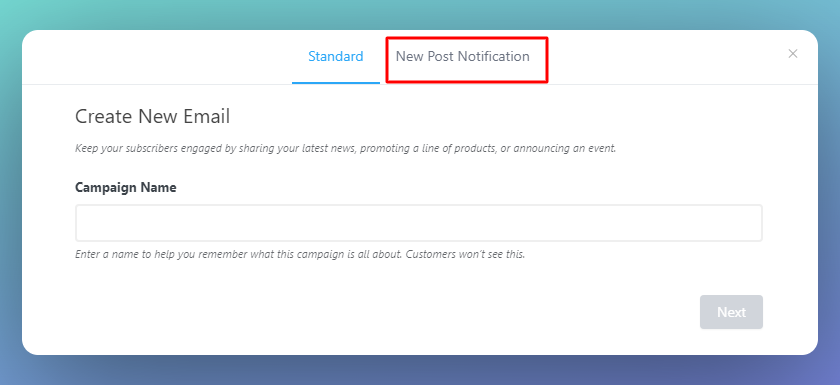
After that, you will see a modal pop-up showing you the options to create a “Standard” or “New Post Notification Campaign.”
All you need to do is click on “New Post Notification Campaign”
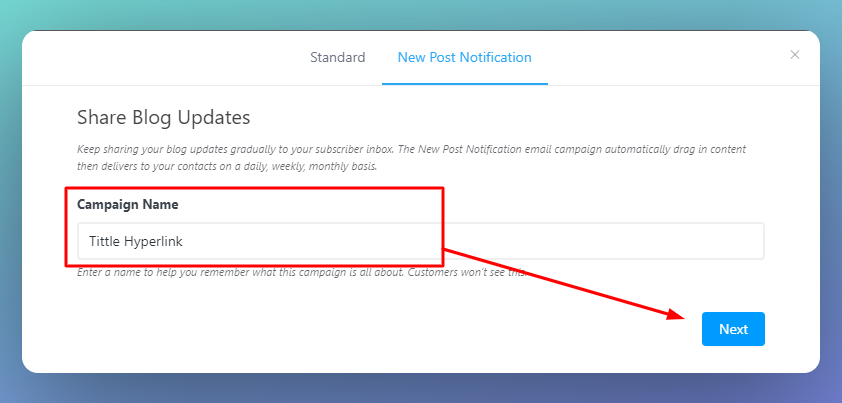
Now, follow the below steps –
- Provide Campaign Name
- Hit Next
When you hit Next, It will take you to another page. There you need to provide the following information –
- Subject Line
- From Name & Email
- Choose List or Segment
After you’ve given the information mentioned above, click on “Create Campaign”

Now that you have created the New Post Notification Campaign, it’s time to design and customize it.
You can choose a suitable template from the weMail template library and start customizing. This is super fun because the weMail template library comes with a drag-and-drop editor.
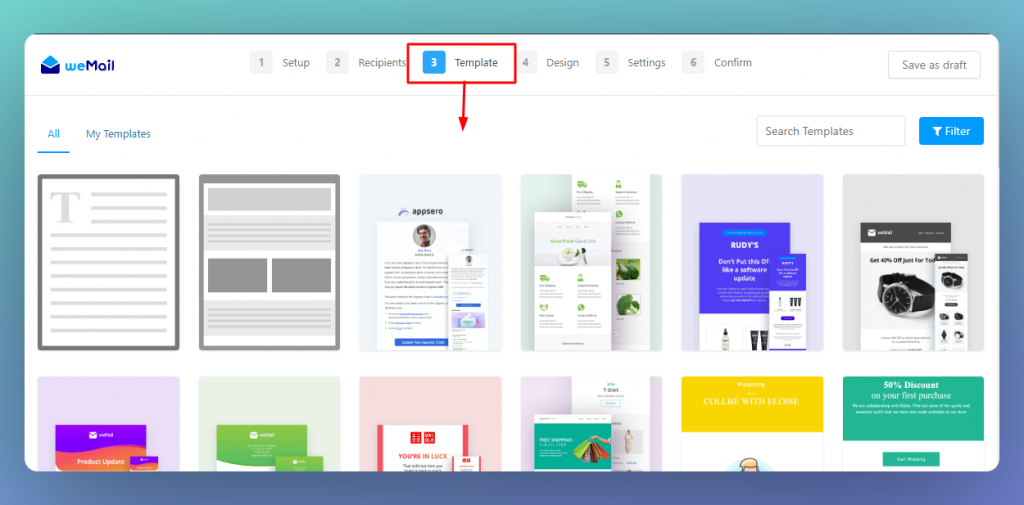
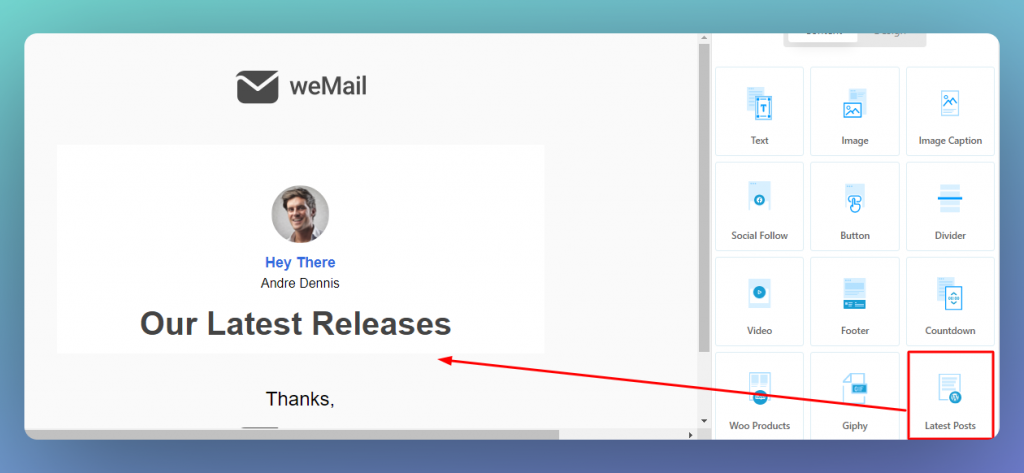
However, you also have an option to select the “latest blog” box and drag it down to your email body.
Well, after customizing, your new post notification campaign would be more than ready. Just one thing left to do.
Step Two – Enabling Hyperlink to New Post Titles
Here comes the crucial part. Just stay on the campaign editor. You don’t need to go anywhere else.
To enable hyperlink on your post’s title, all you need to do is –
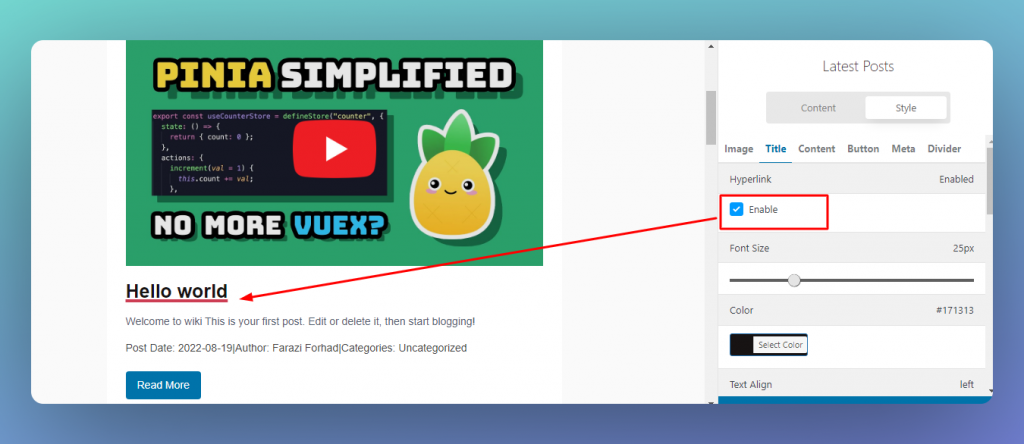
- Hover over any new post in the campaign editor, and click on the edit option
- Select Style

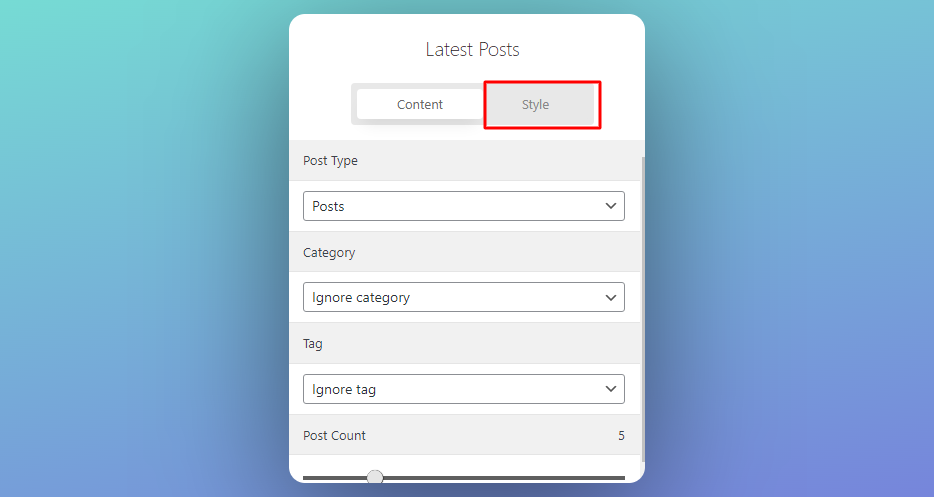
Under the Style Menu, you will find the option to customize your Tittle.
Select “Title” and click “Enable” under the Hyperlink option.
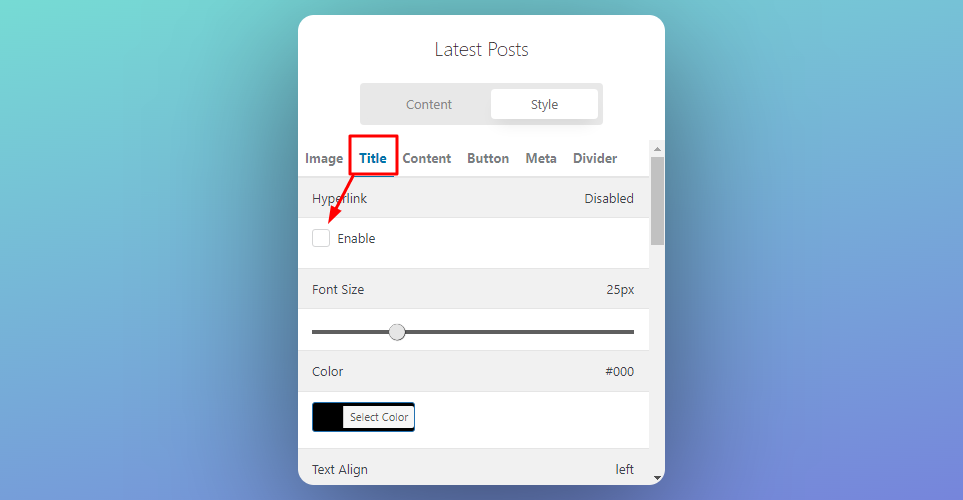
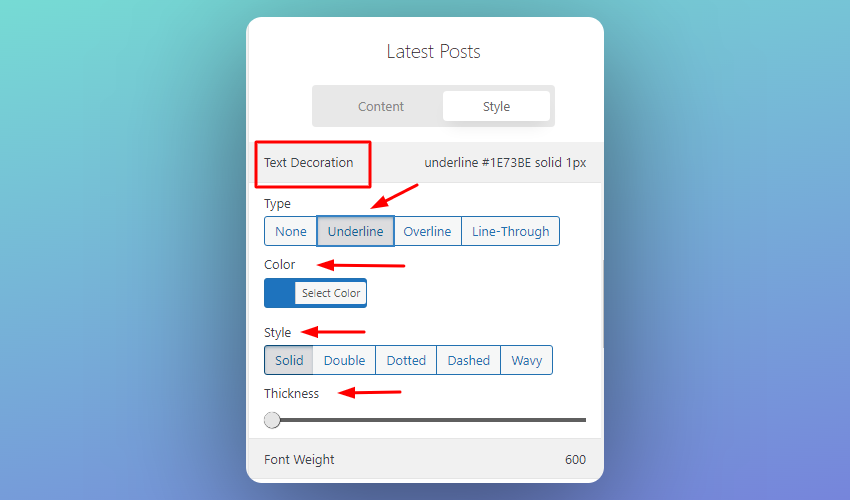
You also have the luxury to configure text underline style by tweaking the “text-decoration” option. Here’s how –
- Select Type
- Pick a Color
- Choose Style
- Adjust Thickness
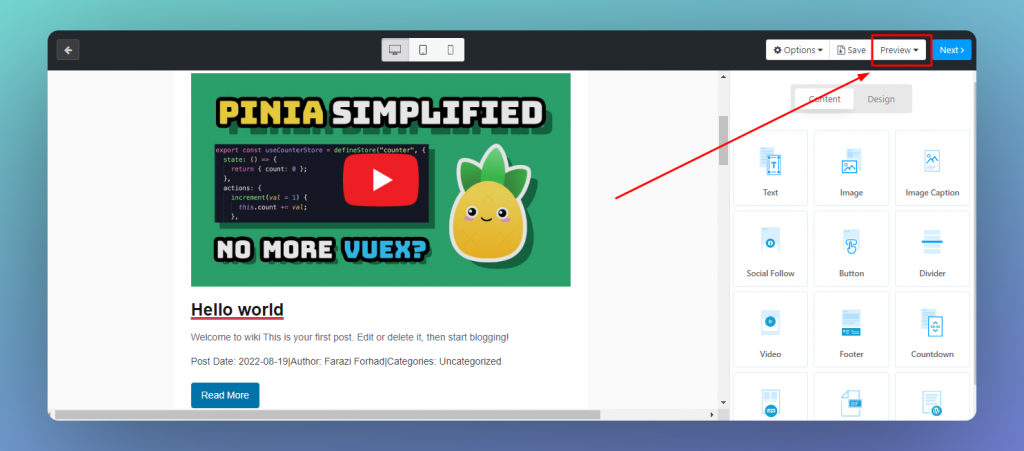
Now all are set! You can preview your email body and check every change before launching your campaign. To check preview –
Click on the preview from the upper left side of the campaign editor.
Here’s what your campaign would look like. Your campaign is ready and the hyperlink in the post title is active.
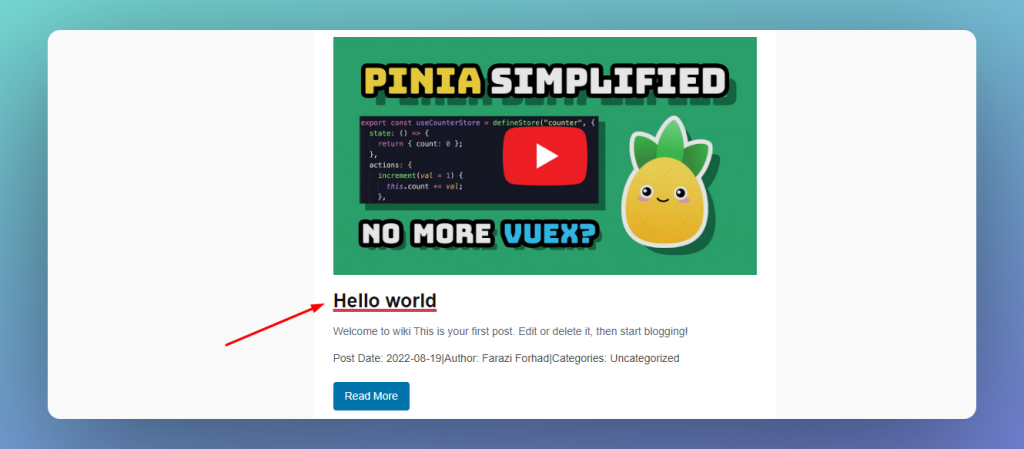
Here’s a suggestion. You must recheck the preview to be more sure about the changes you’ve made. You can make it one of your best practices.
Final Thoughts
So this is how amazing the new weMail features are. They are simply fantastic and easy to use. If you want to explore more unique features like this, try wemail, one of the best email marketing solutions for your WordPress site.