What are Email Automation Triggers and How to Use Them the Right Way (A Step-by-Step Guide)

Email automation triggers are a powerful way to streamline your email marketing efforts. Triggers are set by marketers to automate a series of emails whenever audiences complete any pre-defined action. This enables you to deliver valuable messages to the right audiences within time.
But to make the best of this system, you must have a sound idea of what email automation triggers are, how to set them, and fire triggers in the right way. This article will cover an inclusive guide answering all these questions, including their benefits and differences from other types of email campaigns.
Let’s get into the discussion without wasting any more time.
What are Email Automation Triggers?
Email automation triggers are some conditions set by marketers based on user behavior and activities.
For example, subscribing to newsletters, buying products, and abandoning the cart. When such an event occurs, the specific trigger is activated and fires a series of emails to the user.
The concept of triggered emails will be much clearer if you look at their differences from scheduled emails.
Triggered Emails vs Scheduled Emails
Scheduled emails are also known as email blasts. Below is a quick snapshot of the key differences between triggered emails and scheduled emails.
| Topics | Triggered Emails | Scheduled Emails |
| Timing | Triggered emails don’t have a time schedule. They’re instantly sent once an event occurs. | Scheduled emails follow a pre-defined time schedule. |
| Objective | Triggered emails aim to confirm to audiences that their actions have been accepted/completed. | Scheduled emails aim to send special announcements or promotional messages. |
| Personalization | Triggered emails are highly personalized as they are generated based on specific actions. | Scheduled emails may not be personalized for each user as they are sent to large groups of audiences. |
| Open Rate | Triggered emails have a high open-rate as users check to be confirmed if their activities have been completed. | Scheduled emails comparatively have a lower open rate because users avoid less interesting emails. |
| Automation | Triggered emails are set once and sent automatically based on conditions. | Scheduled emails are manually scheduled before every campaign. |
What are the Benefits of Email Automation Triggers?
There are many reasons why email automation triggers are so popular in the arena of digital marketing. We’ll take you to explore them in this section.
a. Nurture Leads
Suppose a buyer left some products on the cart page. You can poke him constantly to buy the products through abandoned cart emails. Similarly, through regular monthly offerings, you can entice inactive users to visit your shop again and purchase some products.
b. Solve Problems Instantly
Audiences are more like to engage with a website that solves their problems instantly. If you have a vast library of documentation, you can sync it with email automation. Whenever a user faces some problems, an email will be triggered and sent to the user with a solution.
c. Understand the Buyer’s Persona
You can never run effective marketing campaigns without defining the buyer’s persona perfectly. As triggered emails are based on users’ behavioral activities, it becomes easy for marketers to create an accurate buyer persona by following them.
d. Send Personalized Messages
Customers are more likely to buy products if they receive personalized emails and messages. Since triggered emails are automated based on users’ behavioral actions, it becomes easy to send them personalized messages.
e. Improve CMR and Customer Retention
Email automation can help you enliven the bonding with your audiences. Because first of all, you can segment them based on regular, occasional, premium, inactive users, etc. Accordingly, you can send them emails in an error-free way to grow a sustainable relationship.
Step by Step Guide on How to Create Triggered Emails and Automate Them the Right Way
We’ll now enter into the tutorial part of this article. You’ll get a step-by-step guide on correctly setting up email automation and triggering them.
Step 01: Install weMail on Your Website – An Email Marketing Solution
weMail is a powerful email automation tool. It can help you send emails to a large number of users at the same time by exceeding ISP limitations, client-server blockade, and spam filters. Doing these things manually will be time-consuming and increase the possibility of errors happening.
This is why using an email marketing solution is a must. weMail has all these features in-built.
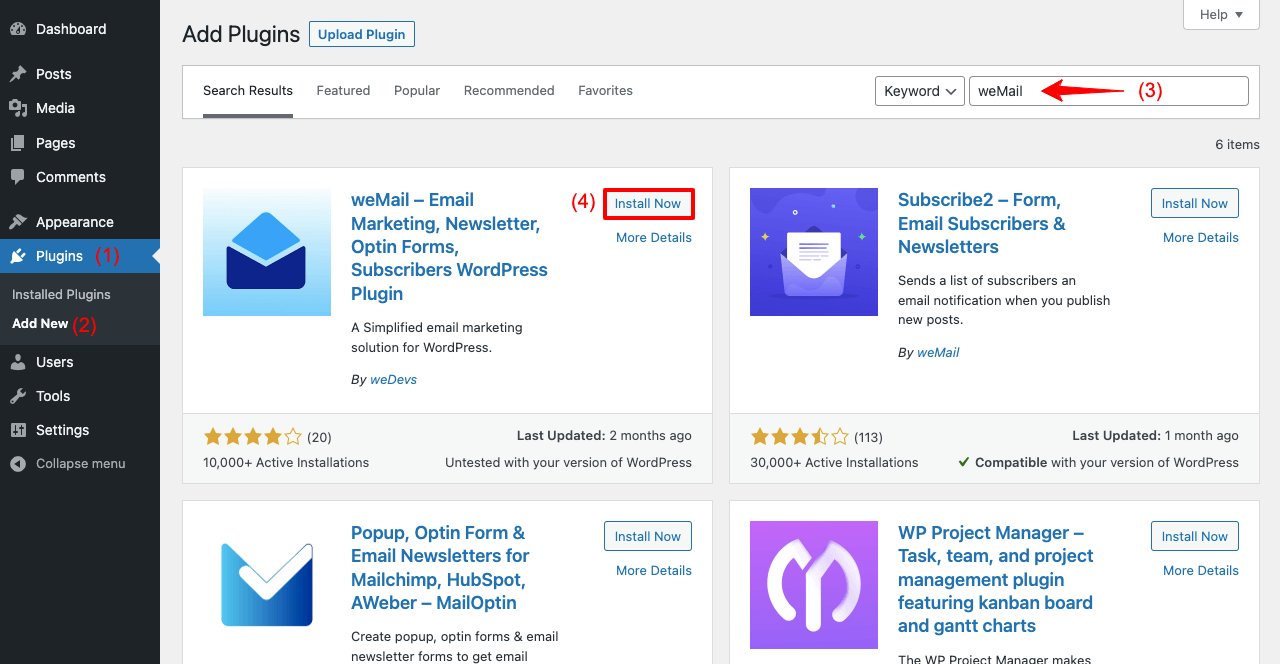
- Navigate to WP Dashboard > Plugins > Add New.
- Type weMail in the search box. You’ll get the plugin on top.
- Install and activate it.
weMail has a pro version as well, coming with many exclusive features at a cheap cost. However, you can set up automation with the free version.
Step 02: Select an Email Automation Trigger
- Go to weMail > Automation
- Click on + New Automation.

- You’ll get a pop-up coming with some readymade automation email templates.
- You may click any one of them if you are convinced.
- But if you want to create a new one from scratch, click on the blank slate.
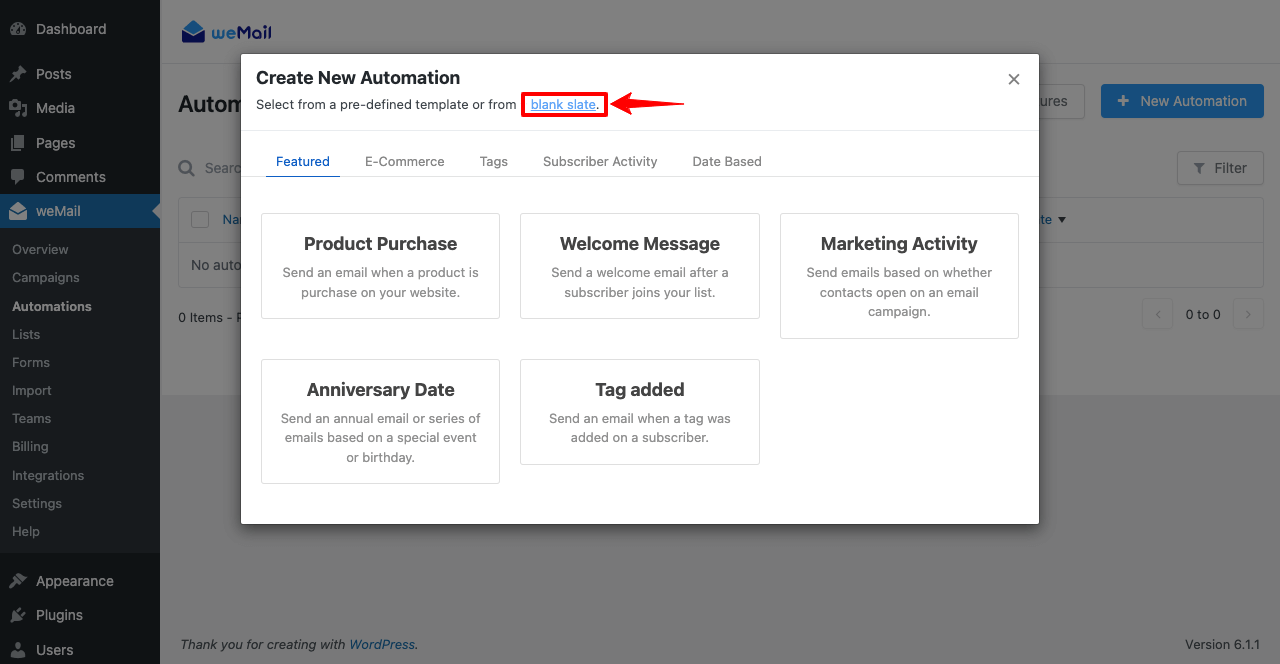
- You’ll get a new pop-up.
- Give a name to the automation.
- Select the trigger you want.
- Select a list where subscribers’ emails will be piled up.
- Tick the check box under Settings to enable this trigger for users who rejoin this list.
- Click the Create Automation button at the end.
Note: Your trigger will be based on the specific activity. You’ll find a number of activities in the trigger list. We’re selecting when a subscriber joins a list for this tutorial. Accordingly, we’re giving a name to this newly set-up automation.
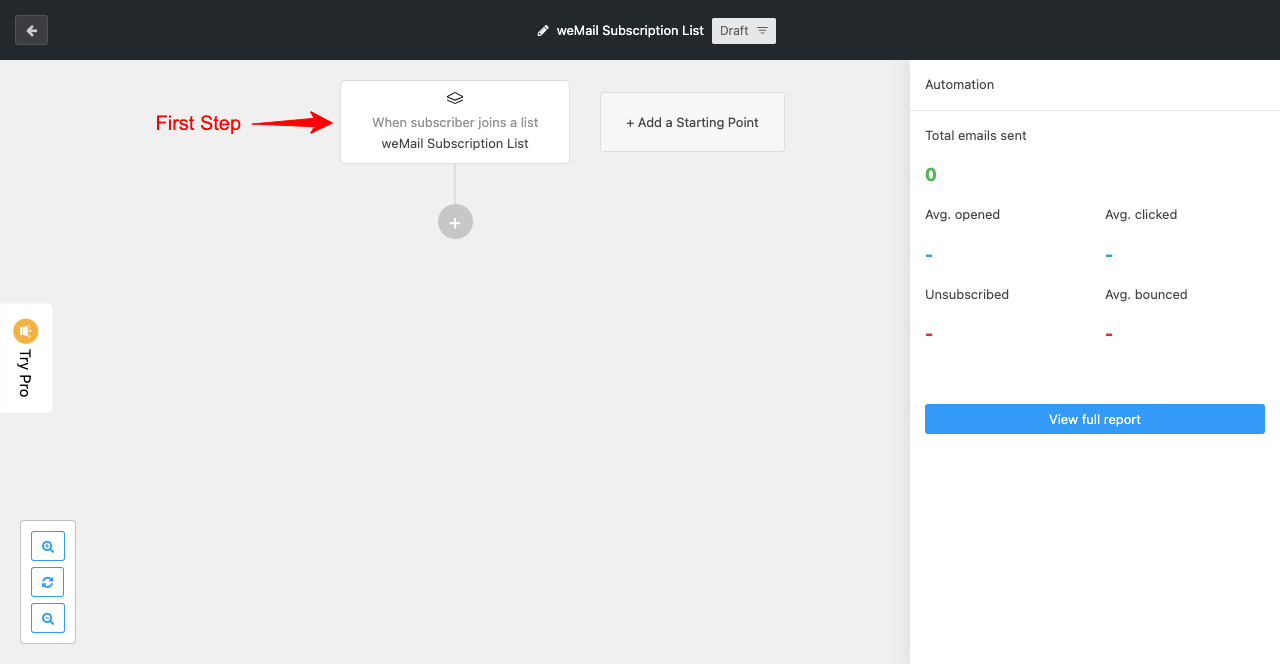
Step 03: Map out the Email Automation Workflow
A whiteboard will appear on your interface at this stage. Here, you’ll add steps one by one to configure your email automation workflow. You’ll see the first step is already there – When a subscriber joins a list.
- Hit the (+) sign.
- Click the Delay option.
- Set the length of the delay.
- It defines when the first email will reach the user’s inbox after their subscription.
- Press the Save button.
Note: Each time you add a new step to this board, save it before switching to another window. Otherwise, the new changes won’t be saved.
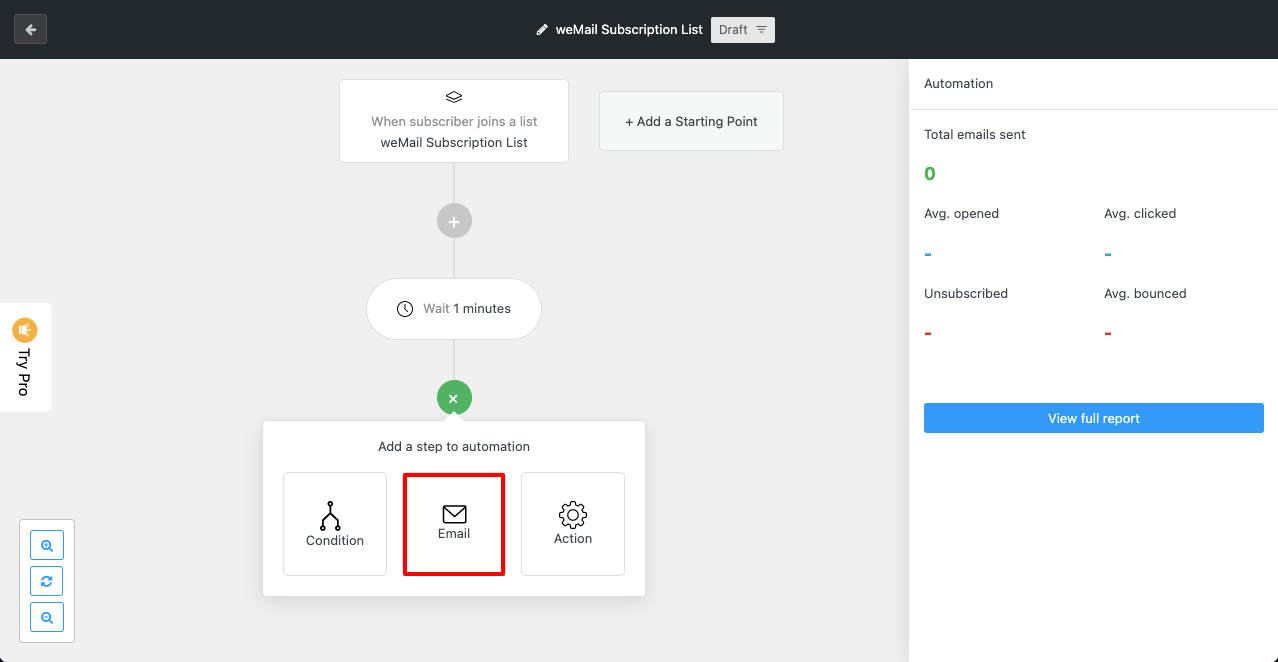
- Hit the (+) icon again.
- Click the Email option.
- It will open several options on the right sidebar.
- Give a name, subject line, and preheader to the respective fields.
- Add relevant information from fields.
- Scrolling down a bit, you’ll get the option to add UTM Campaign Name.
- Click the button Design Email at the end.
Note: UTM stands for Urchin Tracking Module. This name is a tag added to a URL to track the source of traffic and conversions from specific marketing campaigns, like newsletters, promotional emails, email campaigns, or else.
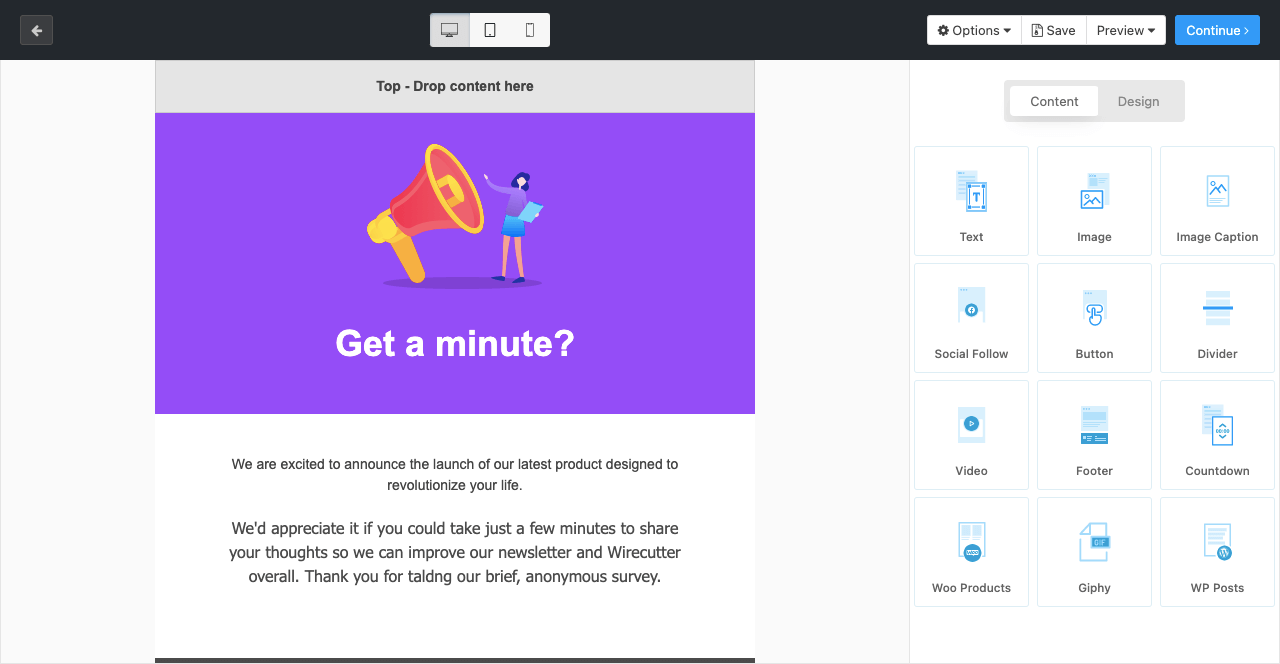
- Click the template you like.
- You’ll get some texts and images added there from before.
- You can change them according to your needs.
- On the right side, you’ll get drag-and-dropable widgets.
- Using them, you can customize the template.
- You’ll get different screen view modes on top by which you can make the template mobile responsive.
- Click the Continue button when you are done with everything.
- In the same way, click the (+) icon.
- Go to the Delay option.
- Set 2 days.
Because it’s not a good practice to send automation emails every day to users. So set at least 2 days. You may further extend this time if possible.

Step 04: Set Condition to Filter Out Inactive Users
Even after joining your subscriber list, you’ll notice some users aren’t opening your emails. We define them as inactive users. Emailing them constantly doesn’t carry any good value. Better if you remove them from the automation list, so your email opening rate and performance go up.
You need to add a condition to do that. This process is simple.
- Hit the (+) icon.
- Click on Condition.
- Check All of the users from the right sidebar.
- Select Campaign Activity under the Rules section.
- Select Opened/Clicked underneath it.
- Check Aggregate.
- Pick Any of the last 5 campaigns.
Aggregate is applied over the total number of users you have, and Sent is applied to the users of any specific campaign.
Phase one:
- Hit the (+) icon under Yes.
- Select Apply a tag from the first field.
- On the next field, pick the tag, Active Users.
Phase two:
- Hit the (+) icon under No.
- Set Remove from a list on the first field.
- Select the list you’re currently using.
Using these logics and conditions, weMail will count those users as active who clicked any of your sent emails of the last five campaigns. Others will be removed from the list.
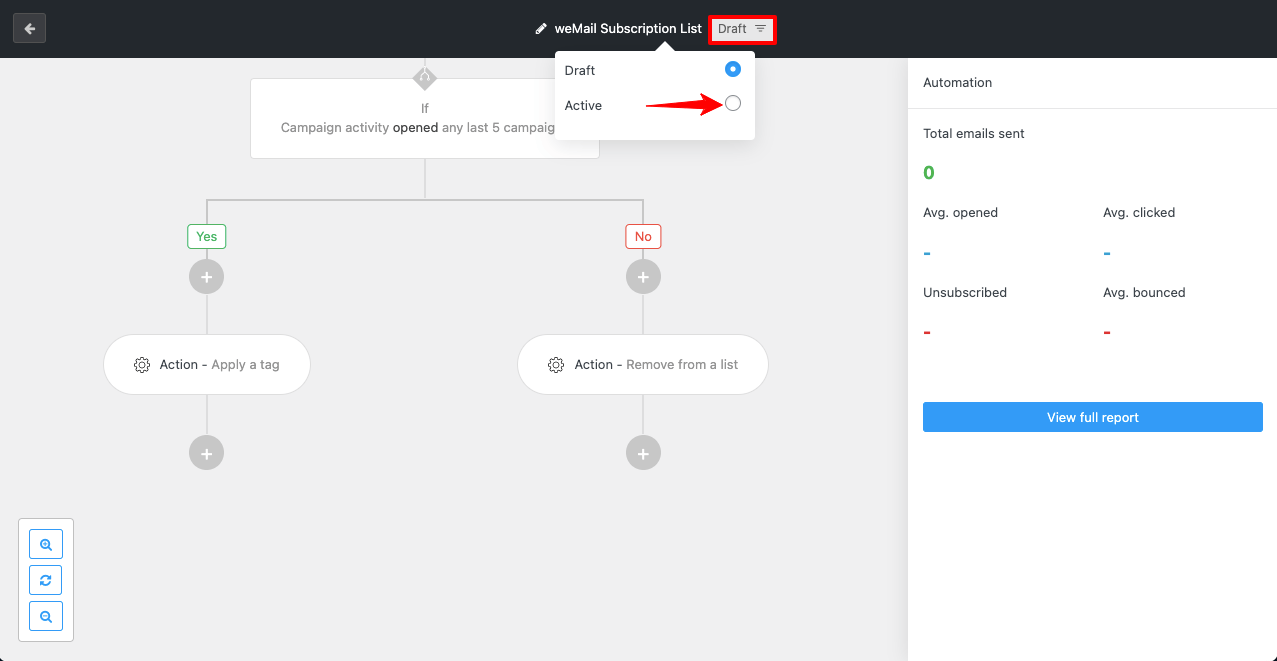
Step 05: Activate the Automation
If you make no mistake in the above steps, your email automation triggers have been configured well. You need to activate it now.
- Click the Draft button from the top.
- Toggle on Activate.
Thus, you can create, customize and activate email automation triggers for your website. Following the above guide, you can create as many triggers as you want.
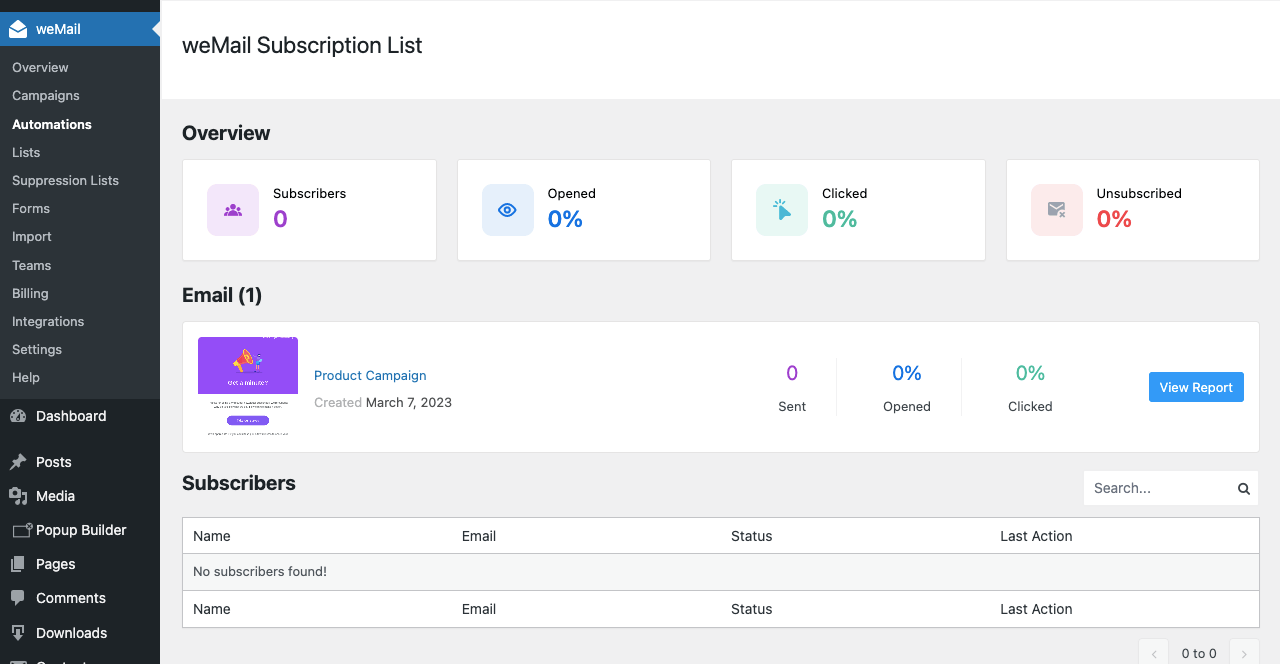
- Finally, go to weMail > Automation
- Click on the list you created for this trigger.
You’ll see the performance report below.
7+ Email Automation Triggers You May Consider Adding to Your Workflow
Your triggers will depend on the type of business you’re running. Whether you are running a B2B or B2C business, there’re some triggers commonly used by all businesses. Now, we’ll introduce you to some popular of them so you can take inspiration.
1. Welcome Email
A welcome email is instantly triggered when someone fills out an opt-in form to join a new platform or receive newsletters. This email creates a quick-first impression about a business or website. So, make sure to include the brand logo in this message.
You may also include the mission, vision, core values, and commitment to the customers. Most eCommerce websites usually include a promo code, voucher, or discount offer, so customers promptly make the first order.
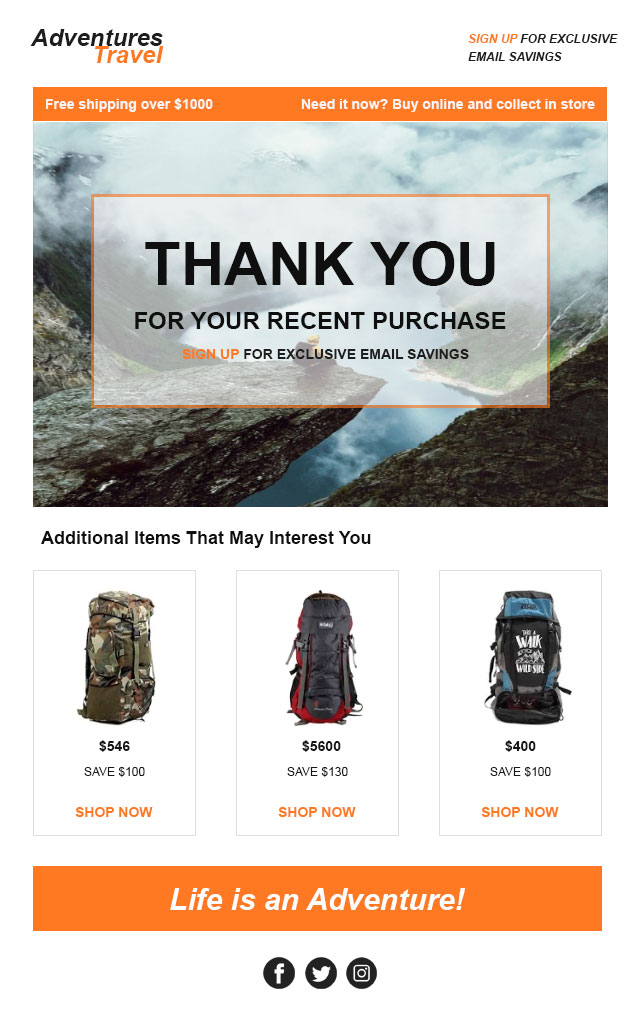
2. Purchase Email/Thank You Email
Purchase emails include a confirmation message that the product-buying process has been successfully completed. Now, the product will be shipped to the customer by a courier company. You may mention the expected delivery date, product tracking code, and the purchasing voucher.
But if you sell any software product, you don’t need to mention the above. Instead, you can include a Thank You message, the license key, and the activation period of the software.
3. Review Request Email
Often, customers forget to give reviews after buying the product or intentionally avoid it. But every positive review is comparable to gold and jewels to online businesses. Triggering the product review emails, you can insist or request customers to submit their reviews.
4. Subscription/Membership Renewal Email
If you sell digital products, domain, hosting, and membership services, customers must renew their subscription plans each year before expiring. But you’ll always find some customers who forget to renew their membership plans within the specified time.
Through membership renewal emails, you can remind them to extend their subscription plan before the expiration date so they can enjoy uninterrupted services.
Note: These emails are also known as onboarding emails. You’ll find here some best examples of onboarding emails.
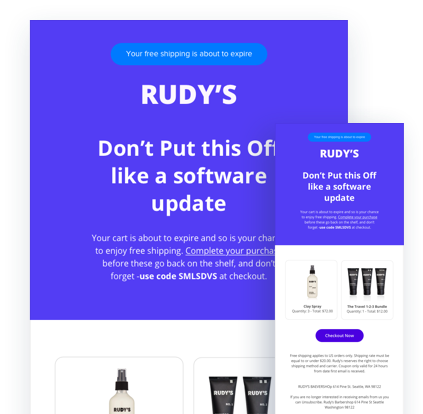
5. Abandoned Cart Reminder Email
According to numerous statistics, the average conversion rate from abandoned cart reminder emails is 8%-12%, and the click-through rate is 18%-35%. This figure fluctuates and varies based on years, products, and industries.
Things that lure customers into buying from abandoned cart emails are snappy subject lines, discount offers, social proof, high-quality images of the photo, a CTA button, and a quick checkout process.
6. Event Reminder Email
Suppose you have a webinar, giveaway contest, opening ceremony, or product launch program. And some users have registered to participate. This automated email trigger will you help remind the users to be free from all businesses so they can join the program. Thus you can ensure the maximum presence of registered users while the program goes live.
7. Milestone Email
Many online product-selling platforms today maintain a milestone program. For example, buying a $10 product will give you one point. Once you reach fifteen points, you can redeem them to buy a new product. Besides, affiliation is also a way to earn points and money this way.
The milestone email will remind users how many points are left to achieve redeemability. It can be a great way to grow user engagement and product selling.
FAQ on Email Automation Triggers

Welcome to the FAQ section! Here, you’ll find answers to some most frequently asked questions commonly found on Google and other search engines.
How to measure the effectiveness of email automation triggers?
You can use the following metrics to evaluate the effectiveness of email automation triggers.
1. Total number of emails sent
2. Open rate
3. Click-through-Rate
4. Unsubscribing rate
5. Site traffic
6. Conversion
What are the common mistakes in email automation triggers?
1. Buying email lists from third-party.
2. Not syncing the right triggers.
3. Sending too many emails.
4. Act like a robot.
5. Overlooking the performance metrics.
What are the best practices for email marketing automation triggers?
1. Use the opt-in form to collect emails from interested users.
2. Add value to messages and write-ups.
3. Provide clear CTA button(s).
4. Keep messages personalized and humanized.
5. Check the triggered email performance against the set metrics.
What type of businesses and websites must use automated triggered emails?
1. eCommerce websites.
2. Bank and financial business websites.
3. SaaS businesses.
4. Online education websites.
5. B2B business websites.
6. Subscription websites.
Is it a must to use an SMTP plugin to send automated triggered emails?
No, it’s not a must. But without using an SMTP plugin, it will be difficult for you to hit each of your emails to recipients’ inboxes. SMTP plugin like weMail improves the email delivery rate, provides analytics, helps you maintain email lists, and many more.
So, using an SMTP plugin is highly recommended for sending automated triggered emails. Explore some best WordPress SMTP plugins.
Final Takeaways
The idea of email automation triggers opens the way for online-based businesses and organizations to maintain regular communication with their users. It gives them an opportunity to nurture these users and convert them into customers.
With an email automation tool, you can analyze the email performance report, optimize messages to boost conversion, remove inactive users, and ensure overall marketing success. We have tried our best to cover everything in this article.
If you find this article helpful enough to meet your needs or experience some crucial steps/information missing, please let us know through the comment section. Our team will update this blog right away. Follow our Facebook and Twitter channels for upcoming updates.