How to Create a Welcome Email Sequence with weMail – A Complete Guide
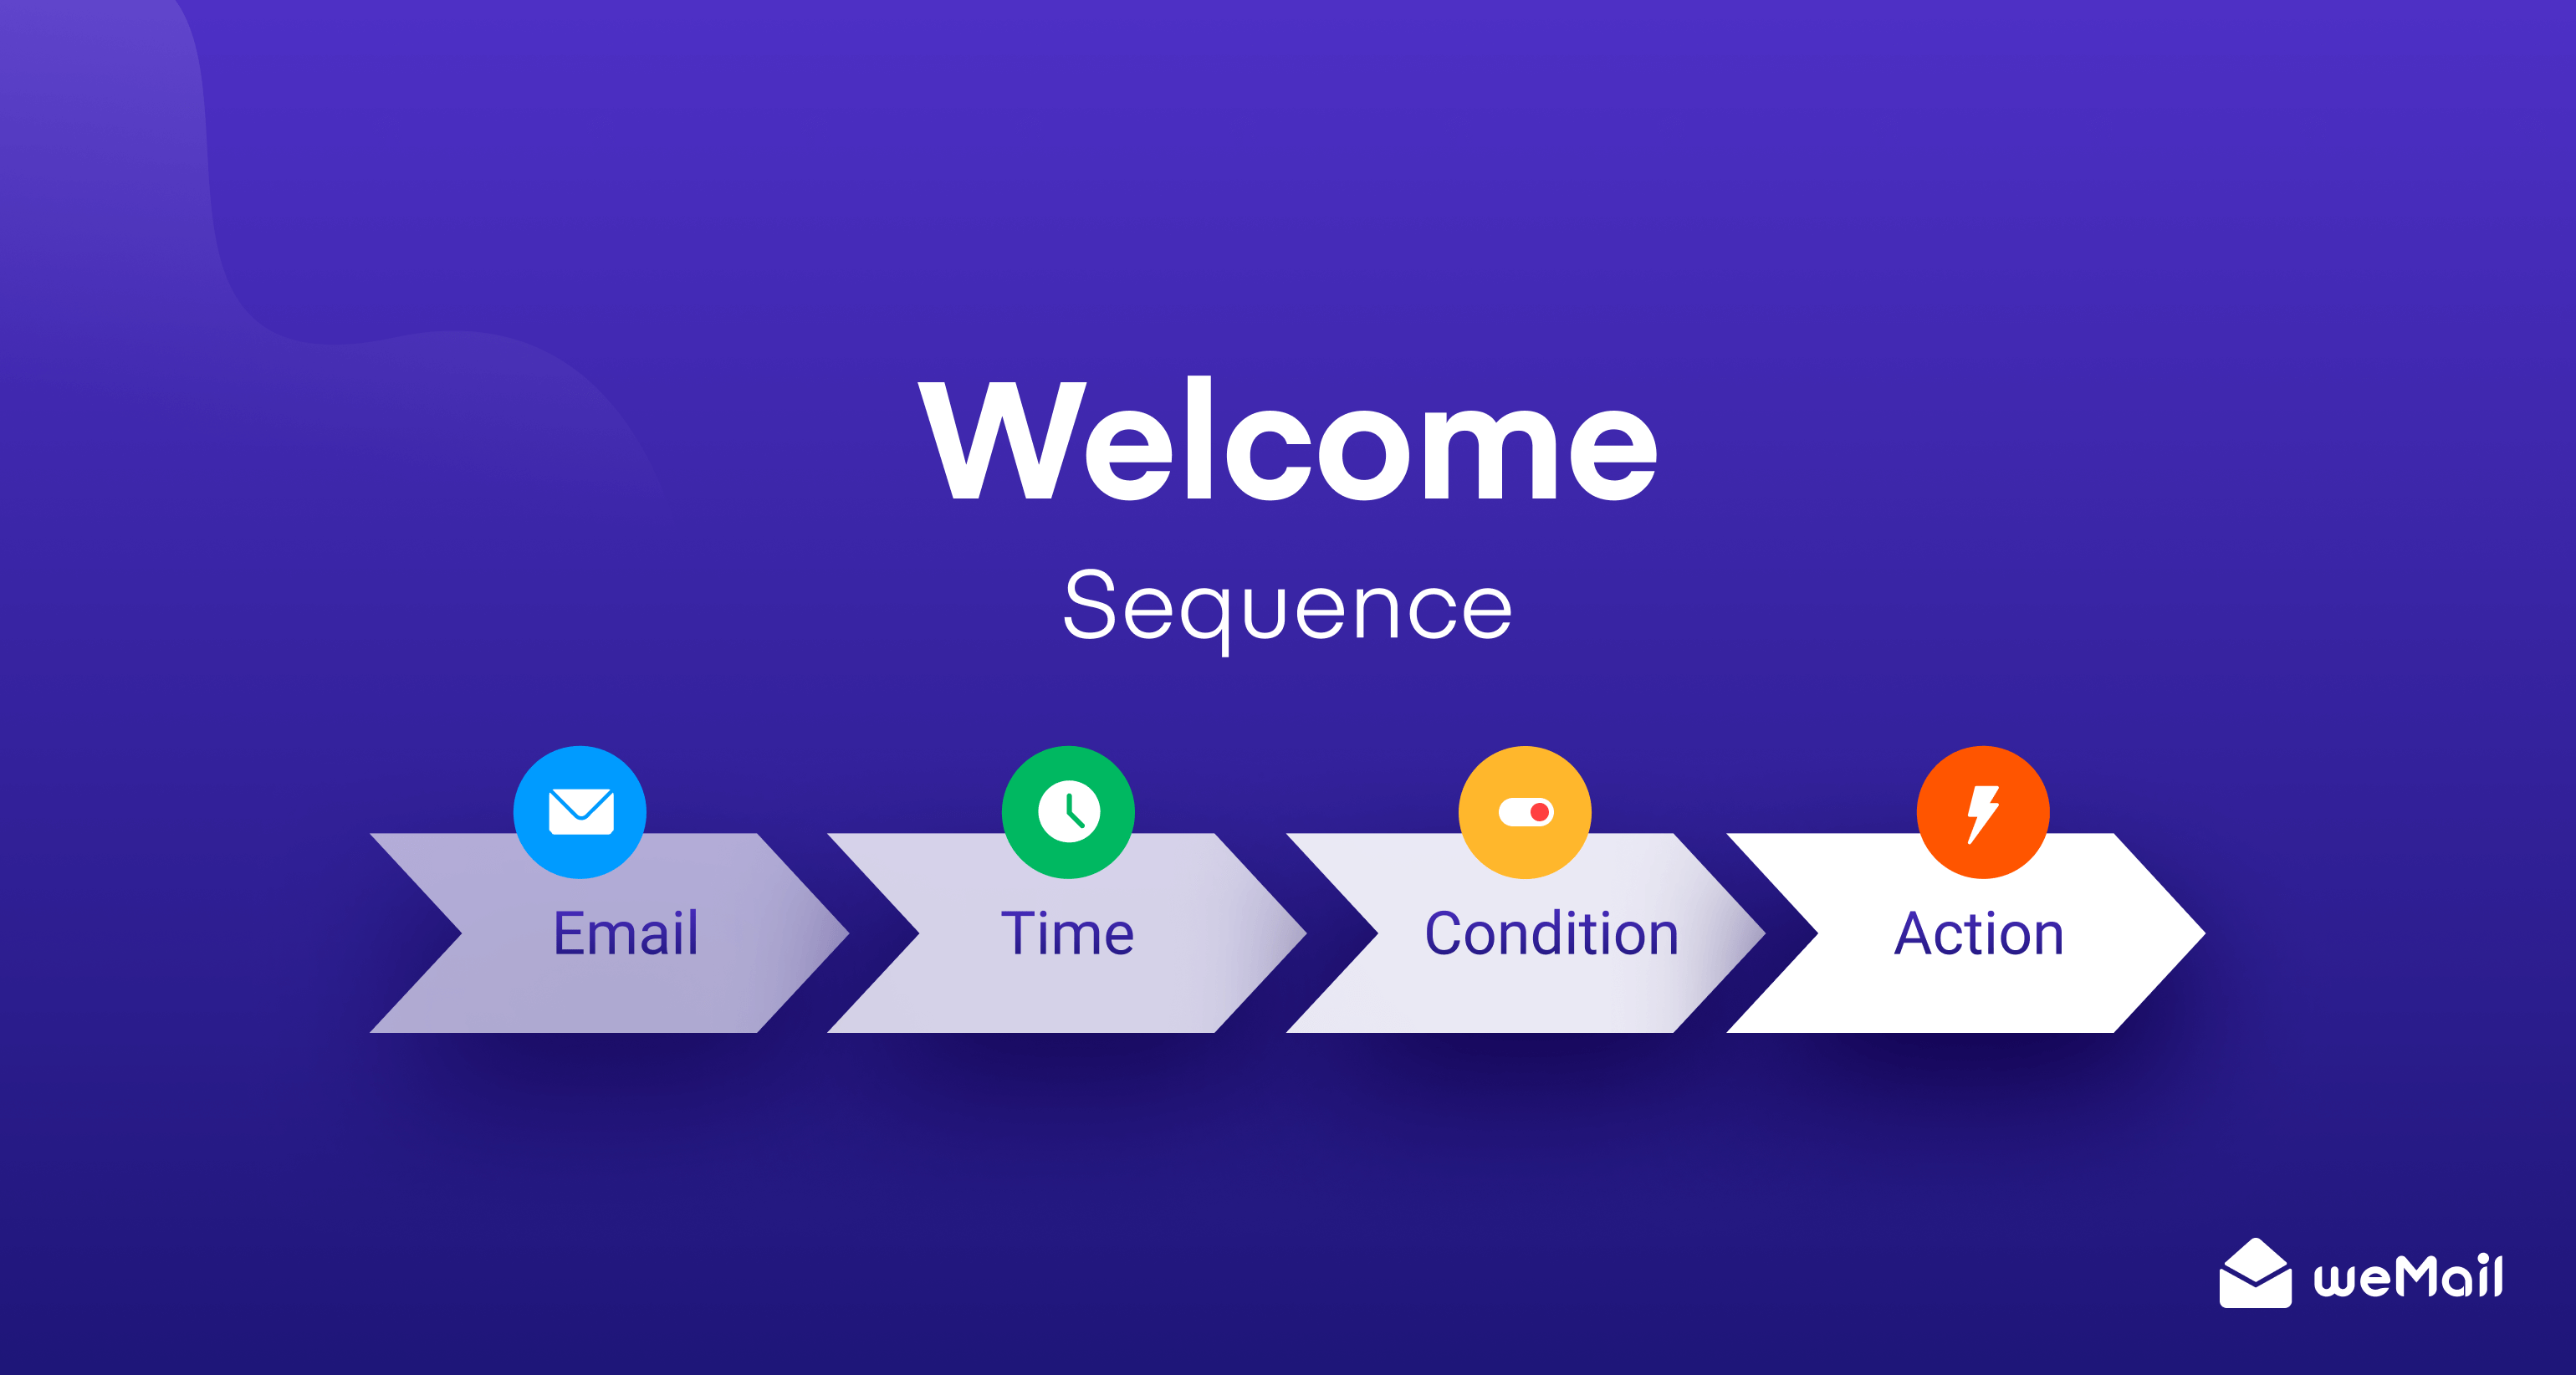
Sending a series of welcome emails can help you begin a warmer journey with subscribers. For that, you must learn how to create a welcome email sequence.
The best way to build relationships with your subscribers is through emails. You need to create value for your newsletters. That way you can ensure that the subscribers are opening emails. So, it is crucial that you get the welcome emails right. Your timing, content, design all are important.
The average open rate of welcome emails is 50% more than regular emails!
invespcro
Therefore, weMail is one of the top email marketing solutions in the WordPress industry right now. Its next-gen features and amazing integrations combined with affordable pricing let you send almost any type of email campaign at ease. So here, we have prepared a guide to show you how to create an automated welcome email sequence using weMail and the necessary guidelines to accomplish the highest results possible.
Why Should You Send Welcome Emails – Some Shining Examples
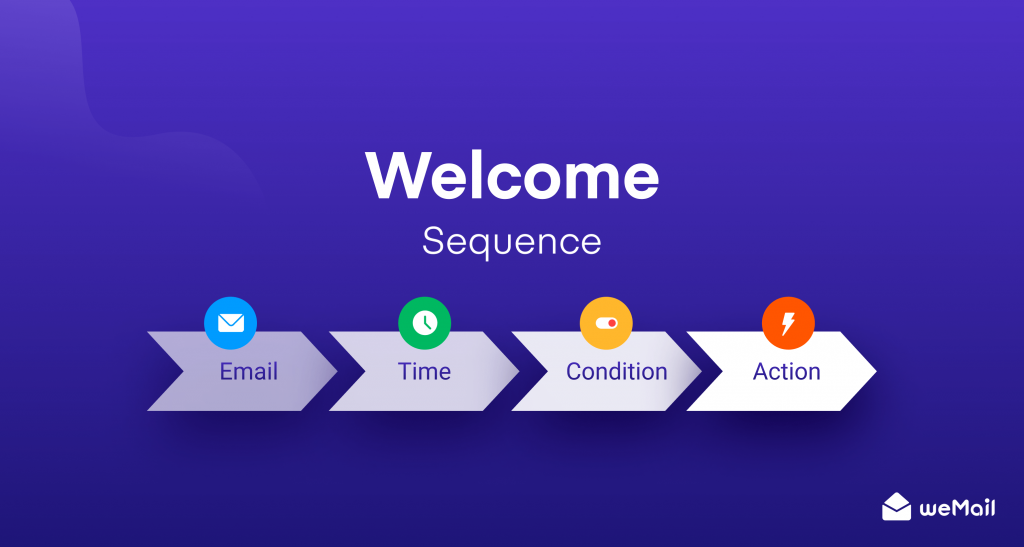
When a user subscribes to your newsletter, that is when their interest is at the peak and they might want to know more about you and your brand.
The open rate of welcome emails is 4x greater than regular emails!
invespcro
Also, welcome emails generate,
89% more revenue, 332% more sales
ActiveCampaign
So, there is no harm in sending welcome emails to your subscribers right after they subscribe. But sadly,
41% of brands don’t send a welcome email within 48 hours. 27% send zero emails in the first three weeks.
First Impression Email Study
With the above stats, you can understand the importance of sending emails to your subscribers after they finish signing up for your newsletter.
Here are some examples of famous brands sending welcome emails to their subscribers,
1. Virgin America
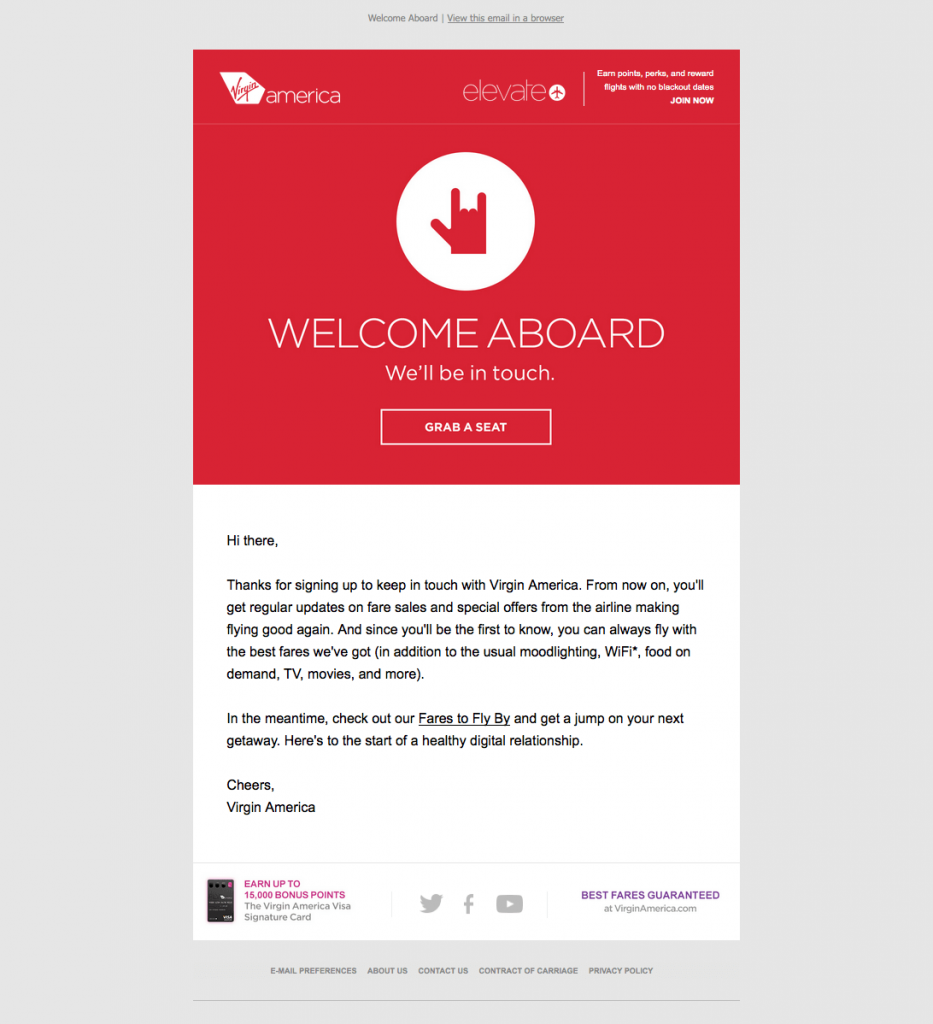
Here is the famous Airlines company Virgin America’s get started a welcome email to their subscribers.
2. Monsterinsights
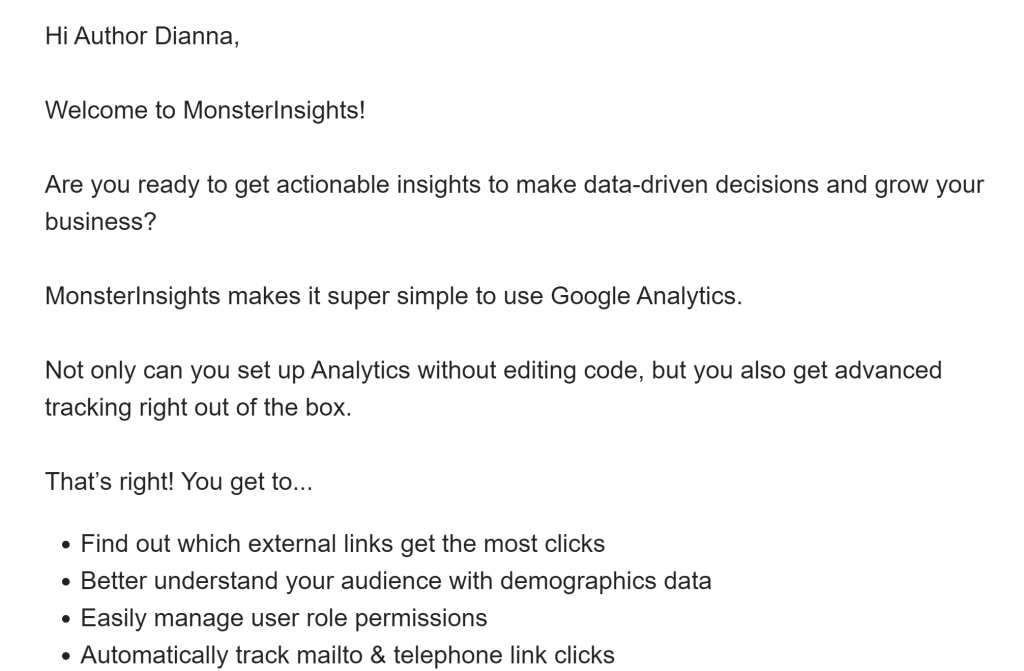
Monsterinsights is telling the benefits of using their tools along with their welcome email.
3. Sleeknote
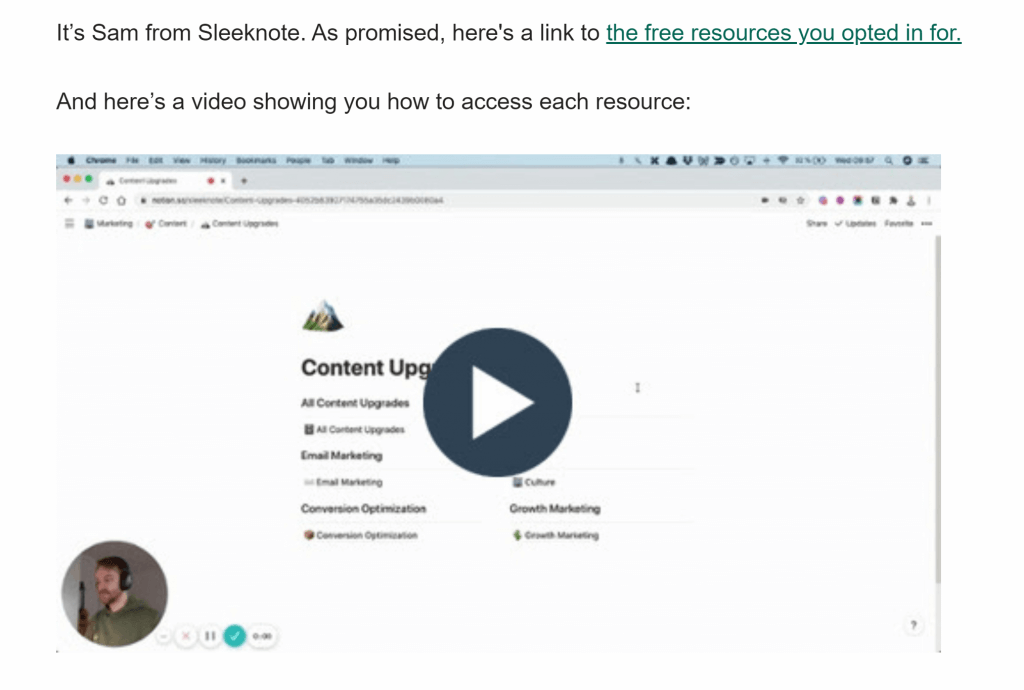
Sleeknote is using video to add more value to their welcome emails while telling them how to access their resources.
4. Kate Spade
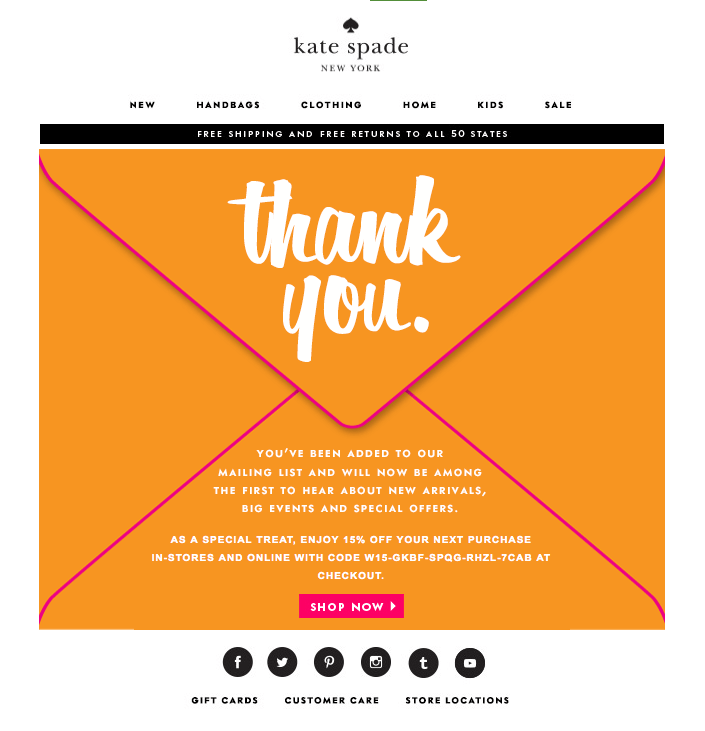
Kate Spade is offering special discounts to its subscribers.
5. Lyft
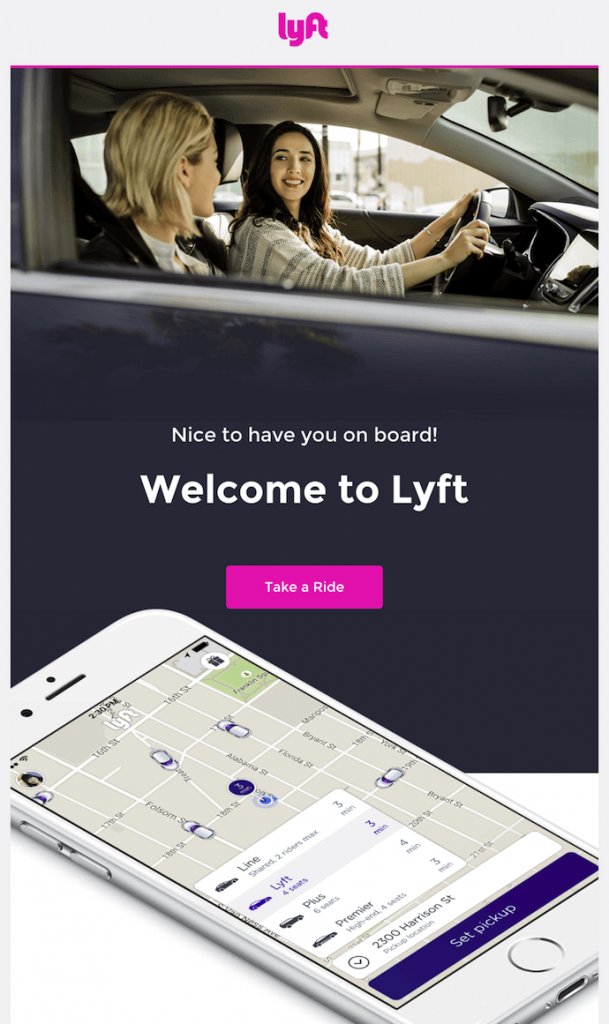
The welcome email from the famous ride-sharing app Lyft.
How to Create a Welcome Email Sequence Using weMail
As we said earlier, we will use weMail to show you how to create a welcome email sequence.
Creating a welcome email series is easy with weMail. All you need to do is follow these simple steps and your campaign will be created.
Step 1: Create a Campaign
At first, you need to create an email campaign that will send welcome emails to your subscribers right after they subscribe.
Navigate to weMail–> Campaign–> Create New to create a campaign.
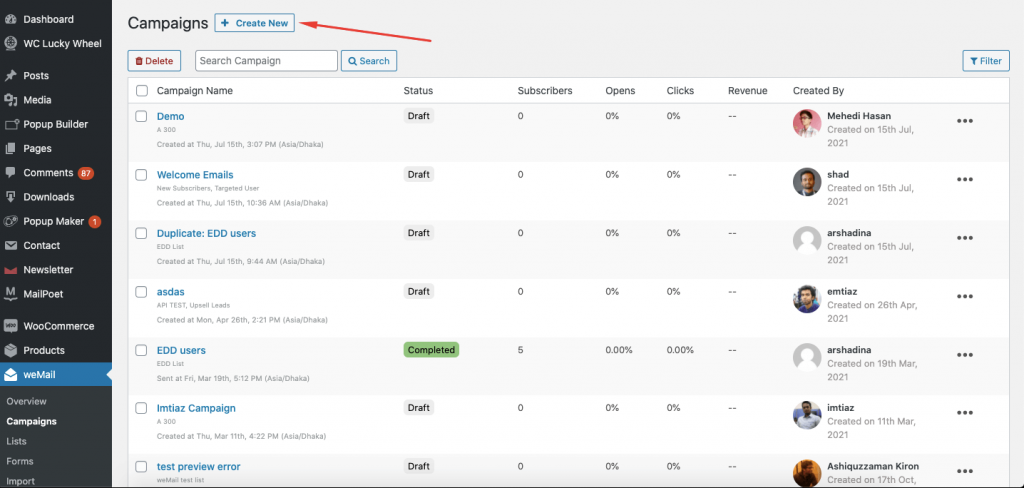
Step 2: Add Campaign Name & Select Campaign Type
The next step on how to create a welcome email sequence with weMail, is you need to select the campaign name and also the campaign type.
Now, you have to select the Automatic campaign type as you want to send an email right after a user subscribes to your list. As for the timing, choose immediately. So the email will be sent right after they subscribe.
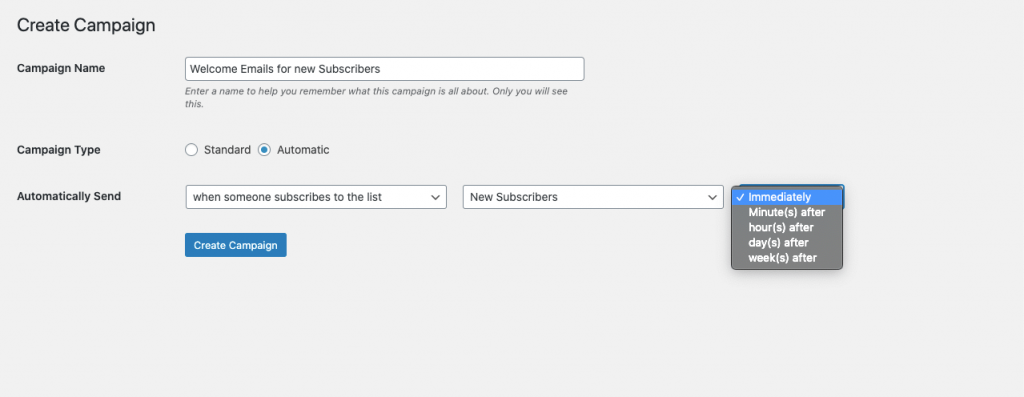
Step 3: Choose Welcome Template
As you know weMail has over 100+ templates for you to choose from. So, in the next step, you need to find the Welcome email template.
Just type “Welcome” in the search box and select the template.
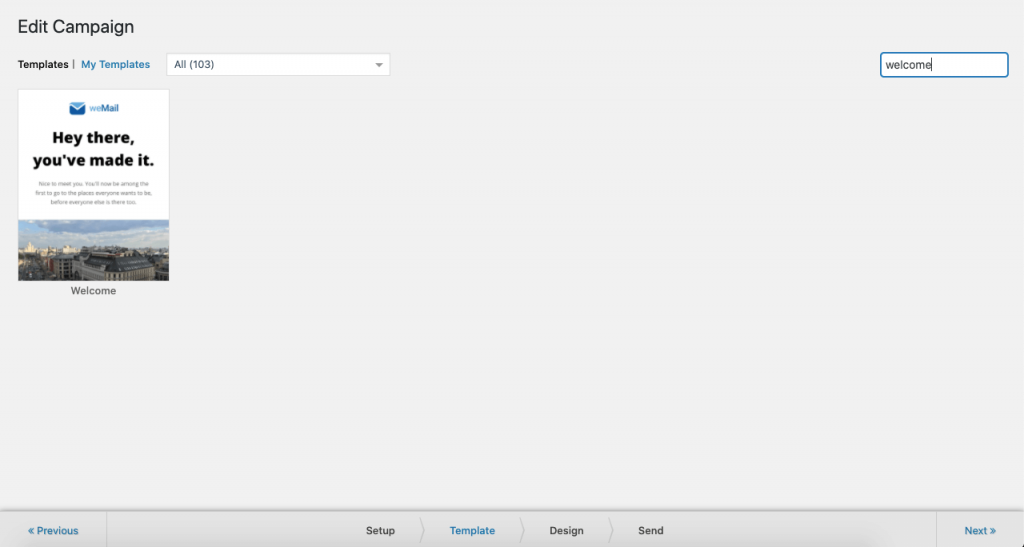
Step 4: Customize the Template & Test Your Email
Next, you need to customize the template. Add the content you have planned, subscribers’ name (use shortcode), current date, images, etc.
After customizing, use the “Preview & Test Email” to test your email. You can use any dummy email or your own email address to test.
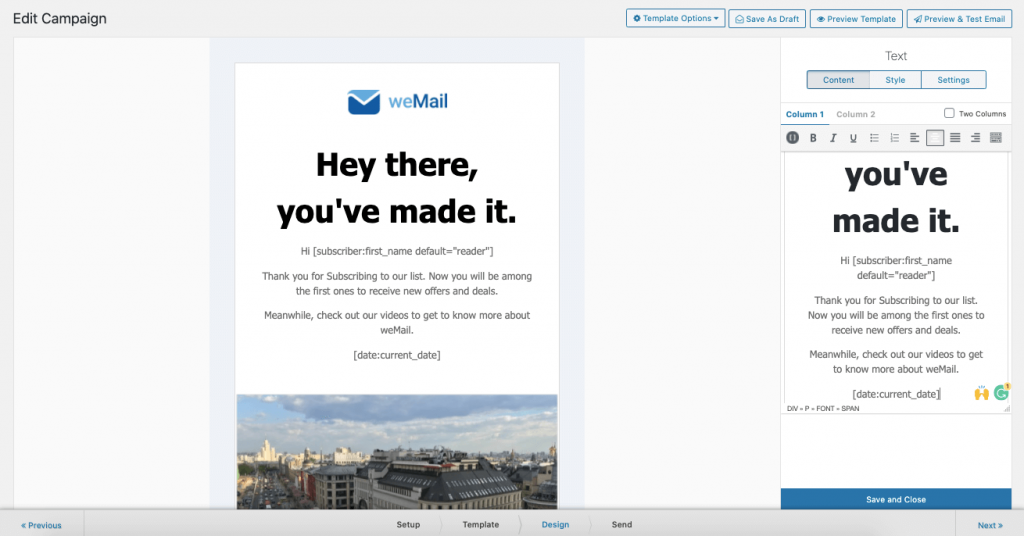
Step 5: Activate Your WelCome Email and Start Sending
Add a preheader, type the from and to email address. If you want you can track your campaign via Google Analytics as well.
Click on the Activate Now button to finish.
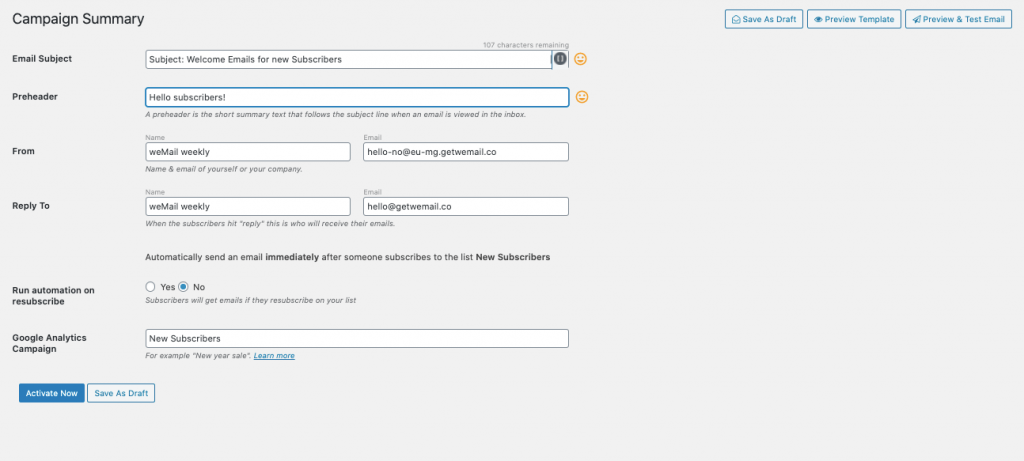
And start sending,
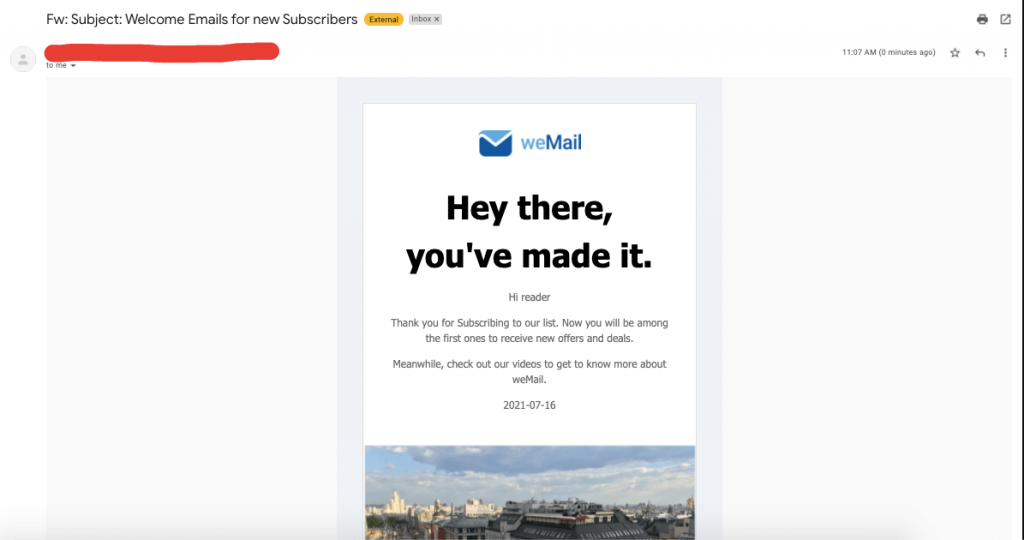
Step 6: Create a Welcome Sequence
Now, to create a sequence, you need to create two other campaigns in the same way. But, change the campaign name, and also for timing, choose days (or weeks).

And that is how to create an automated welcome email sequence using weMail.
Things to Consider When Planning a Welcome Email Series
Now you know how to create a welcome email series. But you must be thinking about why you have to send more than one welcome email.
The problem with sending only one email is people try to add as much as information they can into that email. And when you try to add so much in one single message, either the real information gets lost or disrupts the natural design.
Both of these reason creates annoyance for the subscribers. This is not good considering this is the first email they are receiving from you. That is why it is a good practice to send at least 3 emails. So, along with knowing how to create a welcome email sequence, you need to think about what to add to those emails.
Don’t worry, we are going to help you plan those 3 emails.
First Welcome Email – Show Gratitude for Joining
The first welcome email should be all about thanking your subscribers. The purpose of the email should be ensuing your subscribers that they have made a great decision by joining your email list.
The first email is crucial, because if they don’t receive any form of contact after the subscription then the subscribers will feel like they are being ignored. You should send this email right after someone joins your list.
Your email should,
- Show gratitude for joining your email list
- Welcome them to your company
- Tell them what they can expect in future emails
- Any special coupon or discount available for them.
The email should be simple and straightforward. It should have a welcoming tone.
Second Email – Invitation to Connect
The second email in the welcome series should contain the other ways they can connect with your business and stay updated. New subscribers may not be familiar with how your company works and how they can reach you in case they need any information.
This email should contain links to your company’s social media channels. And also how they could further contact you.
You should send the second email two days after sending the first welcome email.
Third Email – Deliver Value
In your third and final email in the welcome series, you need to add information about your brand. You can describe the benefits they will get, the problem your product will solve. Also, you can ask your users for extra information as well.
Think about the useful information and ask them questions that will give you that information.
Your third email should contain,
- The benefits of your product
- The problems it will solve
- What the subscribers need or looking for.
You should send this email 4 days after the second email.
So, that is how you can plan your automated welcome email sequence and increase the value of your email newsletter.
Now you know how to create a welcome email sequence and plan one as well. Let’s see how to make those emails more relevant.
How to Make the Welcome Emails Relate to Your Brand
Following the plan we mentioned above will help you create an amazing automated welcome email sequence. But, those emails may not represent what your company is all about.
For that, you need to follow a structure and make your emails more relevant. We have prepared a guide that will help you create the perfect emails that will represent your company.
1. Personalization
Remember we said that you need to send 3 emails in the welcome email series. So, between emails 1 and 2, you can get an idea about the web activity of your subscribers. That way you can personalize your email further and add more information in the 3rd email in the welcome email series.
2. Segmentation
If you know anything about email marketing then you have heard about segmentation. Segmentation means you can filter your audience into different categories and target them accordingly.
So, while sending welcome emails, if you can segment your audience then you can make your emails more relevant.
3. Add Product Suggestions and Link to Your Contents
Don’t think about sales all the time. You need to treat your subscribers like any other close relationship. If you have videos, blog posts, or relevant content that will help the customers to come to a purchase decision, then consider including them in your emails.
4. Conduct A/B Testing
Knowing how to create a welcome email sequence, and how to plan them is not enough. No email is truly set it and forget it. You need to try different strategies to see what works for you. With A/B testing you need to find out the right channel, right content, right time of sending, or the right number of emails.
Some FAQ(s) on Sending Welcome Email Series
Do Welcome Emails Work?
Welcome emails generate 4x more open rates and 5x more clicks than regular emails. And the average open rate of welcome emails is 50%, which makes them 86% more effective!
What is the Goal of a Welcome Email?
The purpose of creating and sending a welcome email is to confirm a new registration and welcome a new subscriber onboard.
How Long is a Welcome Series?
Well, it depends on you and your email marketing strategy. The welcome email sequence can be 5-7 emails long or 1-3 emails long. The timeframe can be 2 weeks to 2 months.
Closing Up
Hopefully, now you know how to create a welcome email sequence and use it to good effect.
Email marketing has always been the go-to platform for marketers to create direct relationships with customers. However, for email marketing to be useful, you need to utilize it in every possible way. Try out different scenarios, keep trying until one sticks.
With email marketing, there is no guarantee of what will work. Some email techniques will work for some company but the same won’t work for some. But there is no harm in trying. Just like what Thomas Edison said,
I didn’t fail 1000 times, I just found a 1000 way not to create a light bulb!
That goes for email marketing as well.
Creating a welcome email sequence will do more benefit than harm. All you have to do is find the right timing and content. And if you follow our guide, that won’t be a problem.
