Best Email Customization Tips To Increase eCommerce Sales in WordPress
Email marketing is an ever-growing & powerful communication channel for professionals. According to Statista, there are more than 3.9 billion daily email users. This number is expected to climb to 4.3 billion by 2023. No wonder why marketers from all sectors are trying to utilize this highly converting platform all the time.
But applying all the email marketing strategies at a time would have messed up everything. For instance, you need to consider some email marketing metrics before pressing the Send button. And this will ensure your campaign ends up with a successful result.
After that, you can expect to get a better ROI after your campaign ends. But as an eCommerce marketer or business owner, you need to continuously change your effort to increase your eCommerce sales and generate revenue.
This is where email customization comes to play the role. But how? Well, let’s find out the answer through the simple question below and keep reading the post😊
Why You Need Email Customization for Better Email Campaigns
In simple words, email customization will let you bring some changes to your email templates, copies, content inside the email, and so on. Thus you can send more relevant emails to your targeted audiences on different occasions (email for the one-time offer, product discount emails, seasonal announcement, etc)
But unfortunately, the current email-sending Gateways may not permit you to change or add features according to your own way. That’s why you may need to apply customized email content for getting a better result.
However, let’s shortly check out the benefits that you’ll get if you utilize email customization for your campaign.
- You can edit, add or remove features on the email templates
- Use lucrative images that can engage more customers
- Run A/B test to confirm whether it will work well or not
- Add useful links, images, and social buttons
- Also, you can check the email accessibility
- Utilize CTA button to drive more conversions
- Include a preview mode to check your email design
You may also like: Best color to increase sales leads for online Business
Email Customization Explained with weMail

Well, there are many ways that you can follow to customize emails. But as we said earlier, popular email sending gateways will not permit you to customize certain things like change template design, email content, CTA buttons, add-remove features.
But in this regard, weMail can help you to use custom made eCommerce emails while creating your first campaign. Yes, weMail has the integration with WooCommerce & Easy Digital Downloads.
So if you have huge subscribers (or customers) on any of these platforms, and failing to segment their preferences, weMail could help you to send more personalized & effective business emails to your subscribers’. Also, you can manage your subscribers easily by segmenting & sorting out them for different purposes.
Okay, let’s check out what types of customization that you can do using weMail.
- You can create a campaign
- Create and manage lists
- WooCommerce list segmentation
- Easy Digital Downloads list segmentation
- Import Contact List From Different Popular Email Marketing Platform To weMail
Applying Email Customization Features to Your WordPress eCommerce Site
Well, now we’re going to see how you can apply some customizing features to your email campaign using weMail. If you have a WooCommerce store built on WordPress, you are all set to sending highly customized and converting emails to your leads.
But before we go further, you need to ensure the following items are successfully installed on your WordPress website.
- weMail (free & pro)
- WooCommerce
- Easy Digital Downloads
Let’s say you have installed & activated weMail, WooCommerce and Easy Digital Downloads on your WordPress site.
Note: We are assuming that you have already a good number of subscribers or customers on your WooCommerce or Easy Digital Download store. So we’re going to show how you can manage subscribers & apply some customizing features to increase eCommerce sales using weMail.
01. WooCommerce List Segmentation
Using the WooCommerce integration feature of weMail, you can swiftly connect WooCommerce with weMail to track purchase activity, increase sales, utilize custom segments & automation.
In short, it can directly help you create campaigns depending on the customer’s activities on your online store. So let’s see how you can apply email customization using this feature.
First of all, you need to activate and connect WooCommerce with weMail.
Connect and Activate WooCommerce Syncing Process
To do that, navigate to the WP Dashboard > weMail> Settings> eCommerce> WooCommerce> Click on the Connect with WooCommerce.
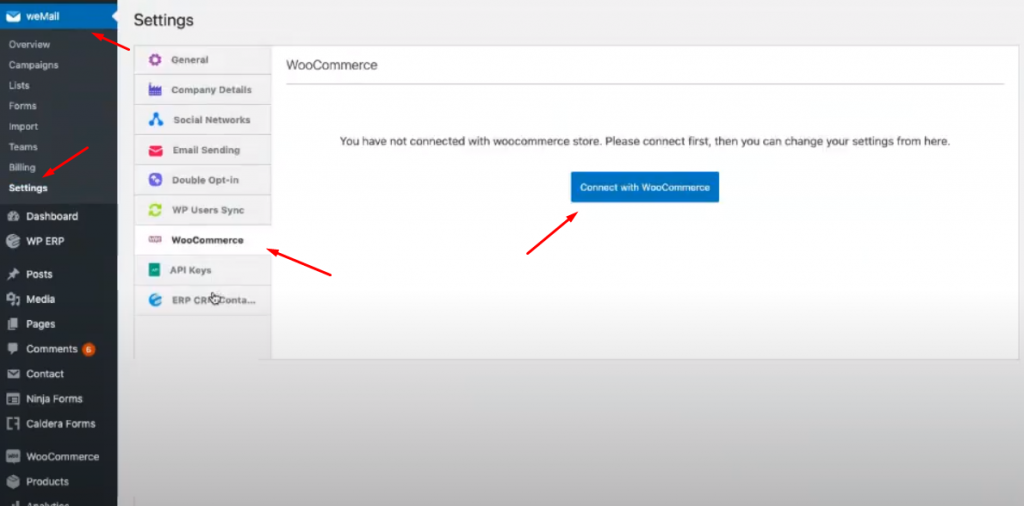
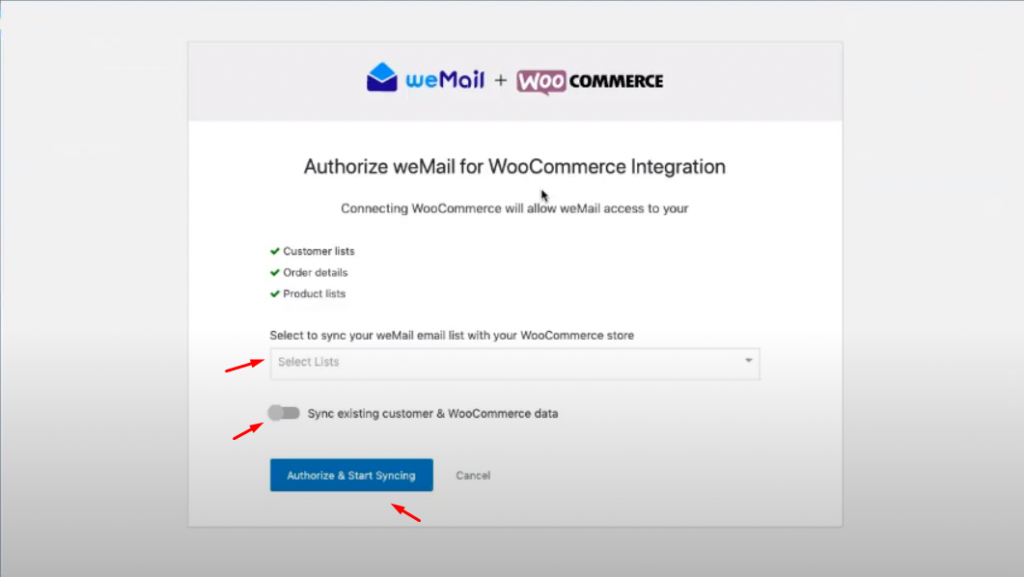
After you click on the Connect with the WooCommerce button, you’ll be taken to the integration page. Here you need to understand a few things:-
- You can track customer lists, order details, and product lists
- Select your preferred list that you want to sync with your WooCoomerce store
- You can enable syncing with the existing WooCommerce data to the weMail list
- And finally, click on the Authorise & Start syncing
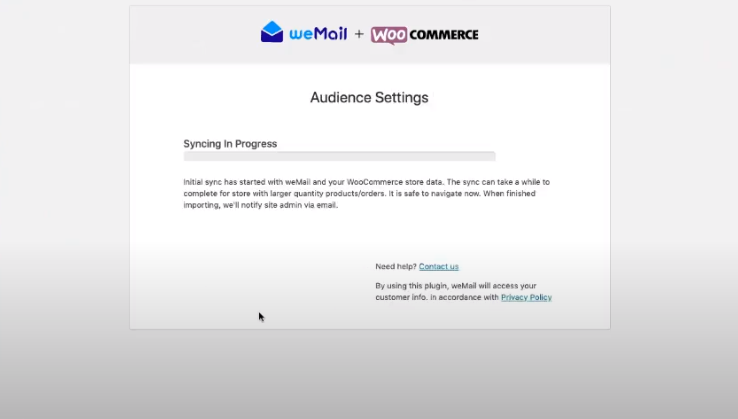
After you click on the start button, your sync process will begin.
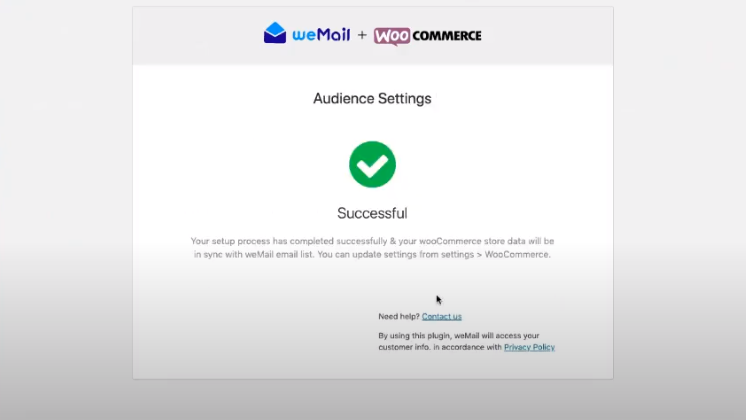
And finally you have successfully synced WooCommerce with weMail.
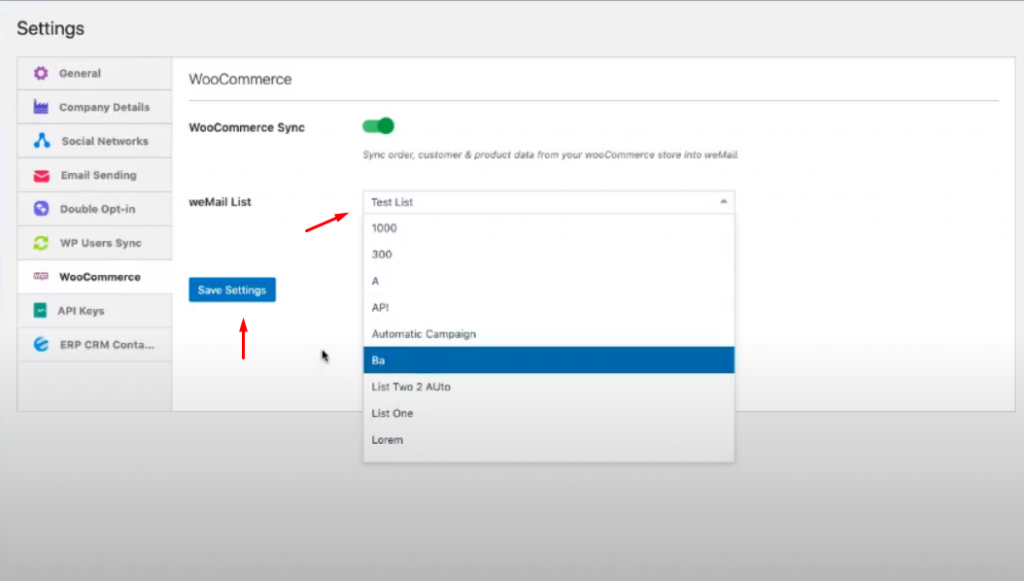
After integrating WooCommerce with weMail, navigate to the WP Dashboard>weMail>Settings>WooCommerce again.
Here you can change certain things such as enable/disable syncing process and merging list with weMail, etc.
List Segmentation of WooCommerce Store
To segment WooCommerce email list, navigate to weMail>List>And select your preferred list.
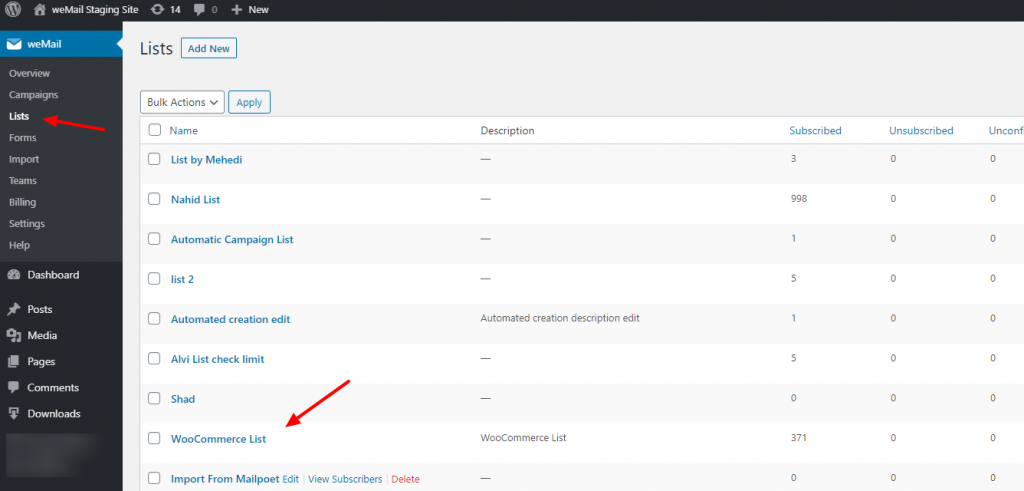
Note: List segmentation feature is a pro feature of weMail. To apply this option, you need to upgrade to the pro version.
However, you may need to create a new email list. In that case, you can check out the guide below. It will help you to create an email list with weMail.
👉How To Create an Email List weMail👈
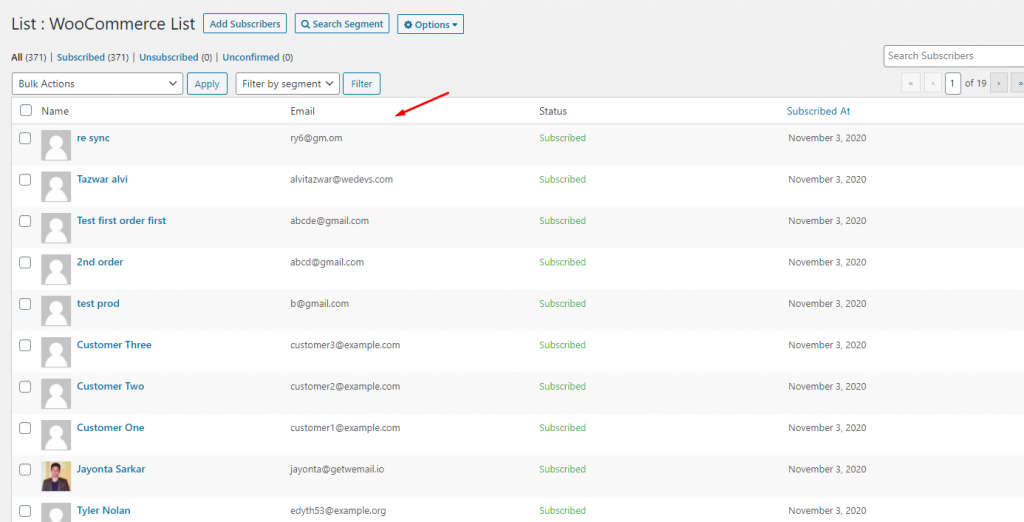
Okay next, select your preferred list that you want to segment for your next campaign. Try to select the Updated List.
Well, the following customer email list is directly generated from the WooCommerce.
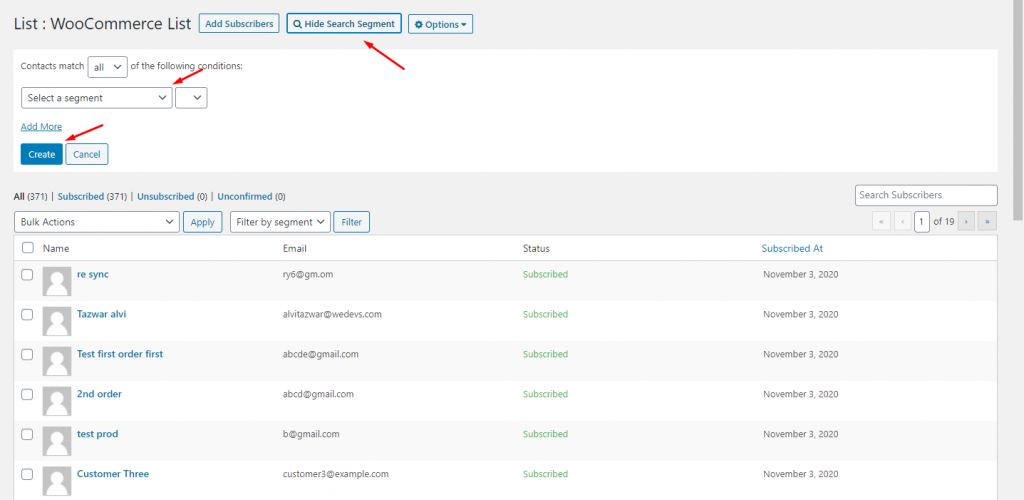
Next, click on the Search Segment option, then other options will automatically appear on the screen.
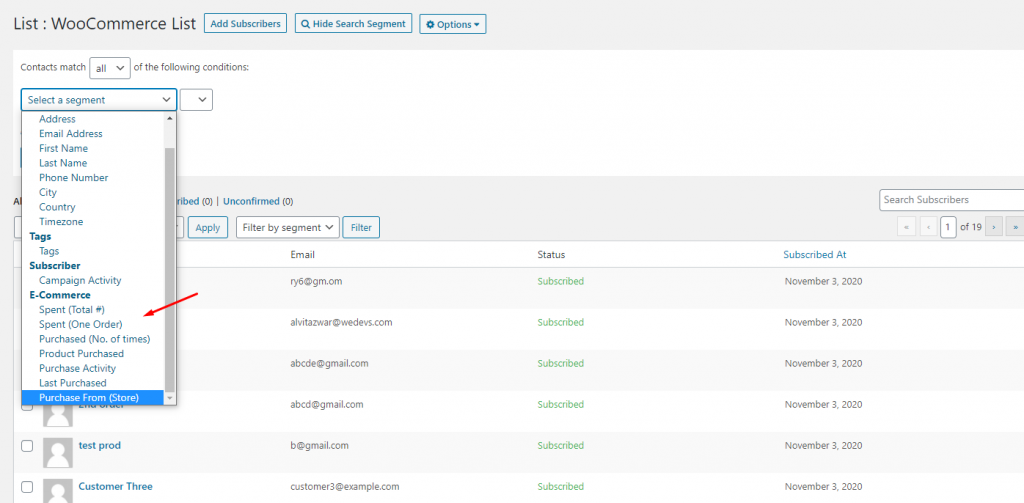
After you click on the segment, the available options will appear. As we’re segmenting eCommerce customers, so we’ll talk about the below 5 options.
- You can segment on (total cost)
- Segment the list who has purchased for one time
- How many times a customer has purchased (one or two times)
- Based on the purchased products
- Purchase activity
- Last purchasing activity from the Store
- Last purchased items or products (time period)
Let’s say you want to segment those customers who have purchased less than $500 and want to give them a special discount for the upcoming BlackFriday Deals. So segmenting your preferred list, you can give some extra benefits to your top customers. Okay now, set up the segment option and amount.
Note: Less then means under the amount and more than means above the current amount
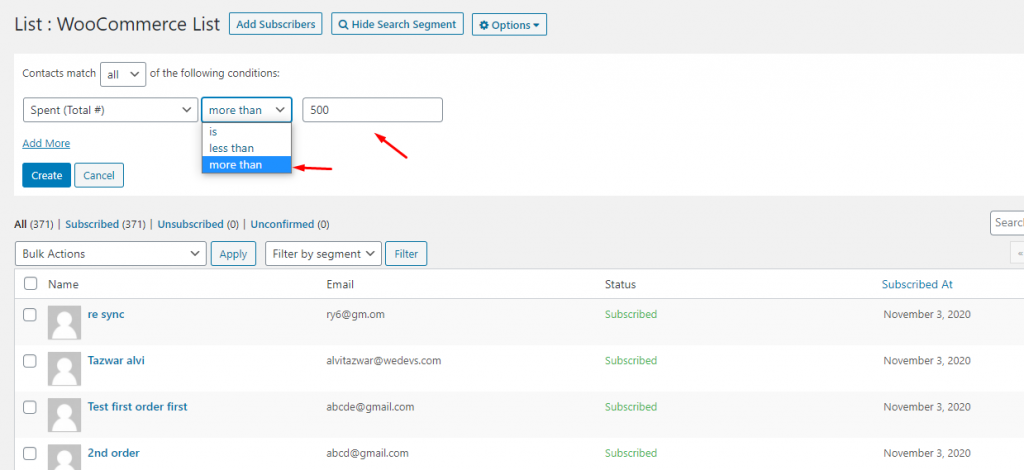
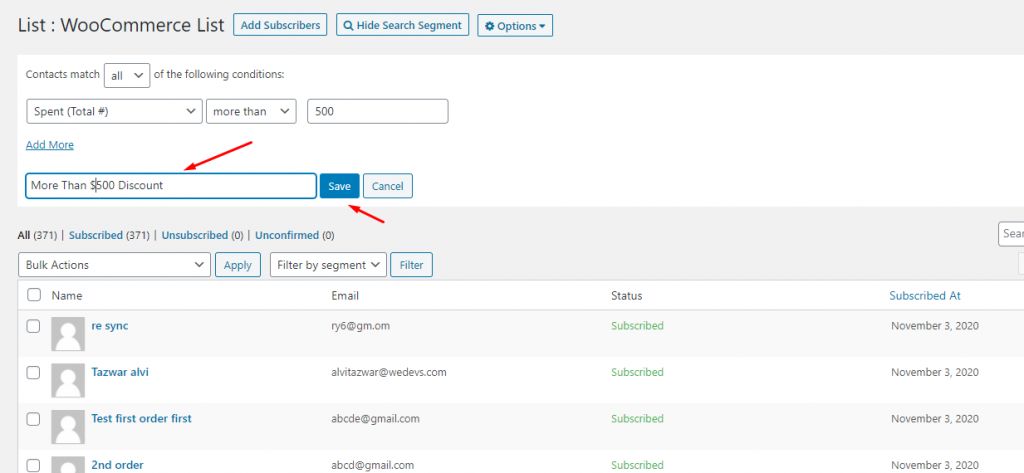
So put the value. And then click on the ‘Create‘ button to prepare a list based on ‘Spent (Total #) more than $500 from your online shop.
Now your list is segmented and also ready to filter. To do that just click on the filter option & select the segmented option that you created earlier. That’s it!
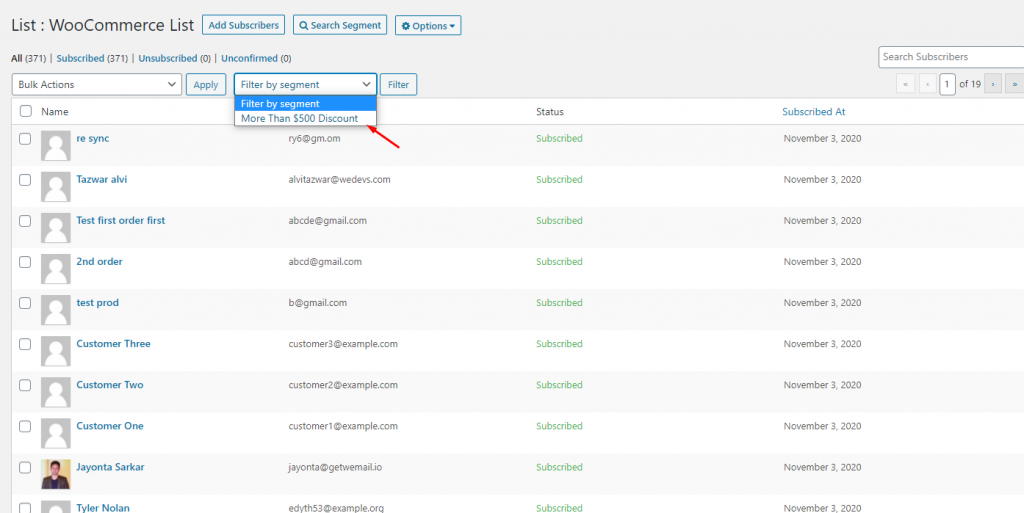
So after you select the filter options, all your customer emails will appear.
Related article: Email Segmentation Strategies That Drives More Conversion
02. Create Campaign with the Segmented List & Apply Customization Features
So now we’ll show you how you can create a campaign with that segmented list that can help you to increase your eCommerce sales.
Okay, let’s get started:-
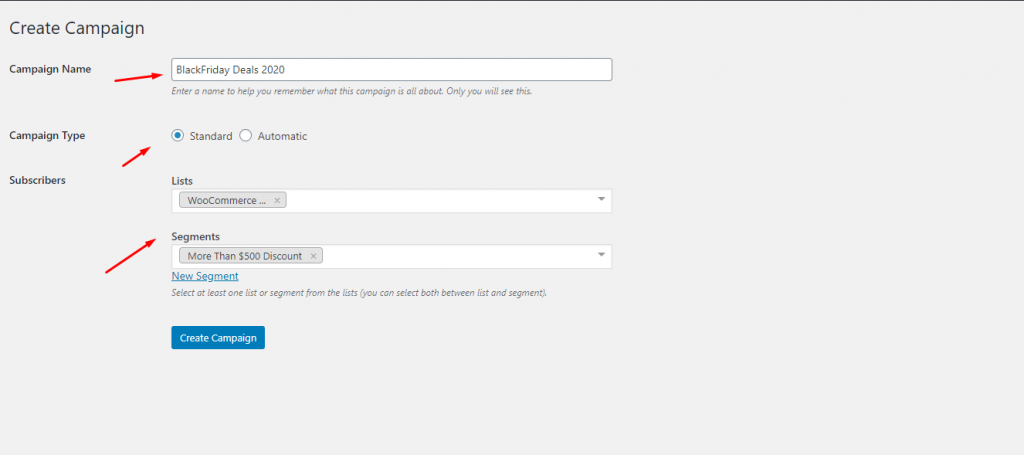
To create a campaign with your segmented list, click on weMail> Campaign> Create a campaign

After that give a title to your campaign and select ‘Standard‘. And then select the list from your WooCommerce store and segmented list. After that click on the Create Campaign.
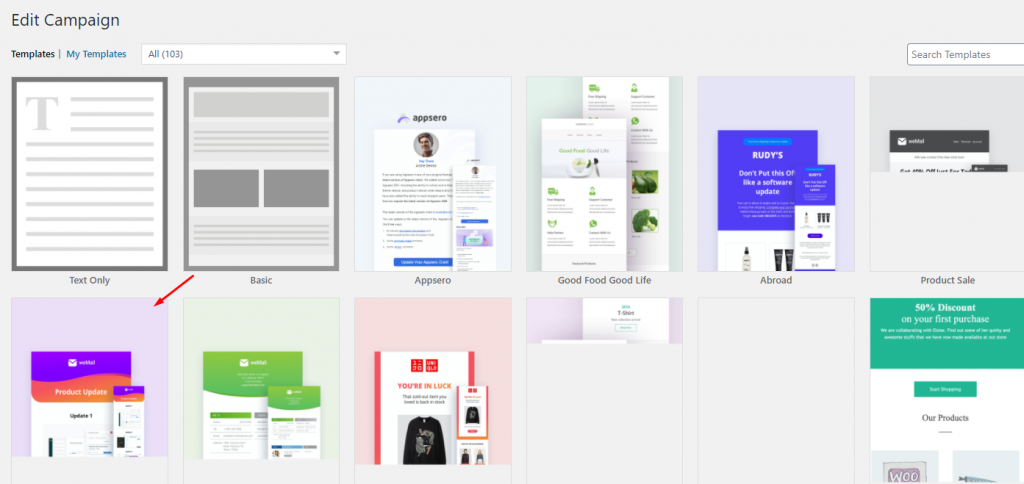
weMail has a collection of some stunning templates for email campaigns. So choose the preferred email template & click on the ‘Next‘ button.
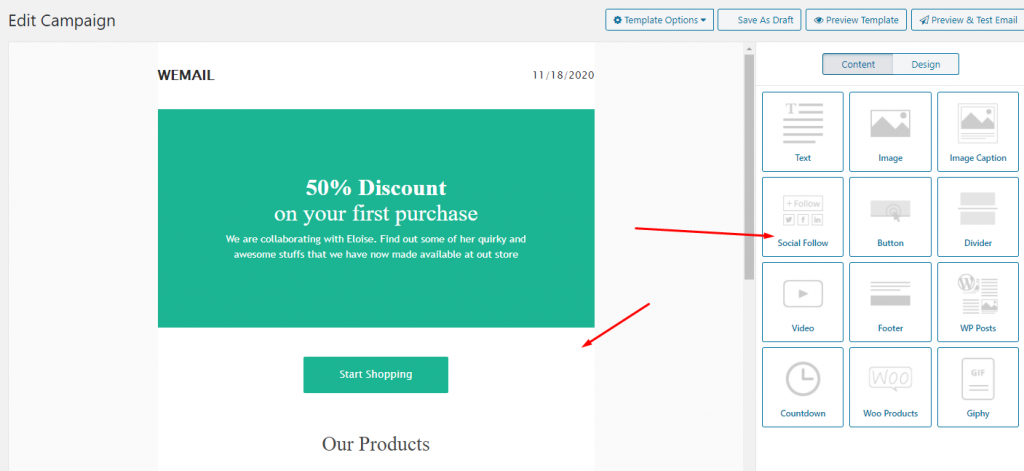
Here it comes the email customization options. But you could only customize the template and its related items.
Such as adding new images, social icons, captions, video, countdown, and so on. So when you are done with that click on the Next button.
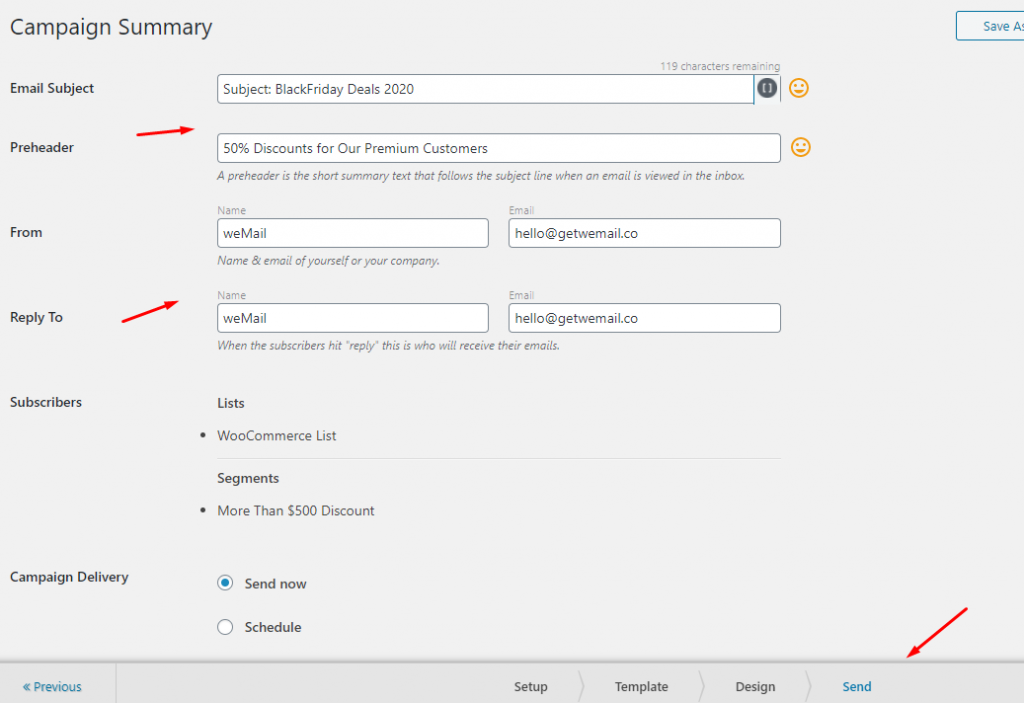
Finally, here you need to input some basic information such as Email Subject, preheader text, the email sender address, etc.
Then click on the ‘Send now’. And your campaign will be activated & deliver the emails to the prospective subscribers.
So this is how your subscribers will get the email.
⚠Caution: weMail can’t send any email. It can just help you to customize emails like templates and manage your store subscribers.
Easy Digital Downloads List Segmentation
In the same way, you can also segment your subscribers’ list from Easy Digital Downloads. And then create an email campaign with weMail.
So for a detailed guideline check out 👉 our official documentation.
03. Import contact list to weMail
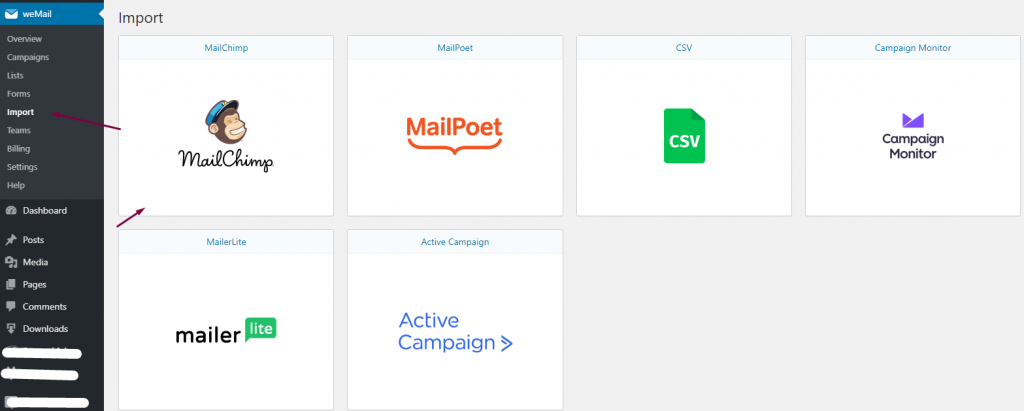
Using the import feature of weMail, you can easily import your subscribers from the following email marketing service providers.
After importing the subscribers, you can easily categorize them in the weMail. According to that, you can run your campaign for that particular subscriber list.
Also, you can import your list from a CSV file as well. You can import the list just as it is in your existing email marketing tools or chooses to import the whole list as well.
However, to give you a brief idea, let’s check out how to import subscriber list from the popular email marketing platform to weMail.
Note: We’ll show MailChimp in this case. Because process for other platforms is almost the same.
Step One
First Navigate to weMail> Import > MailChimp
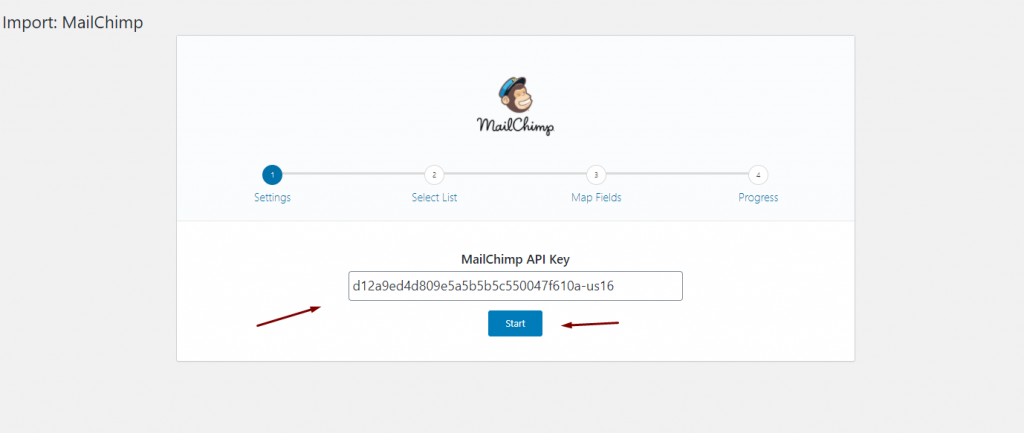
Now click on MailChimp. You will be directed to the settings page where you have to paste your MailChimp API key.
Step Two
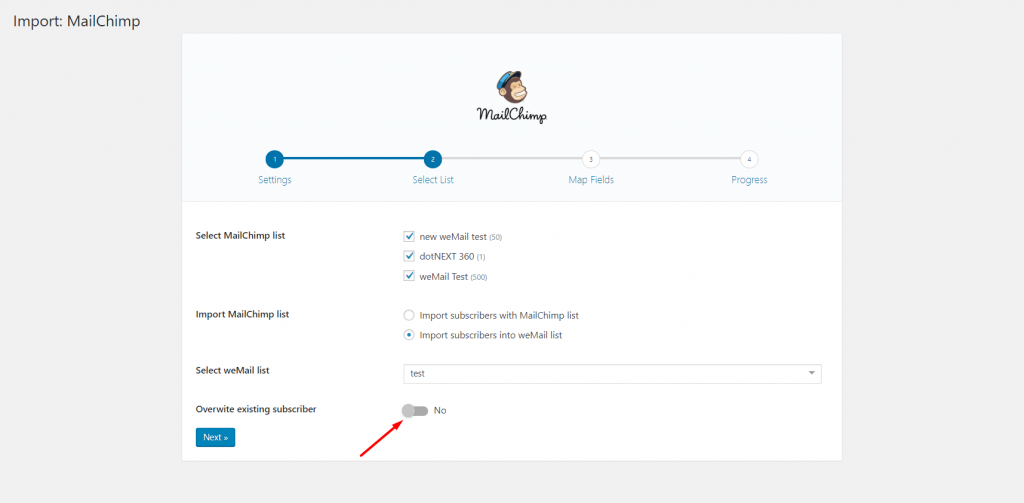
You will find the Select List page where your data from your MailChimp account will be merged. So select which list from your MailChimp account you want to import to weMail.
You have two options to do that. Either you can import to a fresh list or merge it with the wemail’s existing list. Enable the overwrite button if you want to overwrite the existing subscriber of that list.
Step Three
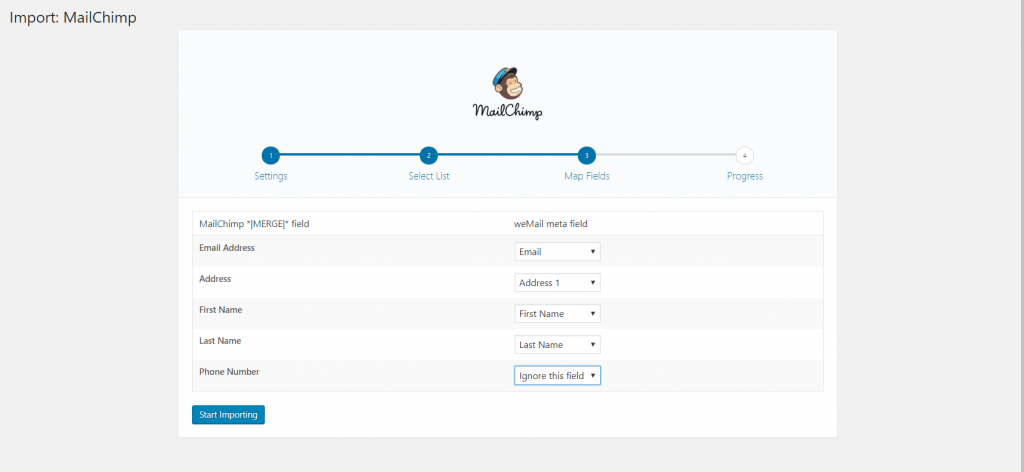
Now, you need to merge your MailChimp list with the weMail list. As you have selected the 2nd option in the earlier step. So you’re importing MailChimp list into weMail.
However, under the weMail meta field, you can see some options. So select which field that you want or leave it empty.
After finishing, click on Start Importing.
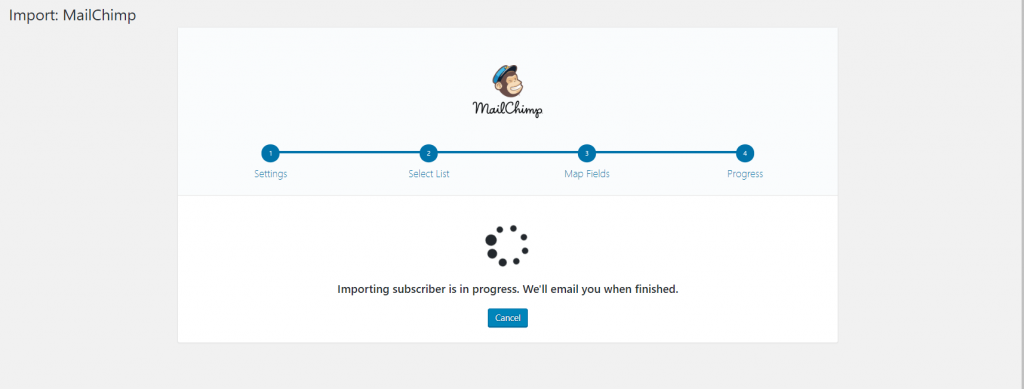
That’s it! Your subscriber importation process will be activated and weMail will start importing your list.
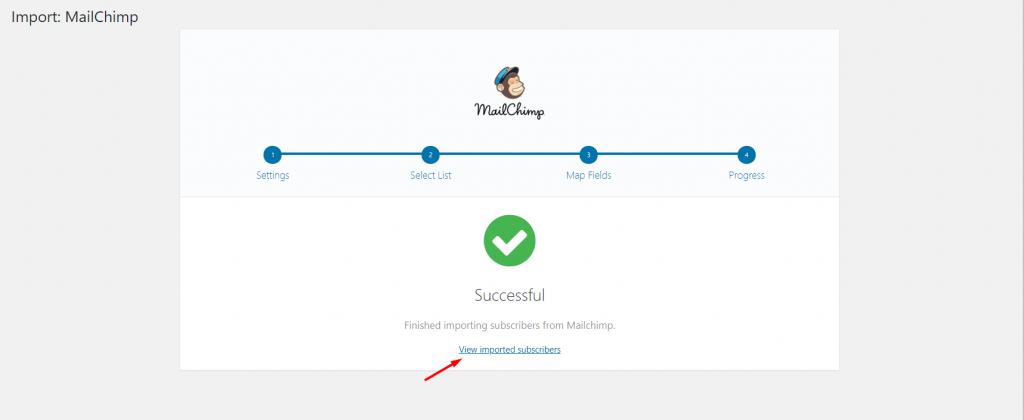
Step Four
Finally, you can see that the import list has been completed. So click on View imported subscribers to see your result.
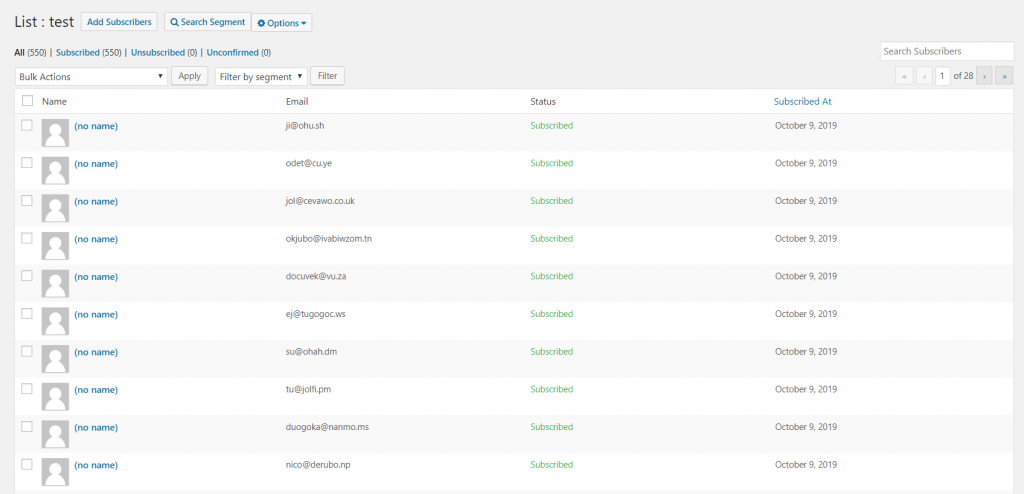
You can see that the subscribers are stored under the selected list.
So this is how you can add the email customization features to your email campaign using weMail. Surely, this will help you to increase your email open rate and improve your overall eCommerce sales by delivering the email to the appropriate recipient.
Also read: Email Deliverability Best Practices
What Are the Key Components of High-Performing Email That Increases Sales

Possibilities in email marketing are endless. Especially if you have an eCommerce business, a proper email marketing strategy could easily help you to reach more potential customers and increase sales.
In this regard, Oberlo expressed that:-
49% of consumers would like to receive promotional emails from their favorite brands
So as an eCommerce business owner or marketer, there is a great chance to grab more customers by sending some effective emails. But without framing for a proper email marketing plan, you may not able to accomplish that.
However, here you’ll get some interesting tips and tricks. After you apply them to your next email campaign, it will help you to generate more product or service sales. In short, it will improve your overall email bounce rate to ensure your aspired audiences have accepted your email flawlessly.
So here are some important note that you should keep in mind before sending any eCommerce emails to your audiences.
- Choose a suitable email template to get started
- Refine your email subject lines that attract customers
- Keep your email copy readable and spelling mistake-free.
- Try to add a relevant new hero image & edit it
- Use relevant email color
- Don’t forget to add alt text and links
- Keep your CTA button more appealing and attracting
- Enable Preview on mobile ( if available)
- A/B Test your email before pressing on the Send Email button
- Do a final proofread
Final Thoughts
Well, you could see how easily you can utilize weMail for segmenting your WooCommerce store’s subscribers and create campaigns according to their attributes. We tried our best to convey an easy process so that you could easily customize emails for your subscribers.
So if you’re not getting the desired result from your email campaign and fail to regain the expected ROI, it’s high time that you should implement weMail for your online marketplace. Definitely, it will increase email deliverability, open rate, reach more customers. Moreover, upgrade the overall sales.😊
However, you can simply put your query in the comment section, or directly connect with us through contacting us. We’ll be glad to solve your problems😉


2Comments
Andrus
Thanks for the nice piece of content Nahid. This is really helpful content since people will know how to customize emails for their eCommerce newsletter.
Nahid Sharif
Hey Andrus
Thanks for the nice compliment😊