The “New Post Notification” feature of weMail lets you send emails containing the recent posts of your website to your subscribers periodically with an automated process. It’s a very useful feature to promote blogs and other posts on your site.
How Does New Post Notification Work
New Post Notification works as an email campaign. It automatically drags the recent posts of your site, then delivers them to your contacts as an email on a daily, weekly, or monthly basis.
How to Use New Post Notification to Launch a Campaign
To use the New Post Notification feature and launch an email campaign with it, first, you need to access your “Campaigns” menu. Just follow the steps below:
- Go to weMail dashboard
- Click on the “Campaigns” menu
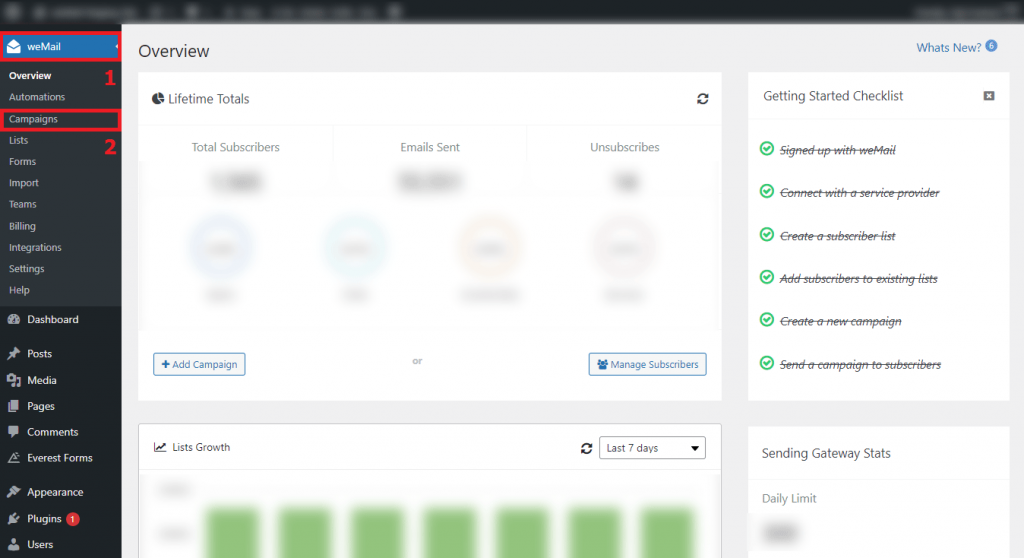
Now, you need to create, customize, schedule, and launch your New Post Notification Campaign.
1. Create a New Post Notification Campaign
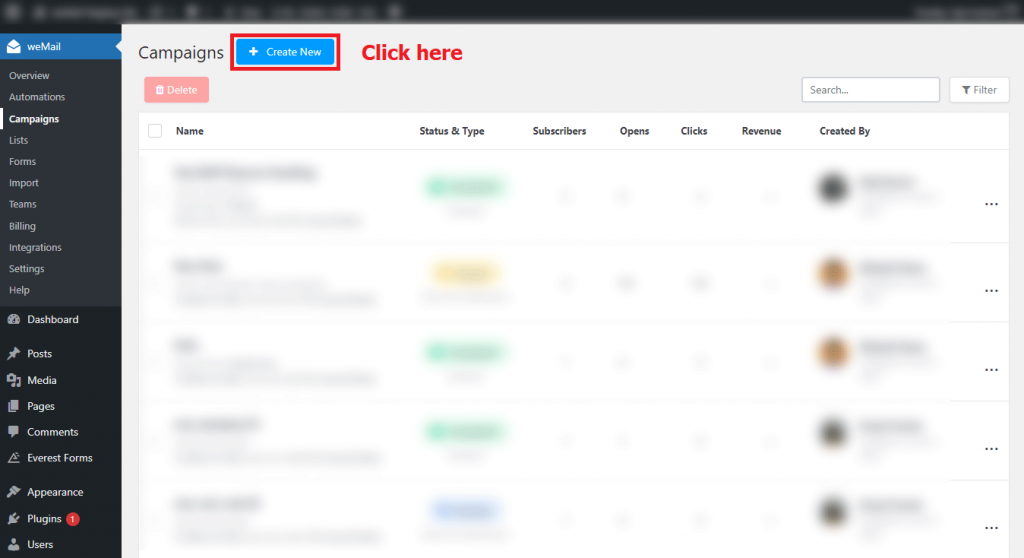
After pressing the “Campaigns” menu, your campaign page will open (like the following image). From there, click on the “Create New” button.
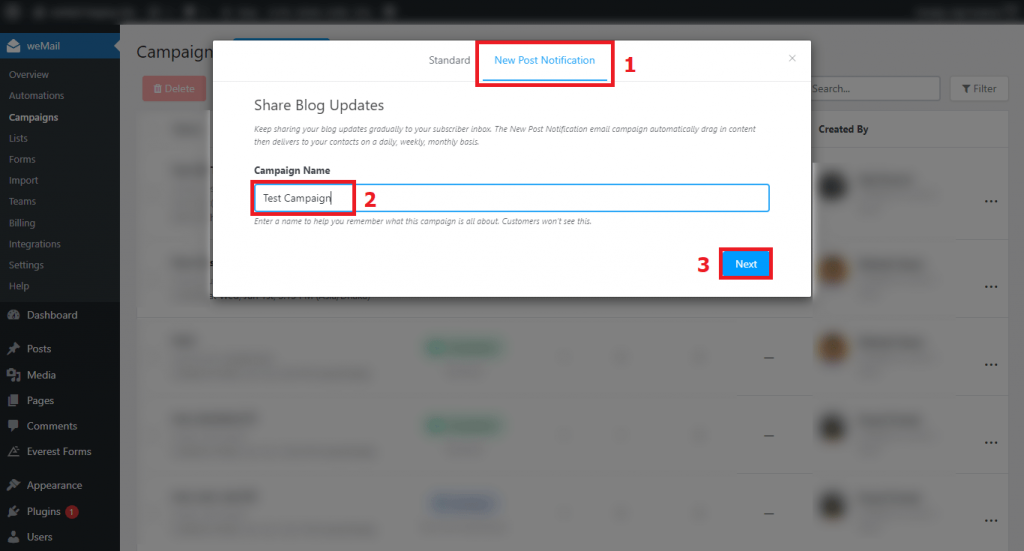
Then, a modal popup will appear like the image below. Here, you need to –
- Choose “New Post Notification” as your campaign
- Give a “Campaign Name” for your own use
- Press the “Next” button
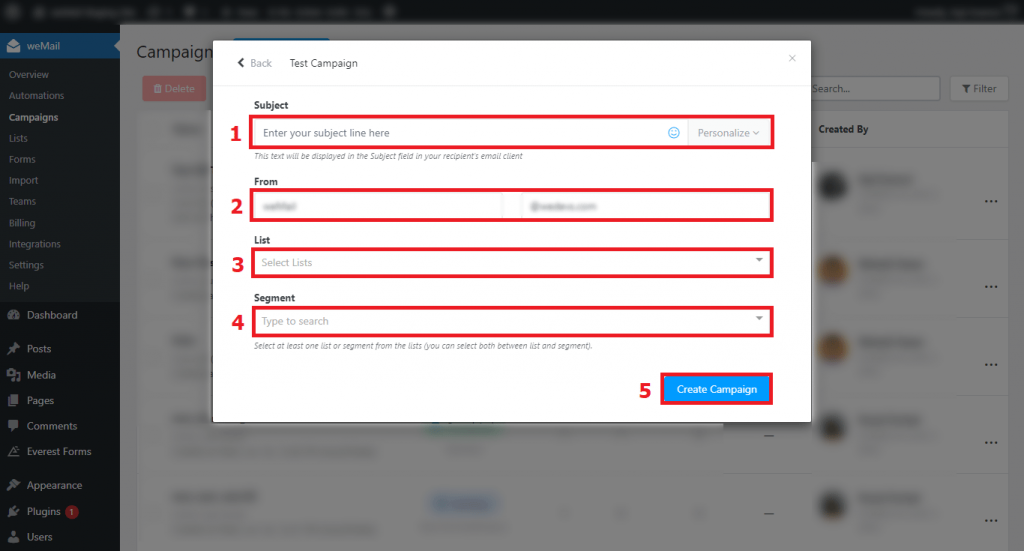
Now, you need to fill up a small form to finish creating the New Post Notification Campaign. Just follow these steps:
- Give a “Subject” line (it’ll be displayed as the email subject to your recipients)
- Check the sender’s name and email address under the “From” field
- Select your subscribers’ list(s) under the “List” field
- Select the segment(s) of your audience under the “Segment” field
- Click the “Create Campaign” button to finish
You have successfully created a New Post Notification Campaign! Now, you need to customize it.
2. Customize Your New Post Notification Campaign
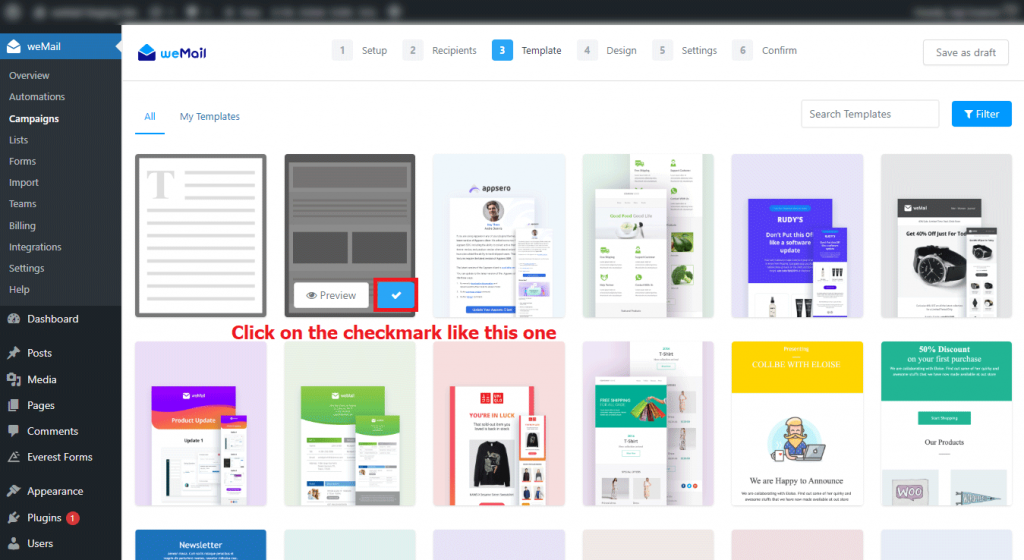
After clicking the “Create Campaign” button, you will be taken to the Template page. Here, you need to choose a perfect template for the emails.
To choose a template, hover the cursor on your desired one, then hit the checkmark at the bottom-right of it.
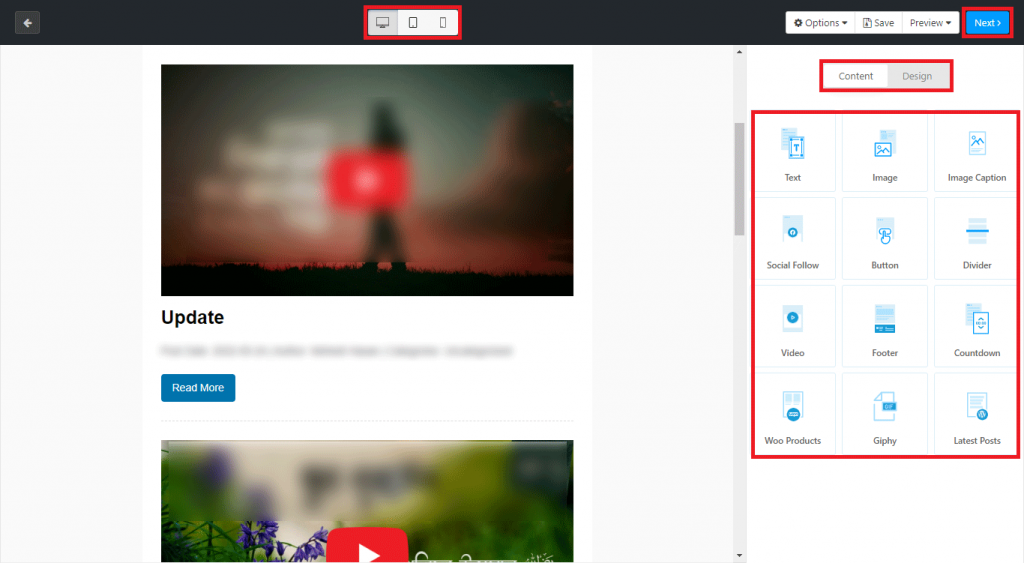
Now, you will be taken to a design page. Here, you will be able to customize your email content and design, and check the preview on different devices. After finishing the customization, press the “Next” button.
Now, it’s time to finish some settings, like scheduling, of your New Post Notification Campaign.
3. Set Up the Schedule of Your New Post Notification Campaign on the Settings Page
After pressing the “Next” button on the design page, you will be taken to the “Settings” page. Here, you will need to fill up another small form. Some of the fields will be filled up automatically with the credentials you have given while creating the campaign.
The things you need to do now are:
- Give a “Preheader”
- Use a “Reply-To Name & Email”
- Set up the schedule on the “When we should send?” field
- Checkmark the “Get a notification” field
- Use a “Google Analytics Campaign” code (if you want)
- Click the “Next” button
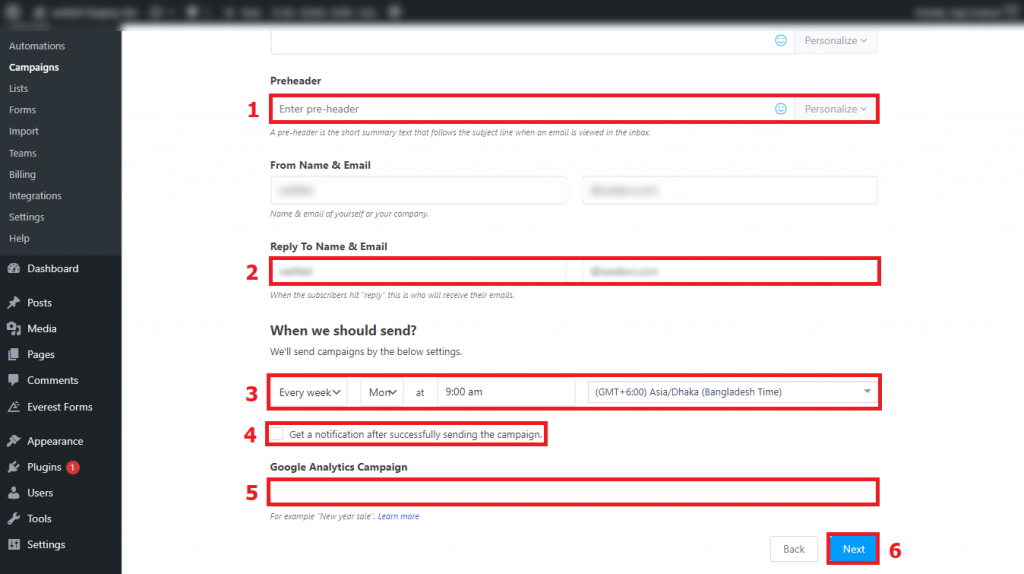
You can set the schedule on a daily, monthly, or weekly basis at any time zone.
4. Launch the New Post Notification Campaign
After hitting the “Next” button on the previous stage, you will be taken to the “Confirm” page. It will look like the image below. Here, you need to click the “Next” button once again.
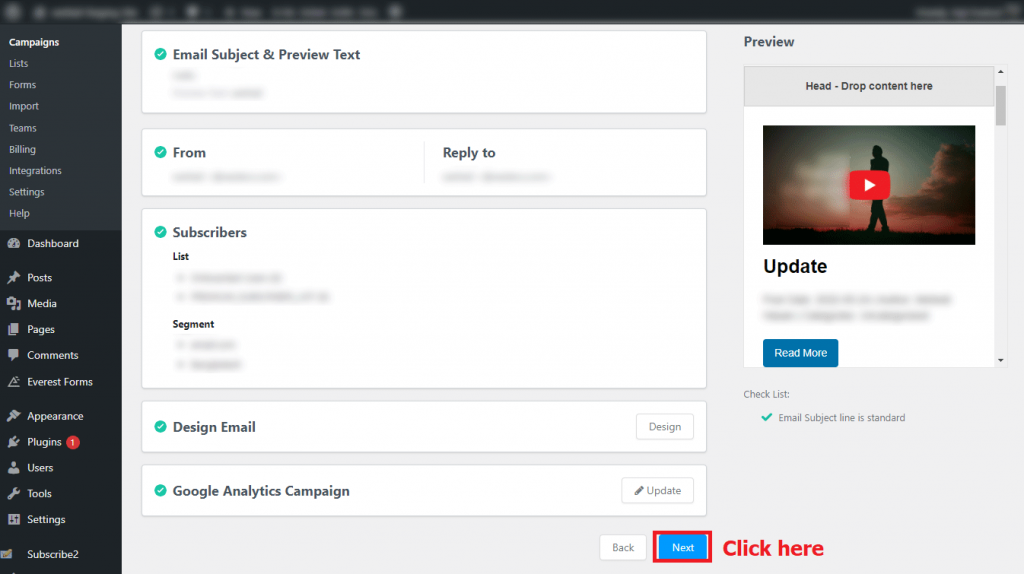
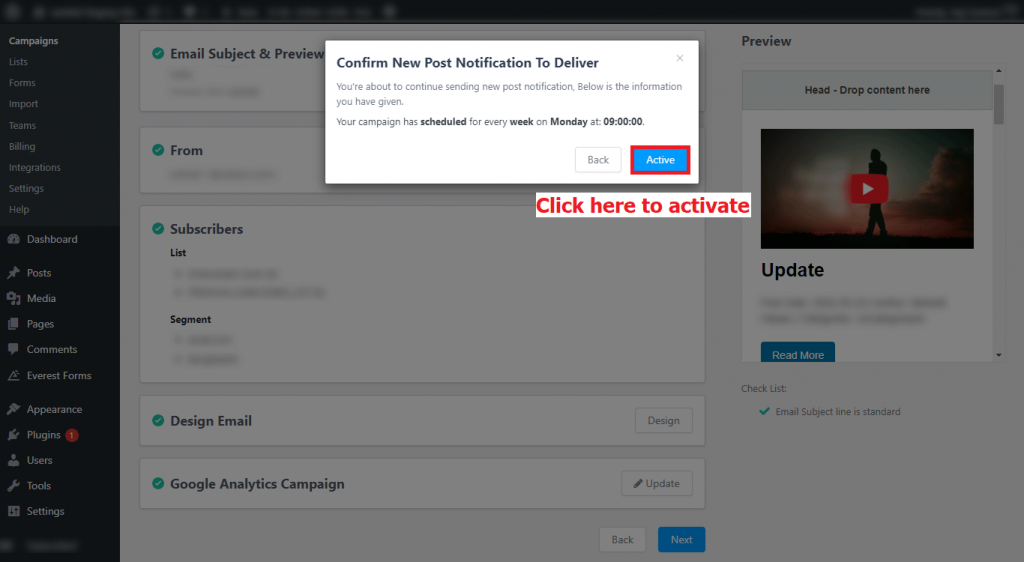
Then, a modal popup will open like the following screenshot. You need to click on the “Active” button there to launch the campaign.
You are done!
Please feel free to contact us if you have any further queries or face any problems while executing these processes. We will reach you as soon as possible.
Stay with weMail and promote your recent posts effectively and effortlessly with New Post Notification.
