If you want to use your Elementor form to manage your subscribers, then with the weMail Elementor Integration, this will become easy. Yes, with this integration weMail can collect all the data using the Elementor form.
Let’s see how you can set it up.
Step 1: Install Elementor Pro and weMail
The form widget of Elementor is available with the Pro version. That is why you need to install the Pro version of Elementor. And of course, you need weMail.
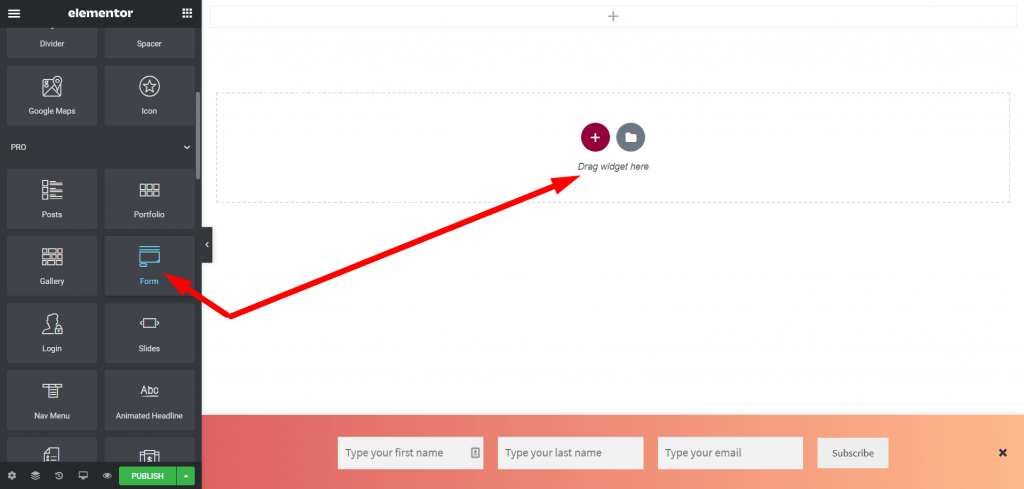
Step 2: Use the Elementor Form Widget
Create a page/post ( You can use an existing page). Then go to the Elementor Canvas/Editing Panel and drag n drop the form widget of Elementor.
Step 3: Integrate weMail
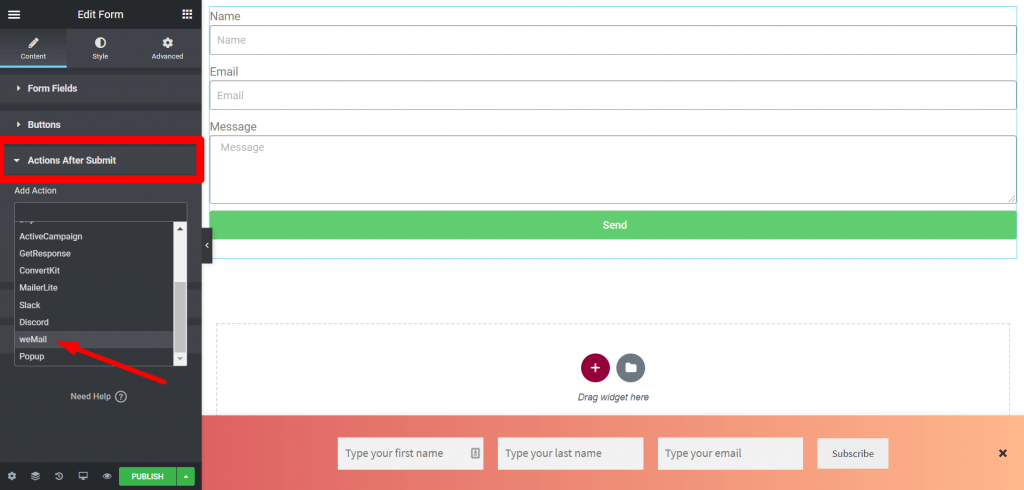
After customizing the form, click on the Actions After Submit option and select weMail from the dropdown menu.
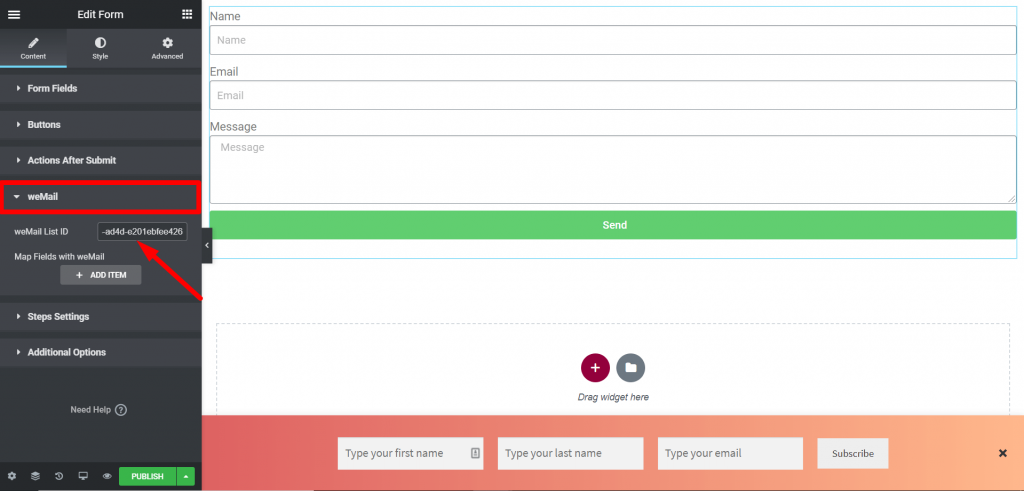
Step 4 : Add weMail List ID
When you select weMail from step 3, you will see a new option weMail in the Elementor menu. There you need to add the weMail list you want your data to store.
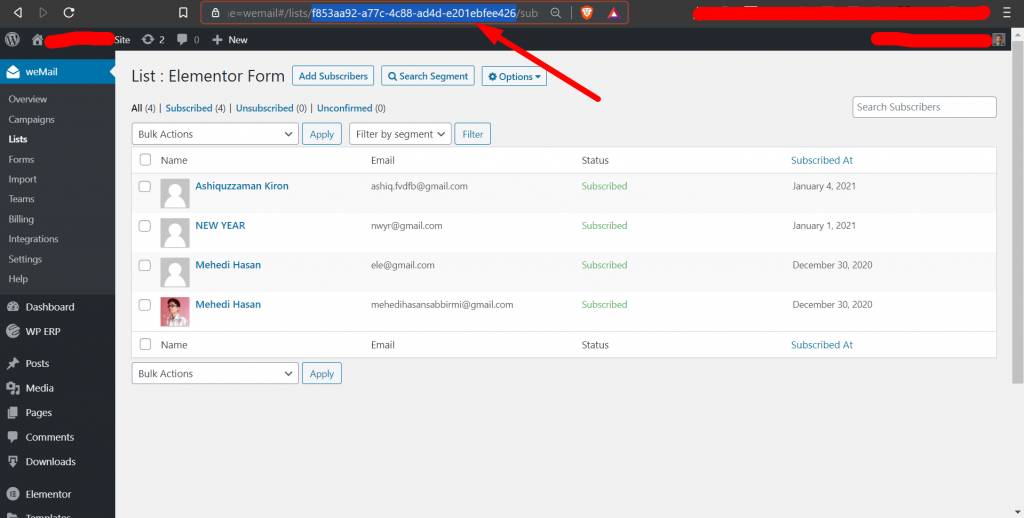
To find the weMail list ID, click on the list name,
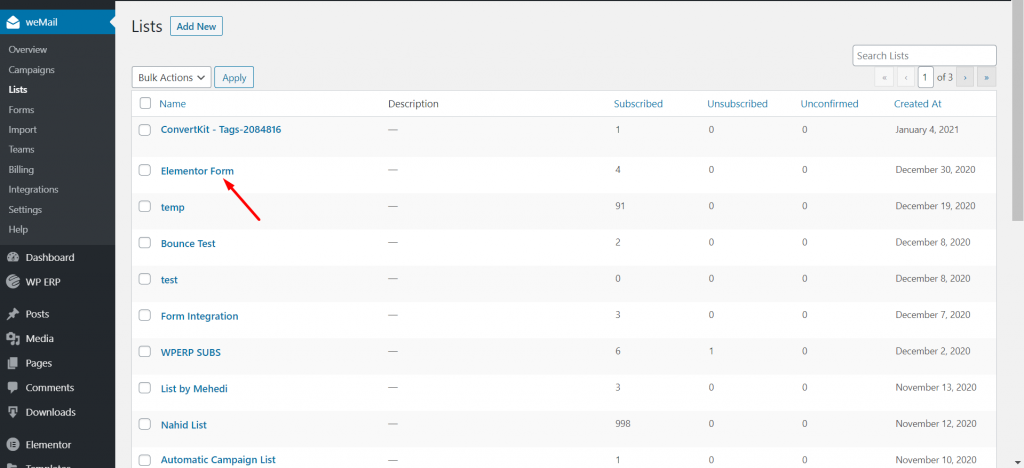
Then, copy the list id from the URL, the number between “lists/………./subscribers” , that is the list id. You can also follow the screenshot.
Now, go to the Elementor Editing Panel and click on the weMail option. Add the List ID here.
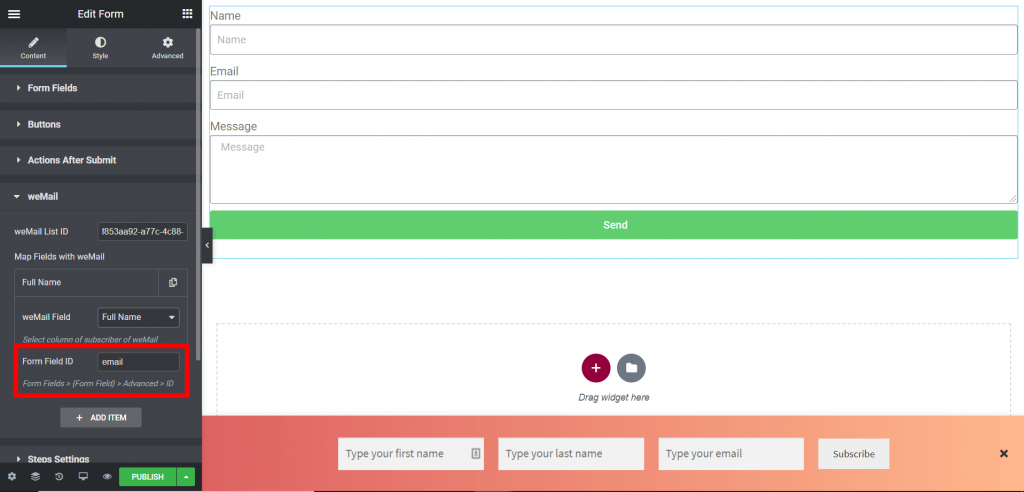
Step 5: Match Fields with weMail
Now, you need to map your fields with weMail. To do that, go to Form Fields-> (Form Field)-> Advanced-> ID.
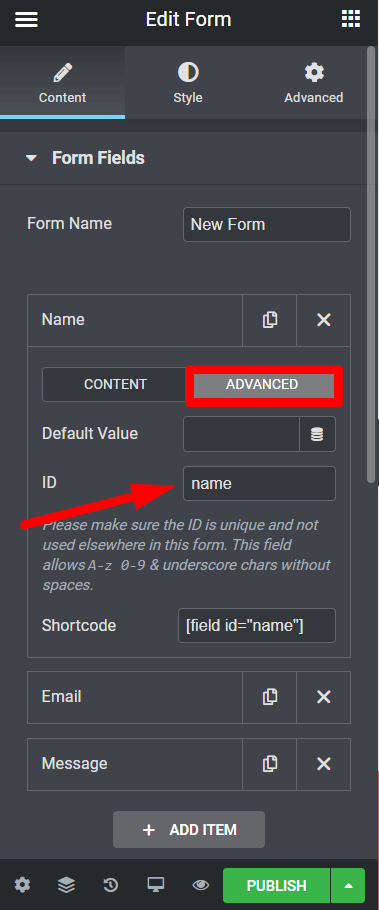
Now, add the id in the weMail Form Field ID.
And after further customization, publish the page.
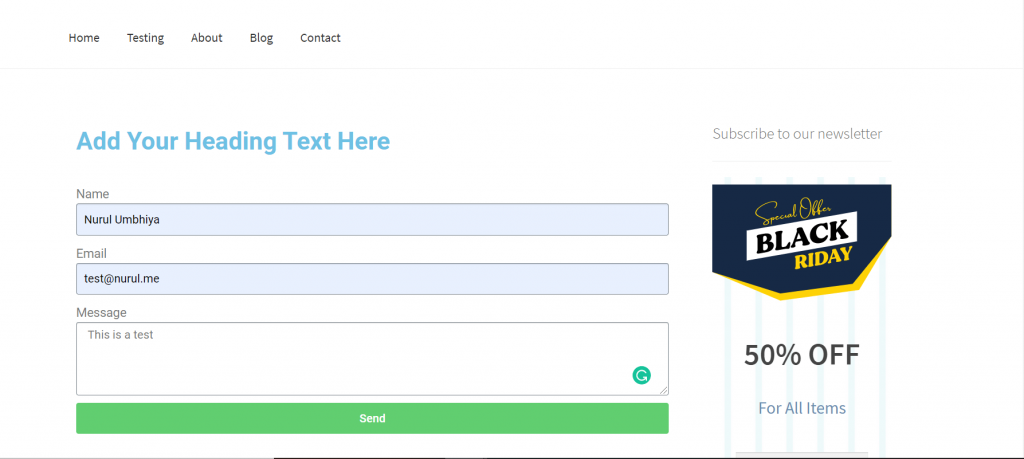
Step 6: Test the Form
You need to test the form to see if the form is working fine. Submit with some dummy credentials,
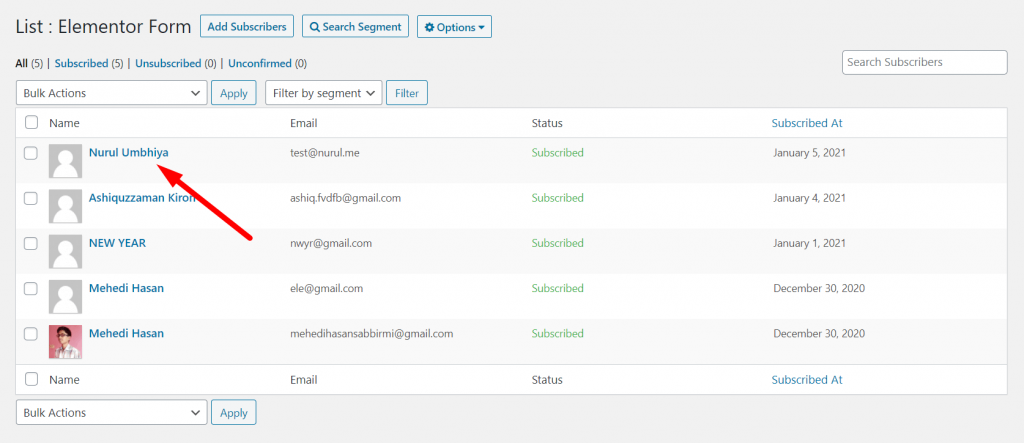
And, if you go to the list, you will find the data in that list.
That’s it for weMail Elementor Integration.
