To get started with weMail’s Opt-in feature, go to weMail → Settings → Opt-in.
From here, you can enable different opt-in methods to automatically collect subscribers from your website.
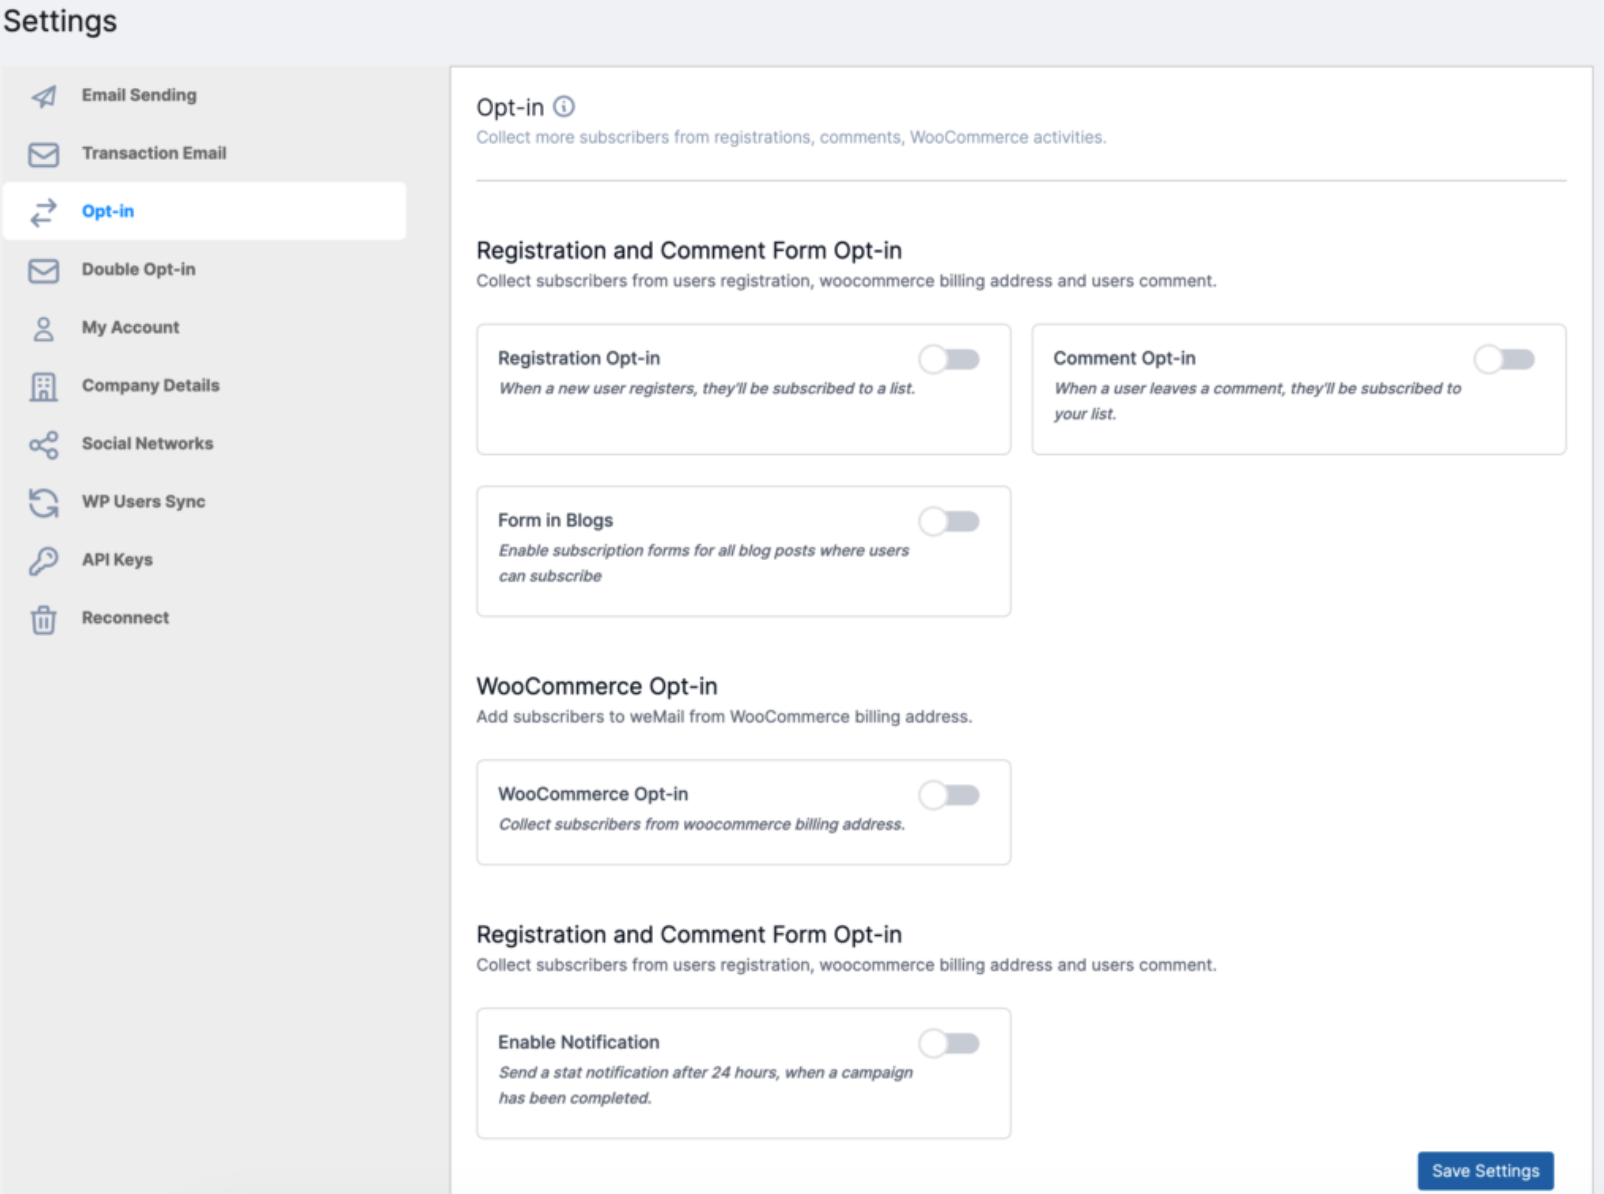
General Settings
Under Opt-in Settings, you’ll find several options to help you grow your email list across your site.
Registration and Comment Form Opt-in
This section lets you automatically collect subscribers when users register, comment, or browse your blog.
Registration Opt-in
When enabled, anyone who registers on your website will automatically be added to your subscriber list.
Comment Opt-in
When enabled, users who leave a comment (and tick the checkbox) will be subscribed to your list.
Form in Blogs
Activate this option to display a subscription form at the end of every blog post.
This makes it easy for your readers to subscribe while engaging with your content.
WooCommerce Opt-in
If you have an online store using WooCommerce, you can automatically collect subscribers from customer billing addresses.
WooCommerce Opt-in
When this option is turned on, every new customer’s billing email address will be added to your weMail subscriber list after purchase.
Notification Settings
Stay updated on your subscriber growth through automated daily reports.
Enable Notification
Enable this to receive an email every 24 hours with a summary of how many users subscribed during the past day.
Save Your Settings
Once you’ve configured everything, click the Save Settings button at the bottom of the page to apply your preferences.
Transactional Email
You can also send all your WordPress transactional emails – such as password reset, registration confirmation, and order notifications – through weMail.
Enabling this feature ensures your emails are delivered more reliably via your weMail setup.
