Using weMail’s Embed Form feature, you have the flexibility to place weMail form anywhere on your website. If you prefer not to use the pre-designed forms, you can simply create a custom form and position it wherever you desire on your webpage.
The process for creating an Embed form is easy and straightforward. In just a few easy steps, you can generate an embed form and place it on your webpage.
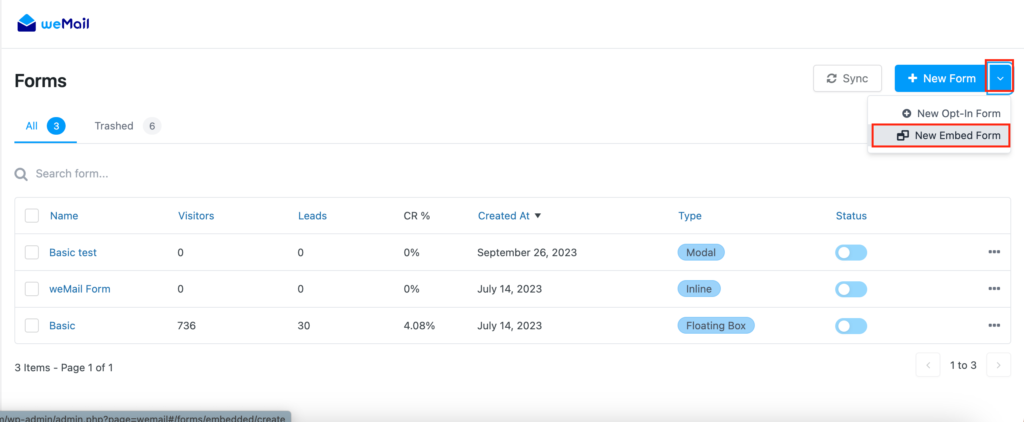
To create weMail embedded form, Please navigate to weMail > Form and click on the Add New dropdown menu, where you’ll find the option labeled ‘New Embed Form.’ Click on this button to get started.
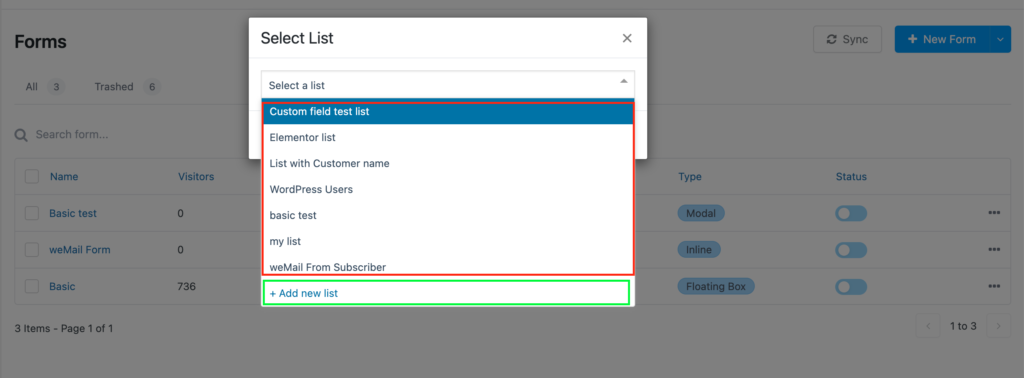
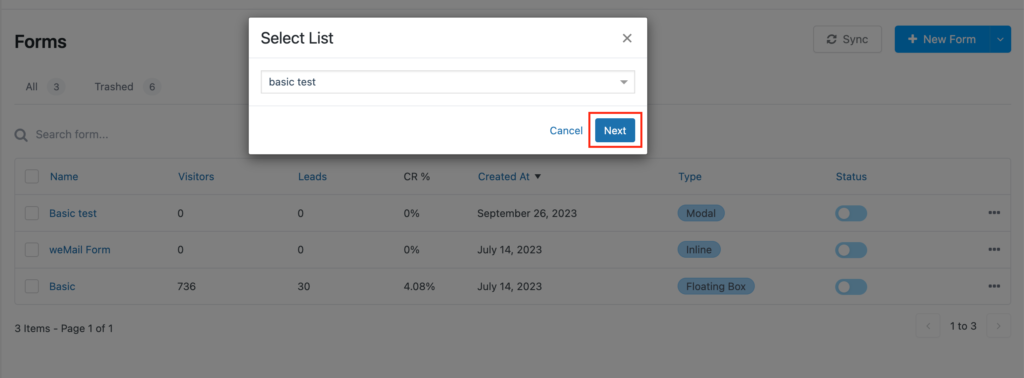
In the pop-up window, you can select a list where you want to store the subscribers or you can create a new list where you can select subscribers by clicking “+Add new list”.
Click on the Next button to continue.
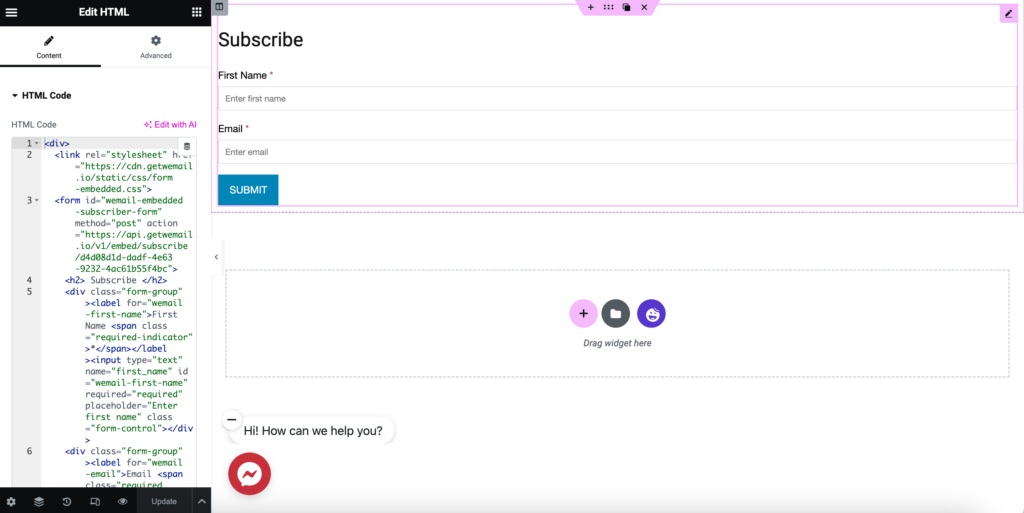
Now you will be redirected to the editing page of the form. Create your form as you like with the necessary fields. If you notice, when you are adding fields or making changes to the form, below the HTML code will modify itself.
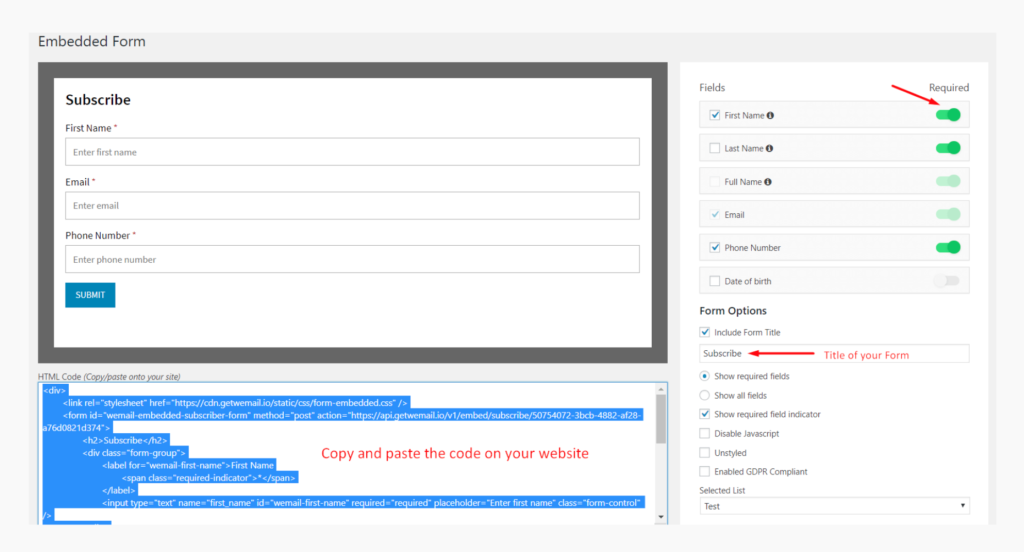
After finishing editing the form, copy that HTML code and paste it on your website. The form will appear depending on where you paste the code on your website.
How It works
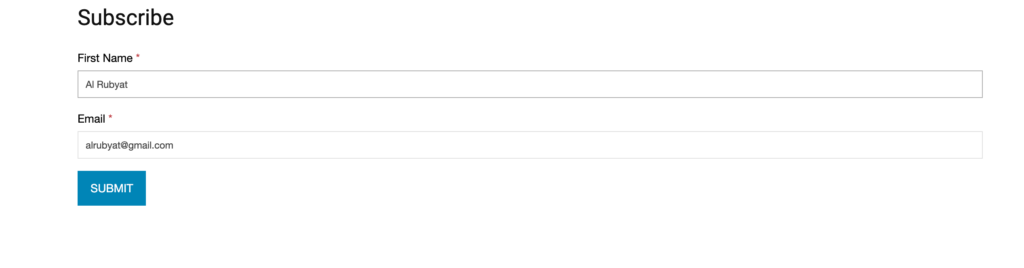
The user can fill up the form and click on the submit button.
When the user clicks on the submit button, It will redirect to a verification page and the user will receive a verification email once you submit this form. The email subscription will be activated once you respond to the verification email.

After that the user can click on the Submit button and the user will see the below message.

That’s it.
Note: If Double Opt-in is enabled (from your list settings), the User will still need to verify their subscription by email. Otherwise, the above-mentioned process will suffice.
