So, you’re ready to create your first campaign using weMail. Let’s get started.
You have 7 options to create and manage your email campaign with weMail.
- Choose a new campaign
- Give names & select types
- Select Templates
- See how you can design your one
- Send a test email
- Save or Activate right away
- Get reports
- Go to weMail→Campaign, click on Create New.
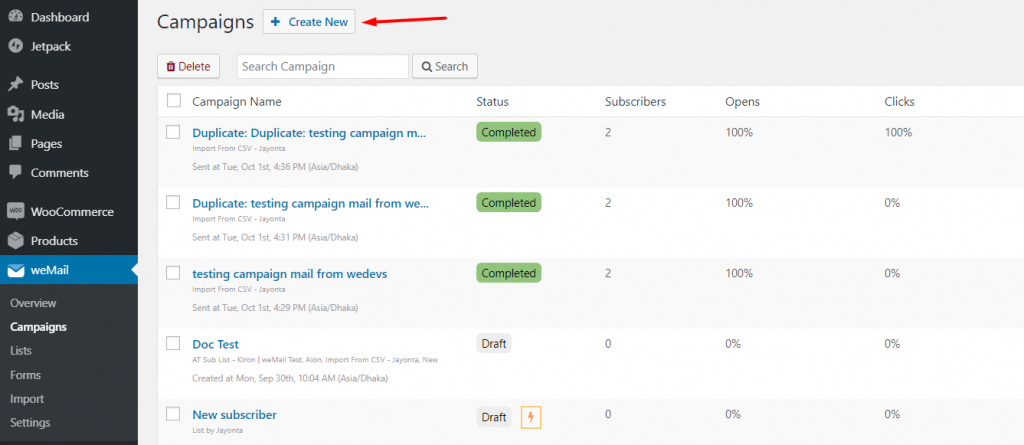
You will be directed to a Setup page.
2. Now-
- Put your Campaign Name
- Select Campaign Type (Standard or Automatic)
- Select your Email Lists
You may have two or more lists of subscribers. You can choose any of them to send your email. Check the page below.

Choose a list for that campaign and a segment, also a time as when to send the email. Click on Create Campaign and your Automatic Campaign will be created.
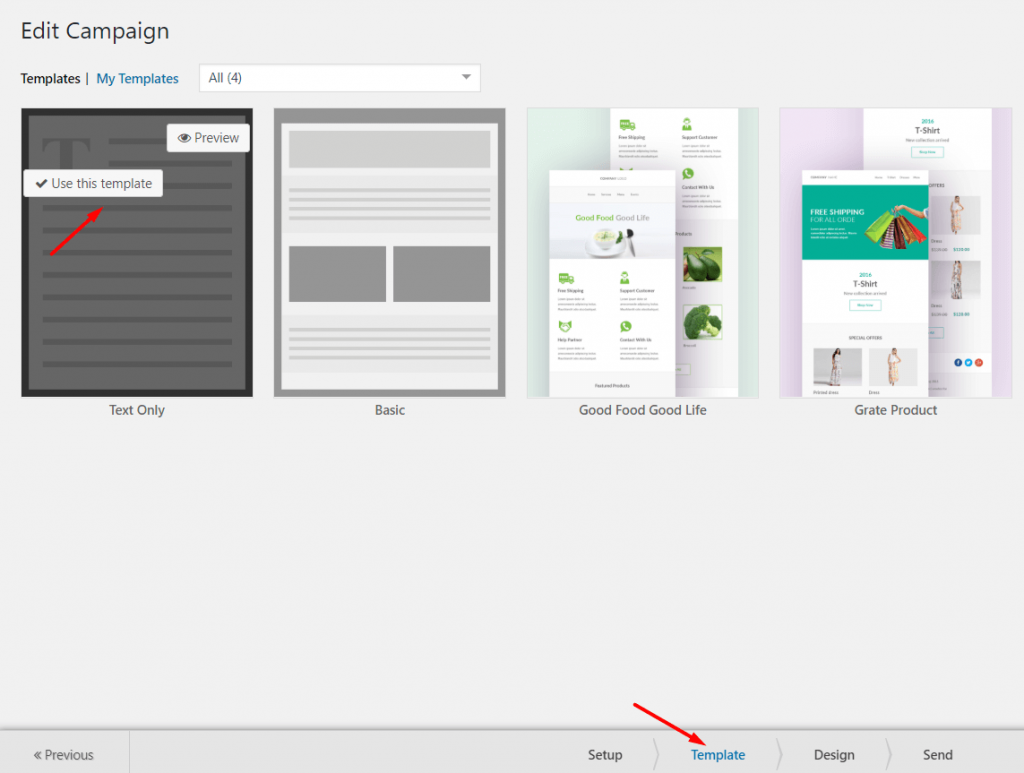
3. Next, you will be directed to the Template page. Here you will get to select the templates for your email campaign.
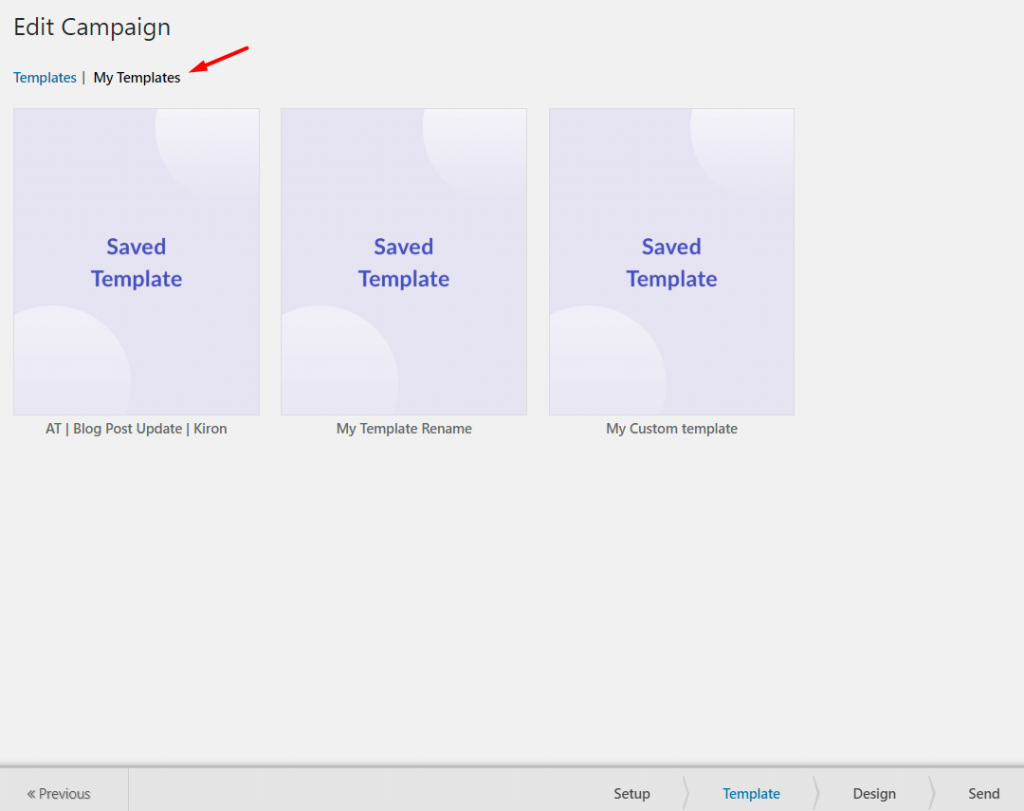
4. If you want to use customize templates, then you can click on My Templates and there you will see your saved templates. You can also use them to run your email campaign.
In the Design page, you can design your template from the Content section. You can add text, image, image caption, video, footer etc to your template.
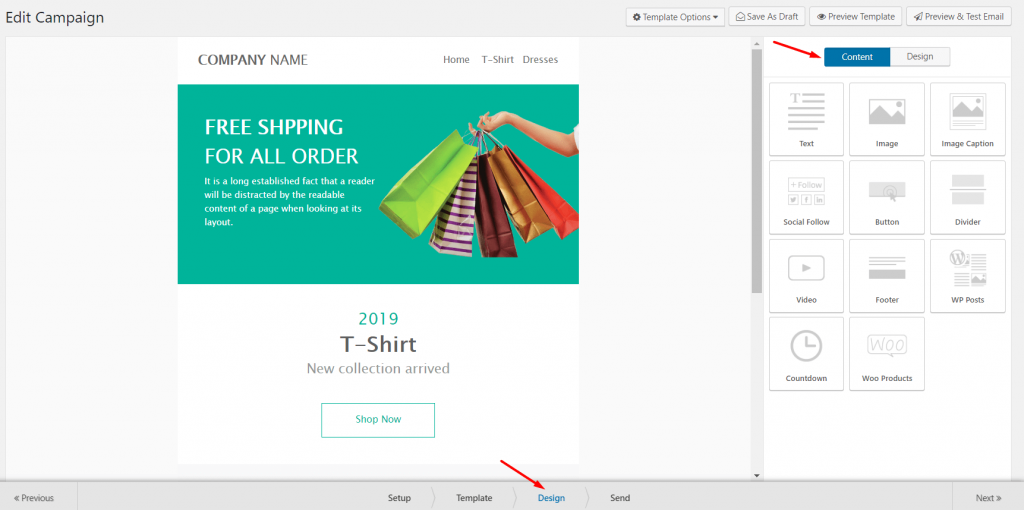
There is also the option to design your header, footer, body, top, and global of your template also in the Design section.
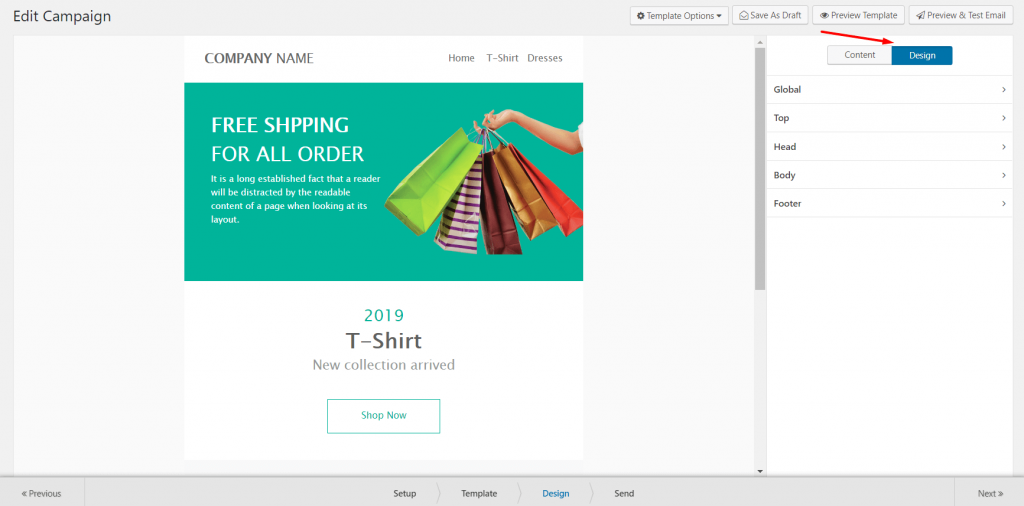
Options available to design your header, footer, body, top, and global.

When you are done with customizing your template, click on the Save button. It will be saved in the My Template section. So next time, you can use that customized template in your next email campaign.
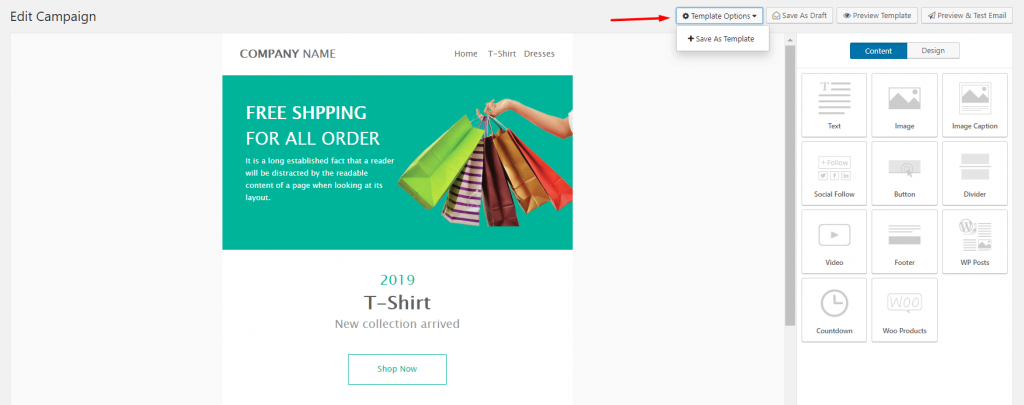
Here you can do more with your selected template. Yes, you can individually add YouTube videos and also customize it. Let’s see how to do it.
Drag the video widget from the right side of the screen.
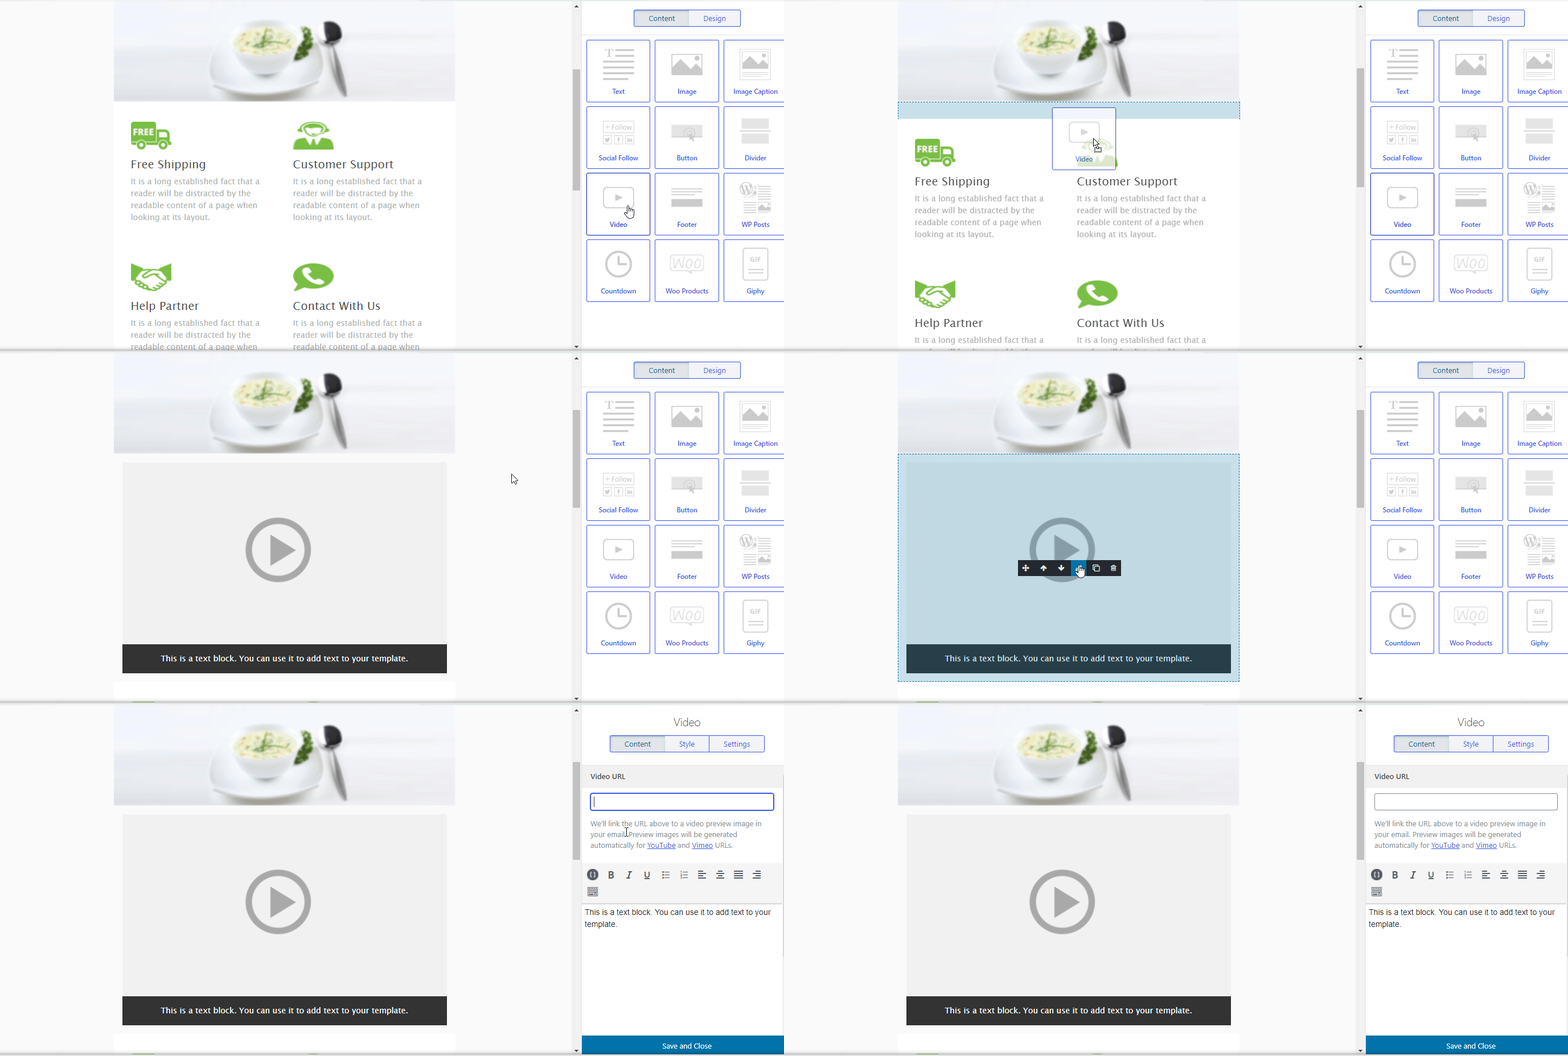
After adding the video link from the YouTube, it will appear right on the screen.
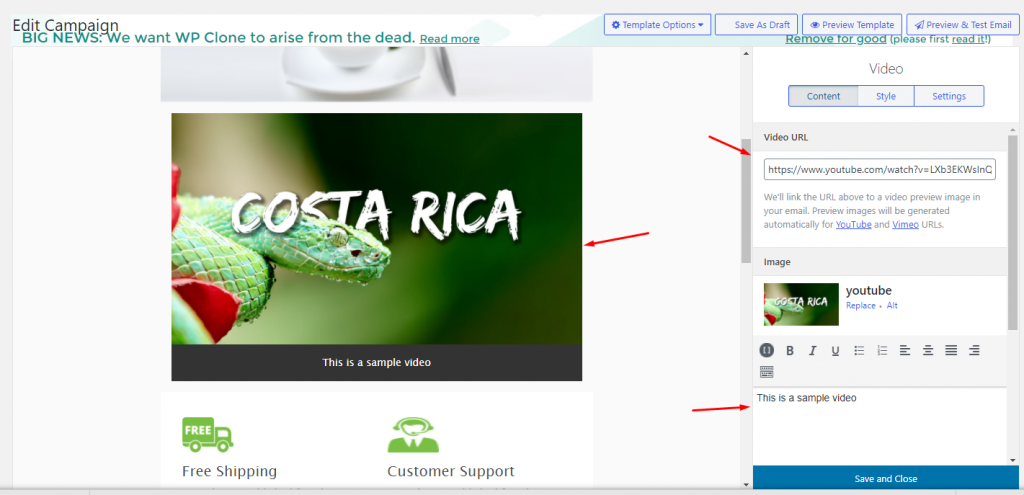
Also, you can customize certain things like background color, size, content color, text color and border color, etc.
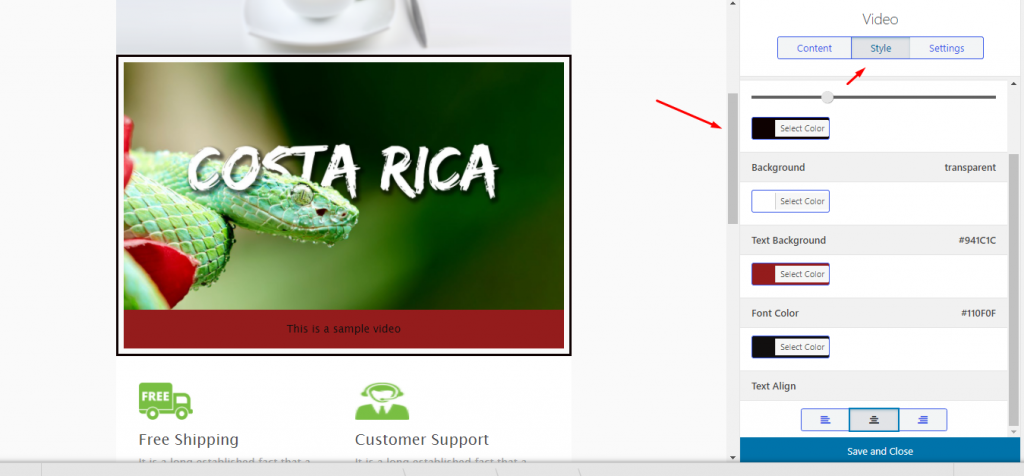
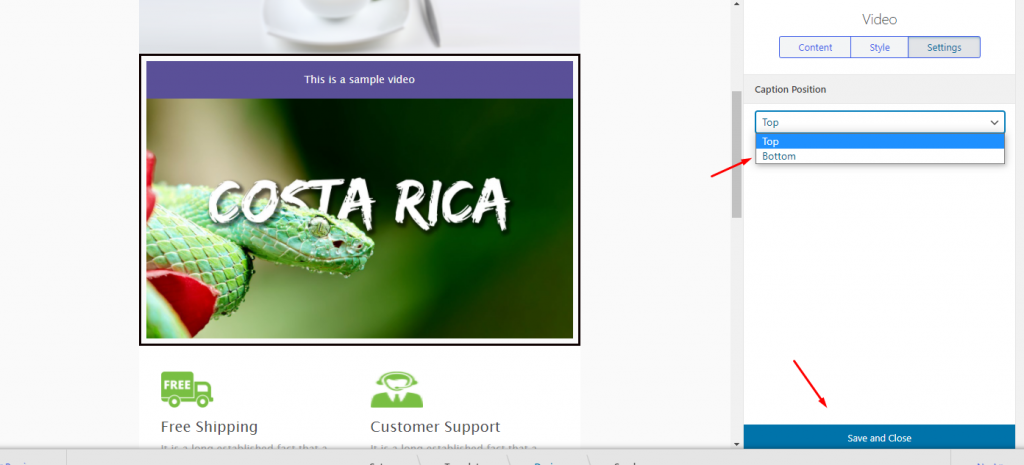
So after done with the style, then click on the settings. Here you can show the text either on the topside or on the bottom side. And then click on the Save and close.
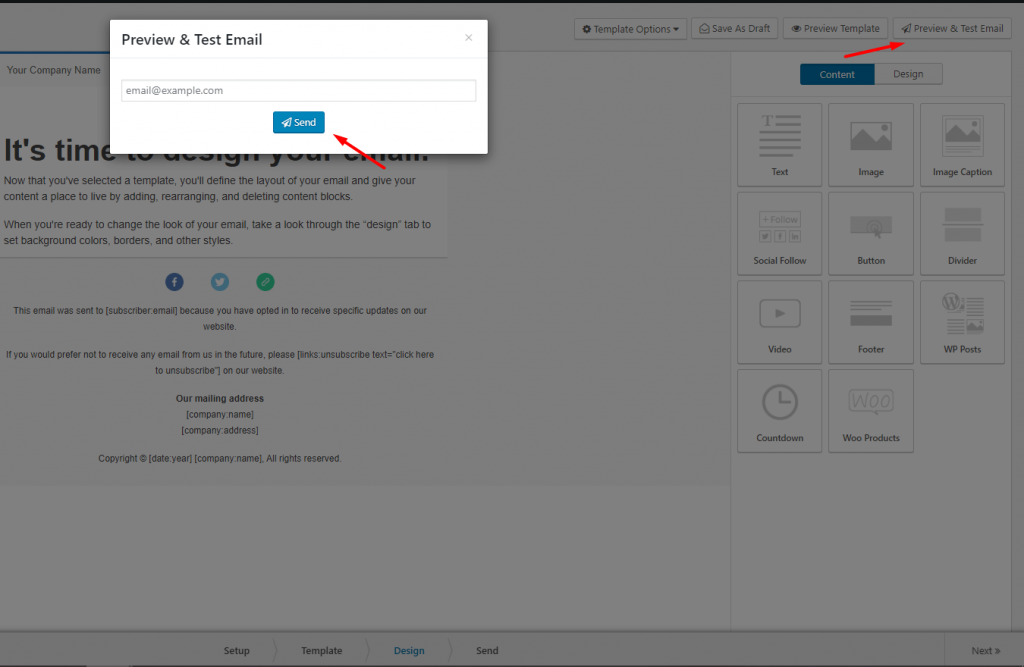
5. You can test your email by sending a test email to a dummy account. Click on Preview & Test Email. You will get a pop-up window where you will type your dummy email address.
Click on Send, your email will be sent to that particular address.
Finishing all this, you will be in your last step.
- Type your Email Subject, Preheader
- Type the email address you are going to send from
- And receive your confirmation email
6. You can add a specific keyword that will show up in Google Analytics. That way you can identify traffic coming from emails. You can save the campaign as a Draft or Activate right away.

7. If you want to see the details of your campaign, just click on the Campaign. After that, you can see Summary, Email stats, Geolocation information.
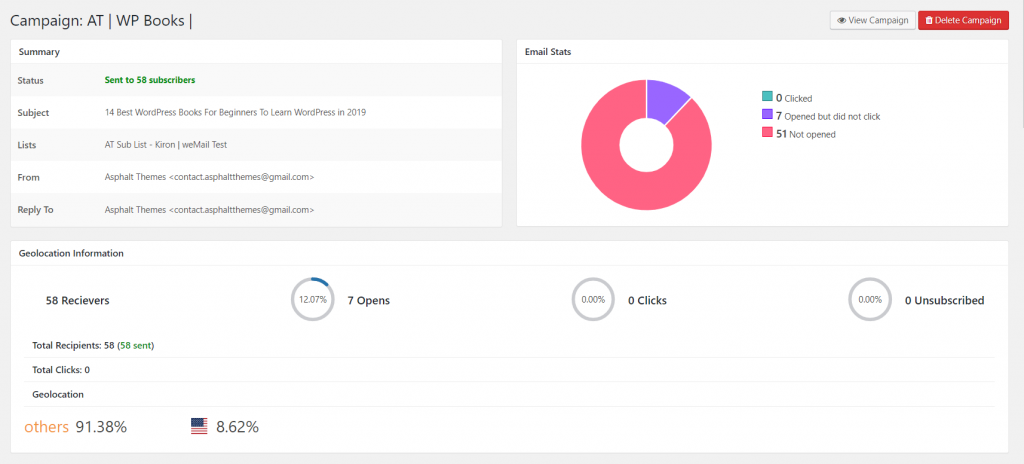
You will also get a graph that shows the number of total Click and Open rats of the last 7 days or the last 30 days.

Link Clicks
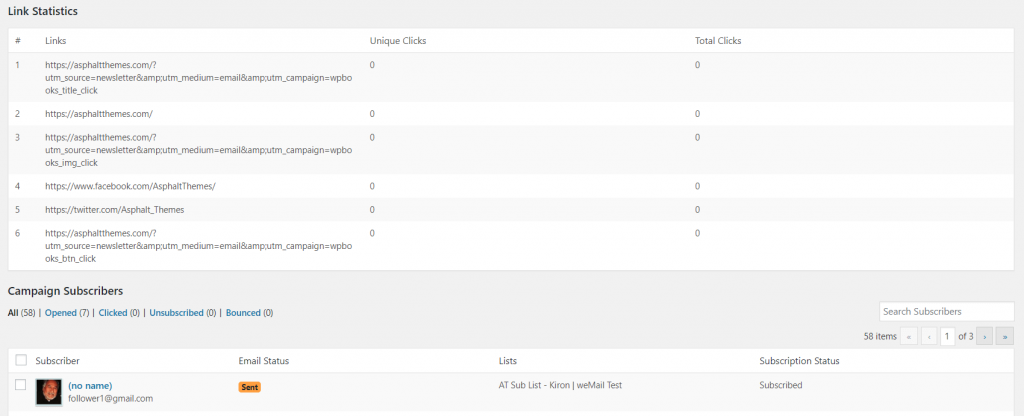
You can also see the link statistics and campaign subscribers. Check the screenshot below.
Congratulations! You are finished with creating your first campaign with weMail.
